Page History
| Note | ||
|---|---|---|
| ||
This page has been moved to https://nasa-gibs.github.io/gibs-api-docs/gis-usage/. Please update your bookmarks. This page will redirect in about 5 seconds. |
| Redirect | ||||||
|---|---|---|---|---|---|---|
|
Through the OGC Web Map Service (WMS) and Web Map Tile Service (WMTS), it's often possible to access imagery directly from NASA's Global Imagery Browse Services (GIBS) from your favorite Geographic Information System (GIS) client
...
.
Please note:
...
some existing GIS applications
...
do not currently handle time-varying imagery layers
...
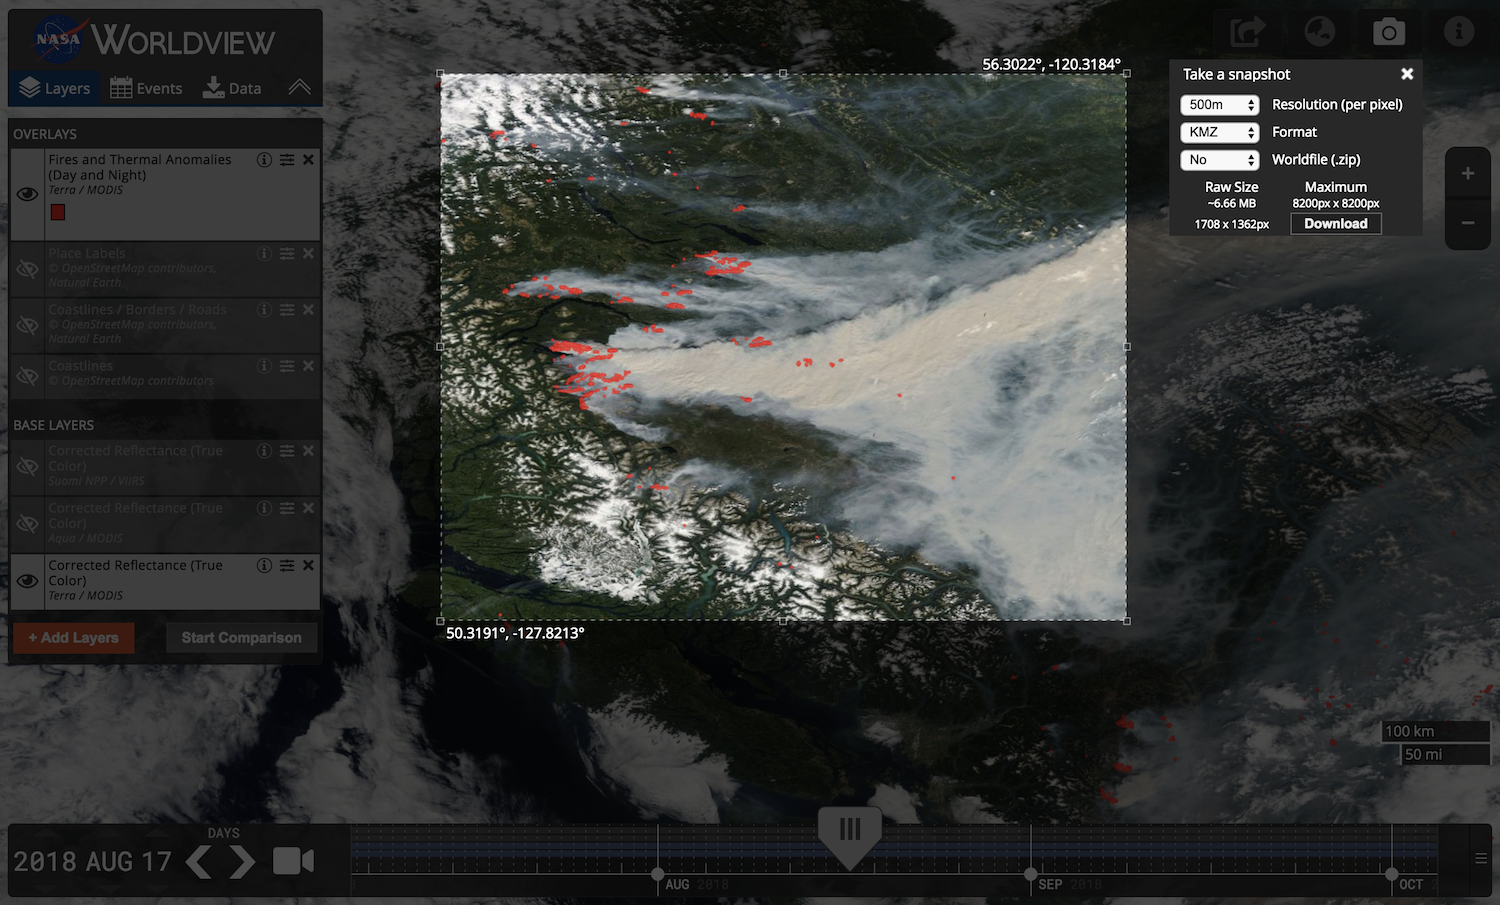
, especially with WMTS sources. The primary suggested method for access within GIS clients is through WMS as this protocol has better time support. Alternatively, Worldview's "image capture" tool (camera icon in upper right) can be used to export imagery as a GeoTIFF or KMZ (or other formats with worldfiles) which can then be imported into your application.
| UI Expand | ||
|---|---|---|
| ||
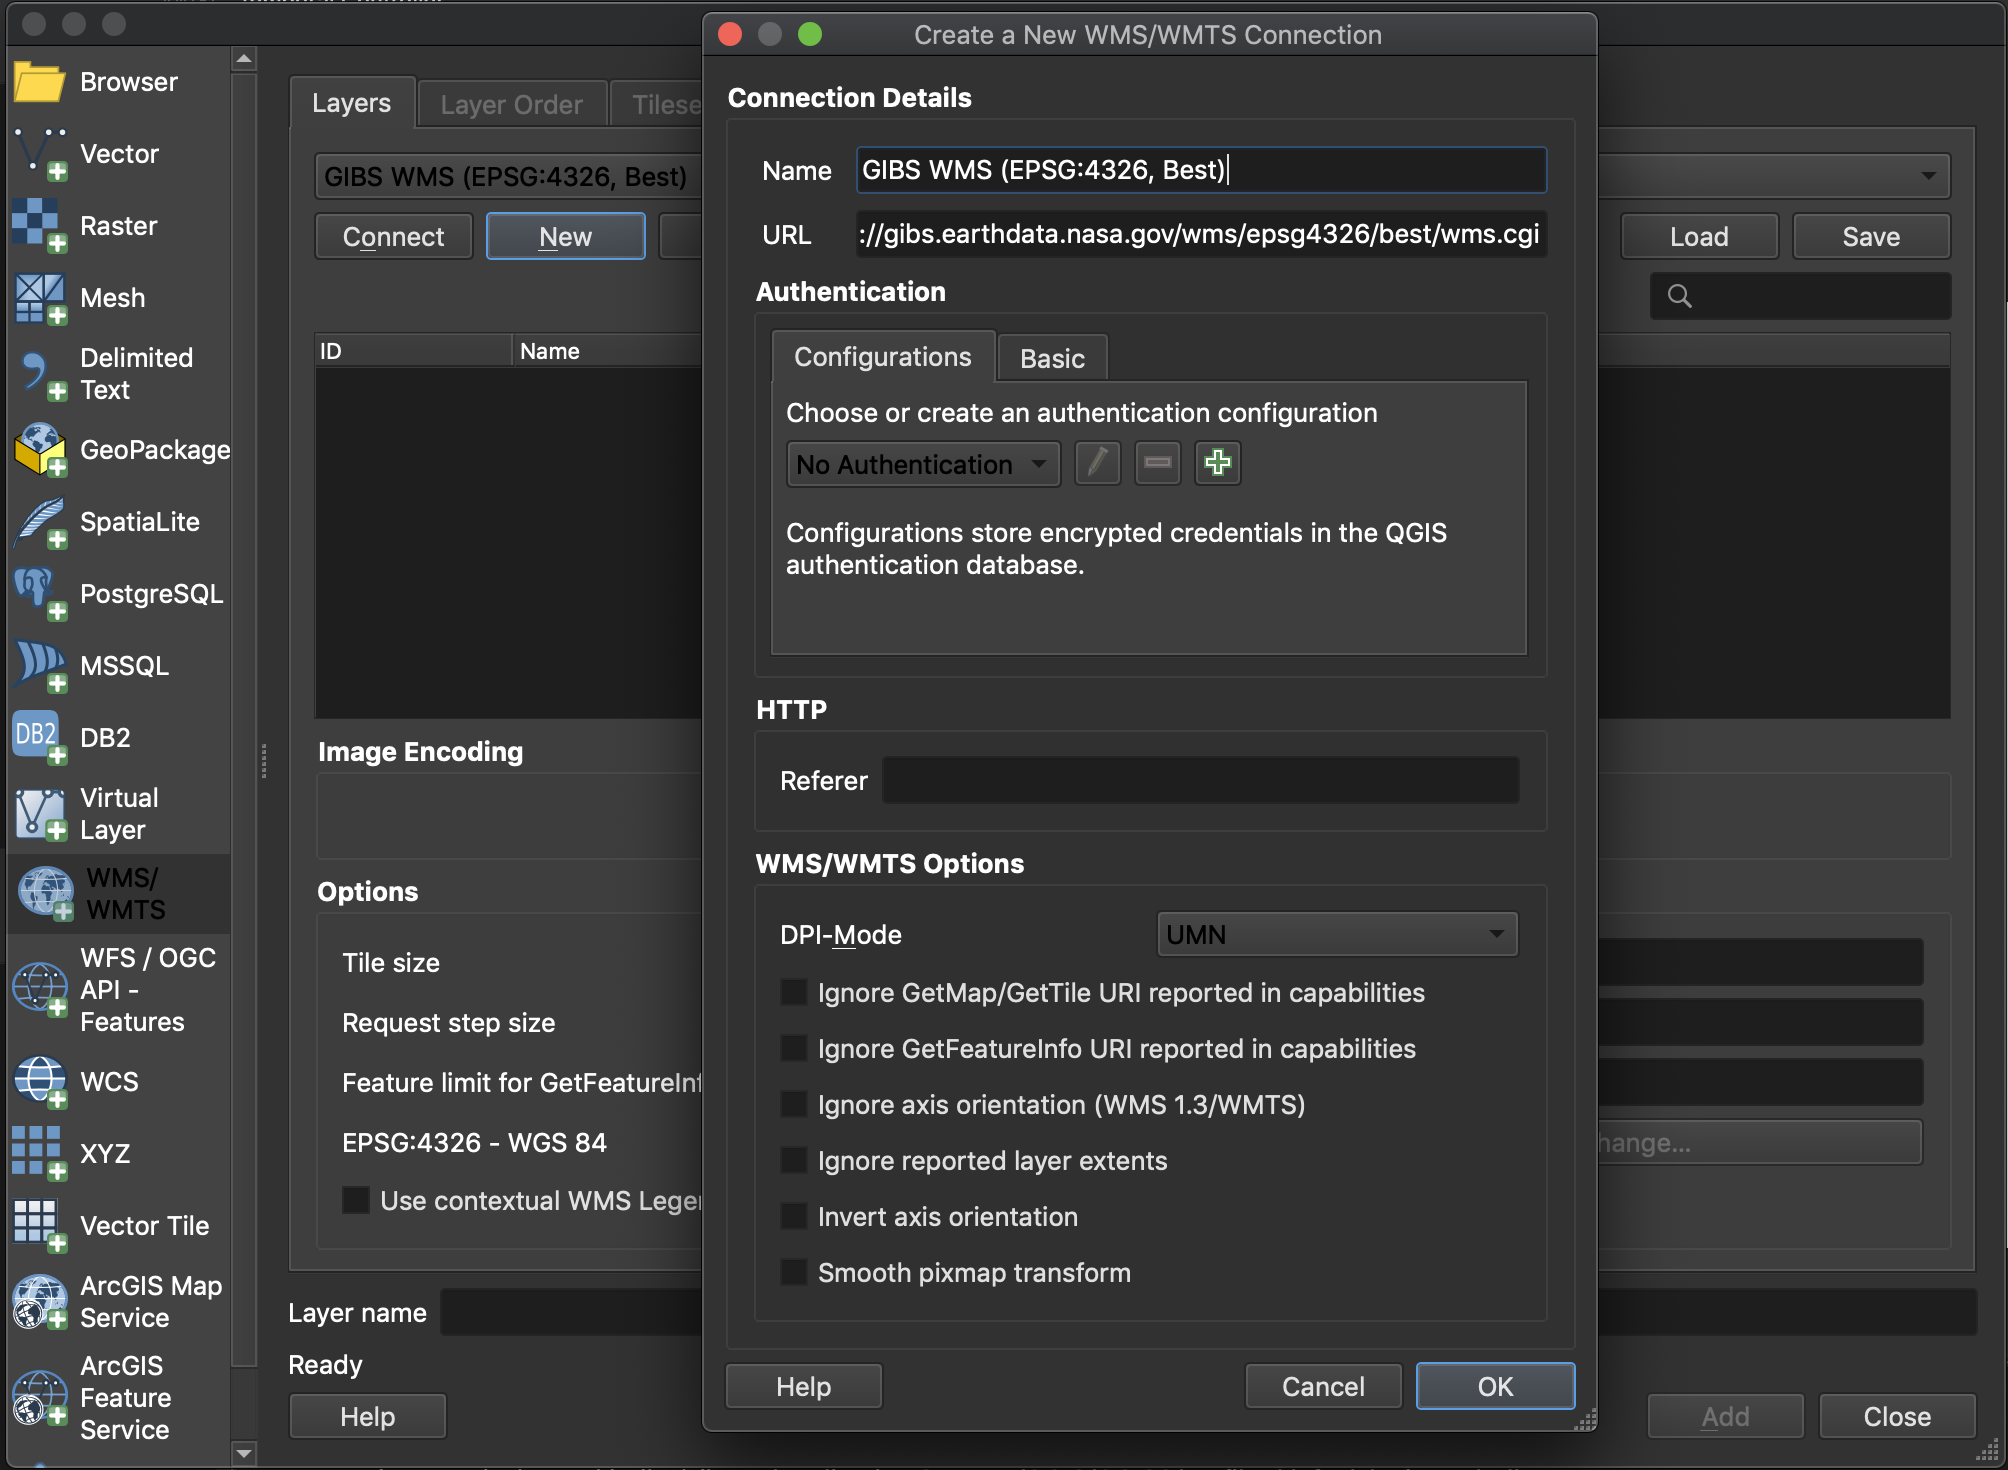
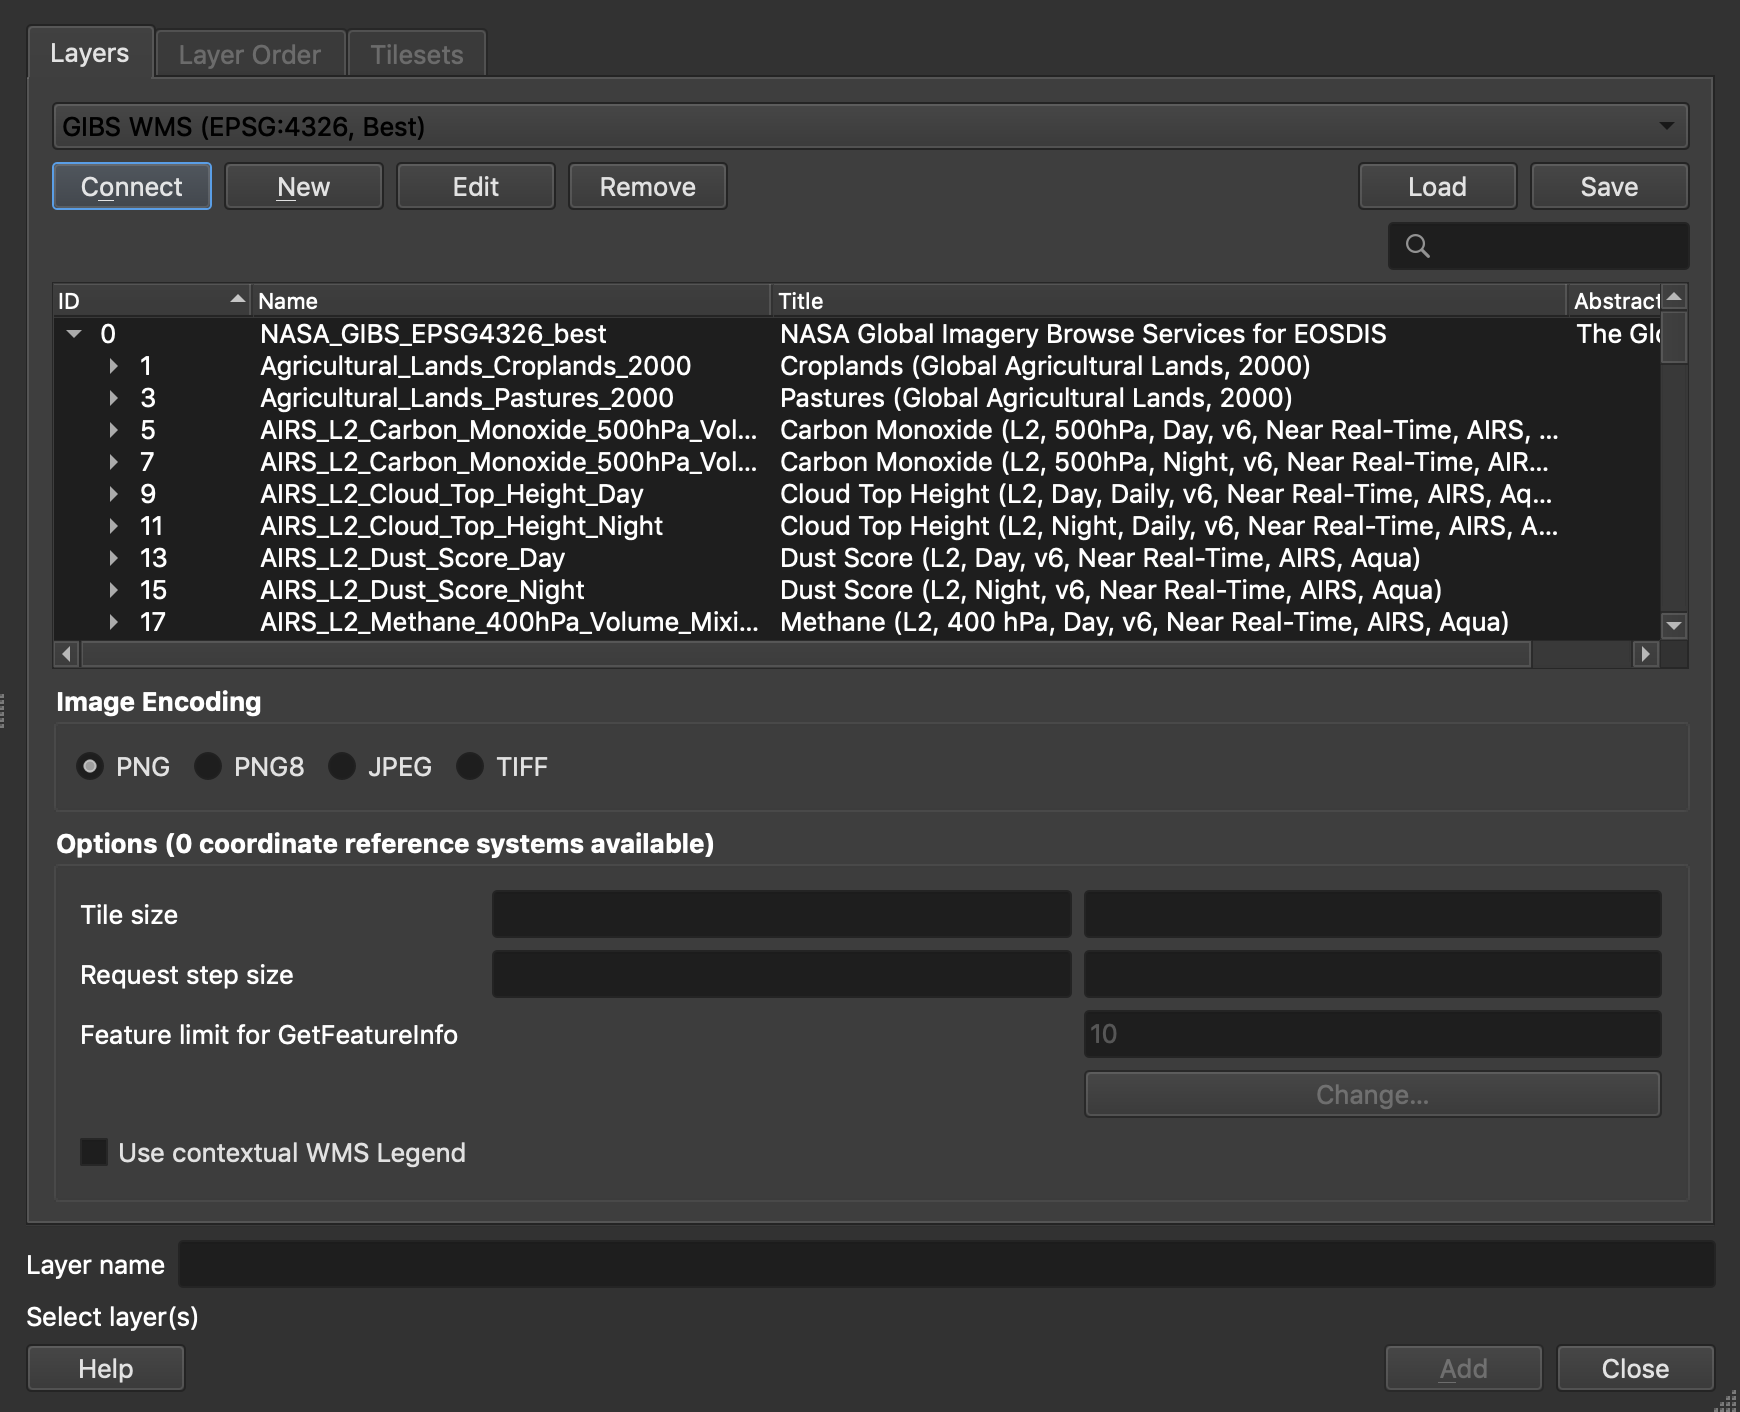
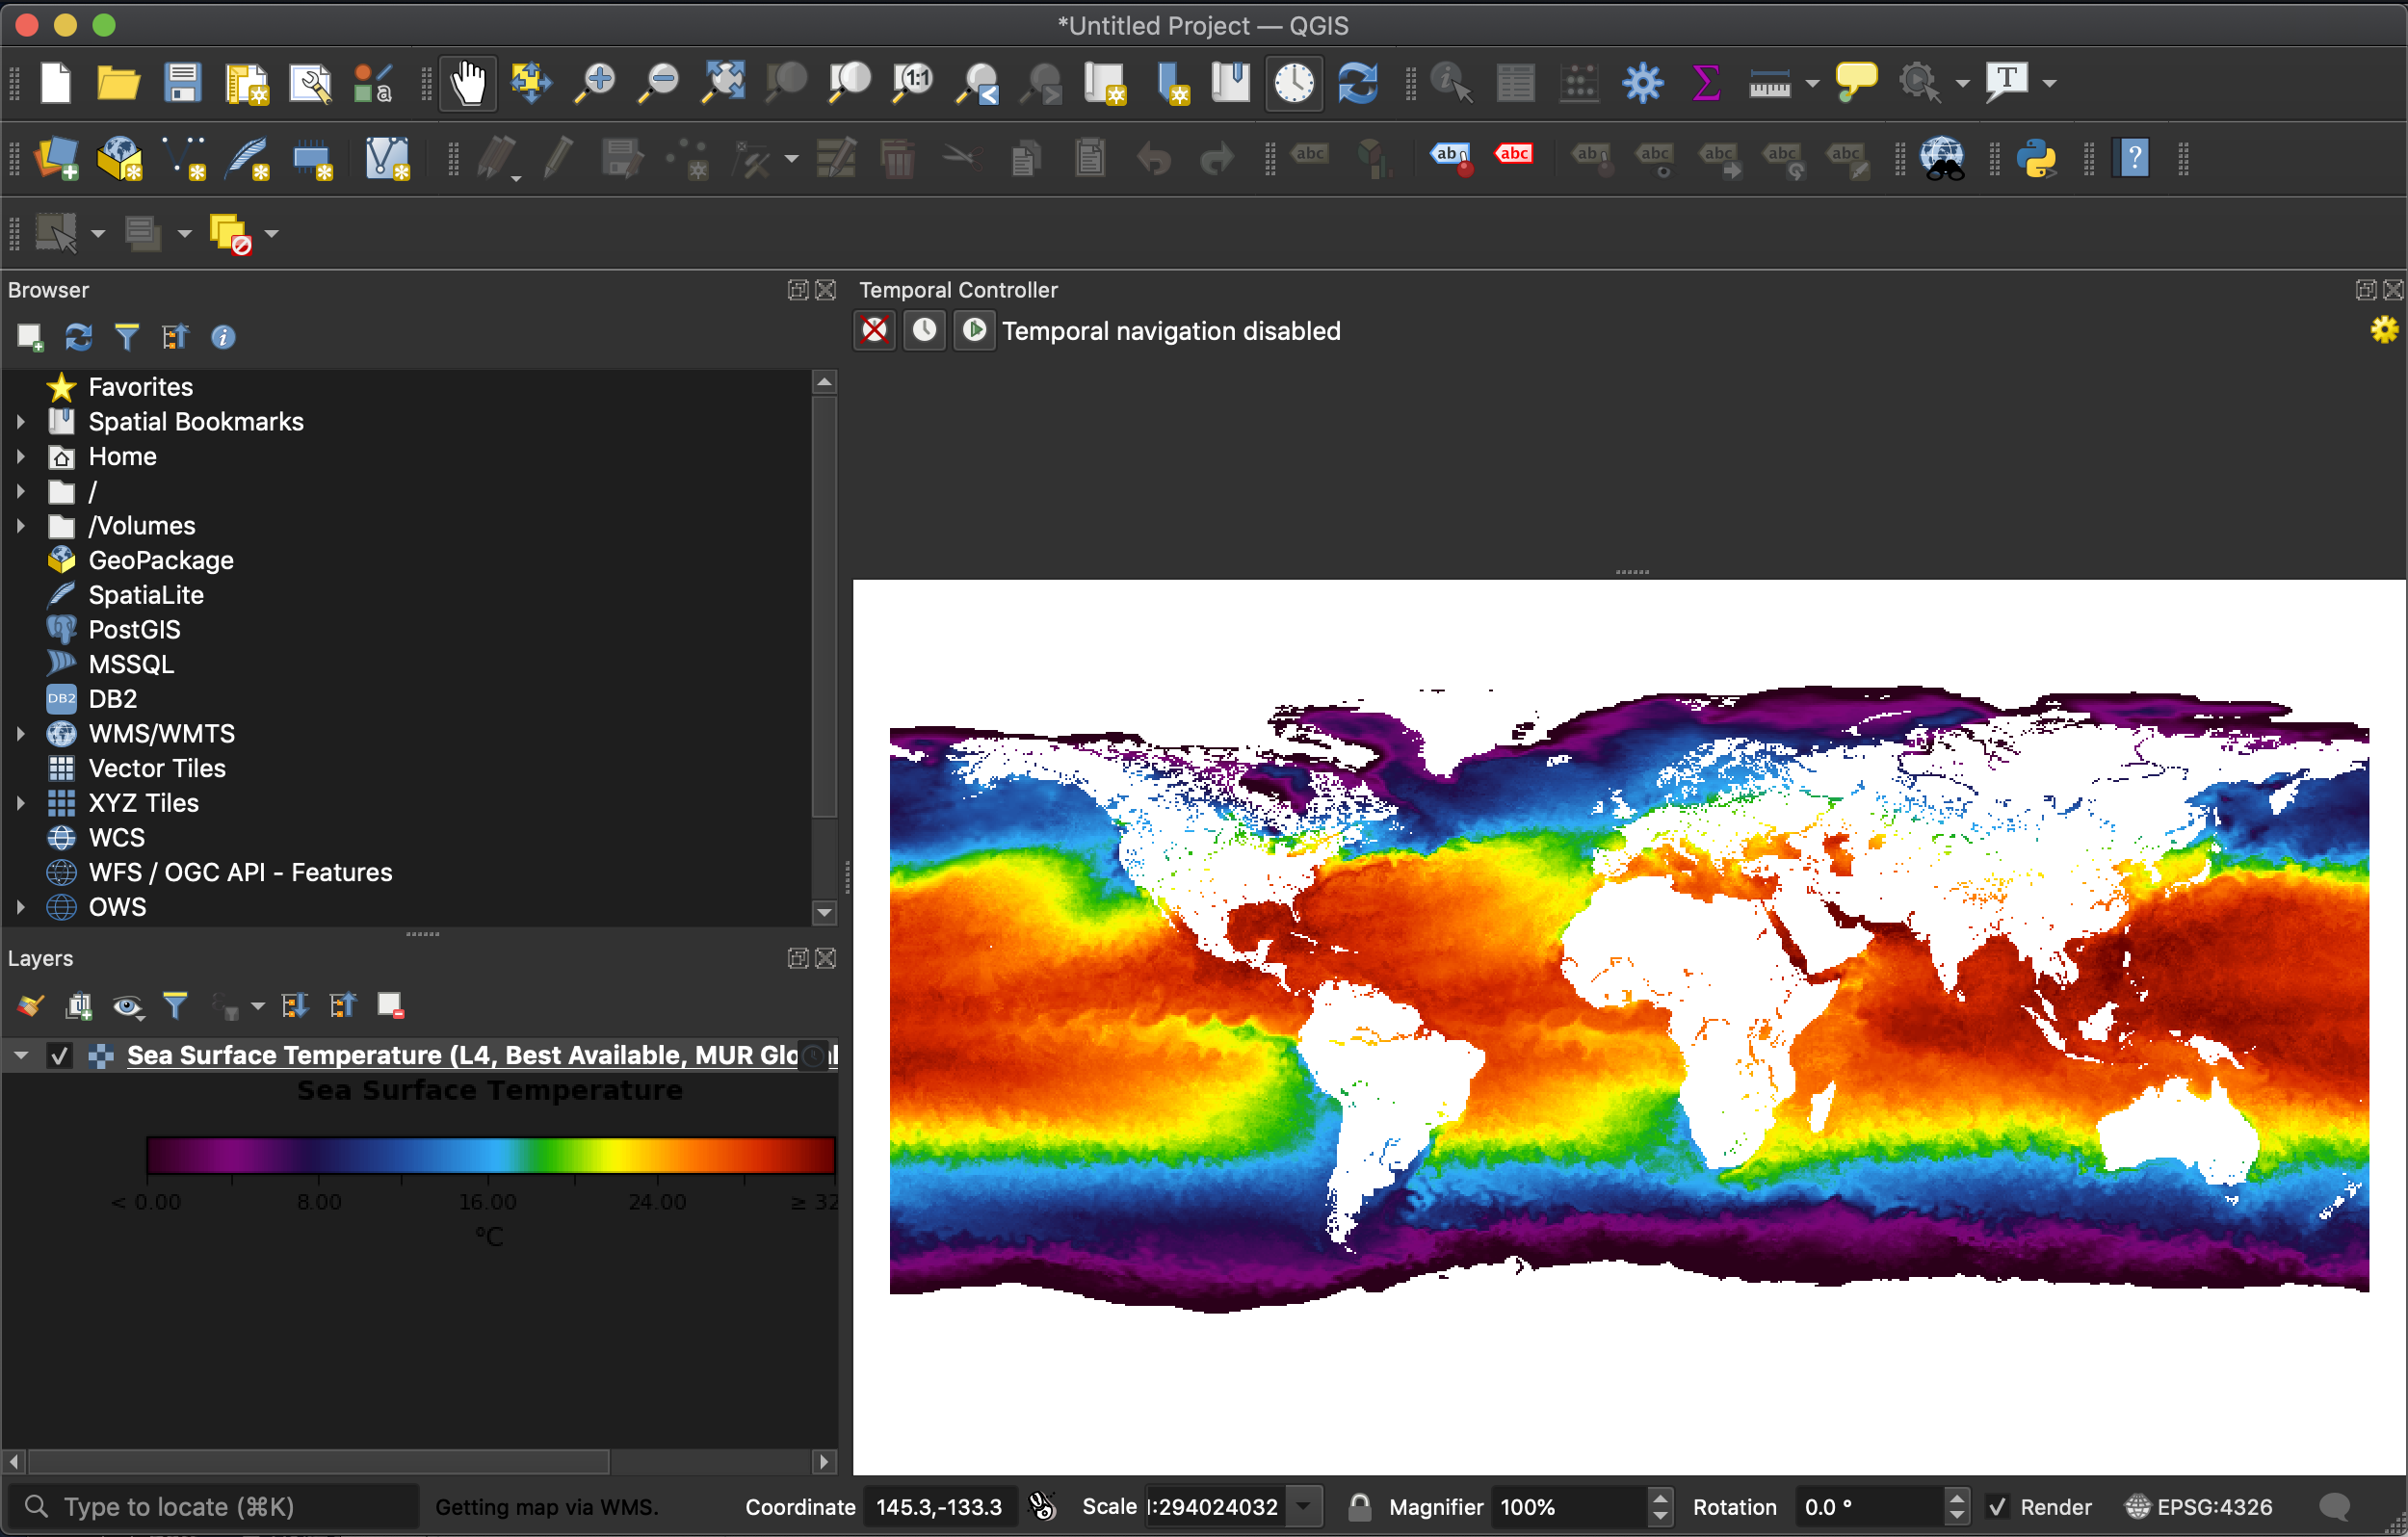
The QGIS application supports GIBS' time-varying layers using the WMS protocol. Requirements
Instructions
|

| UI Expand | ||
|---|---|---|
| ||
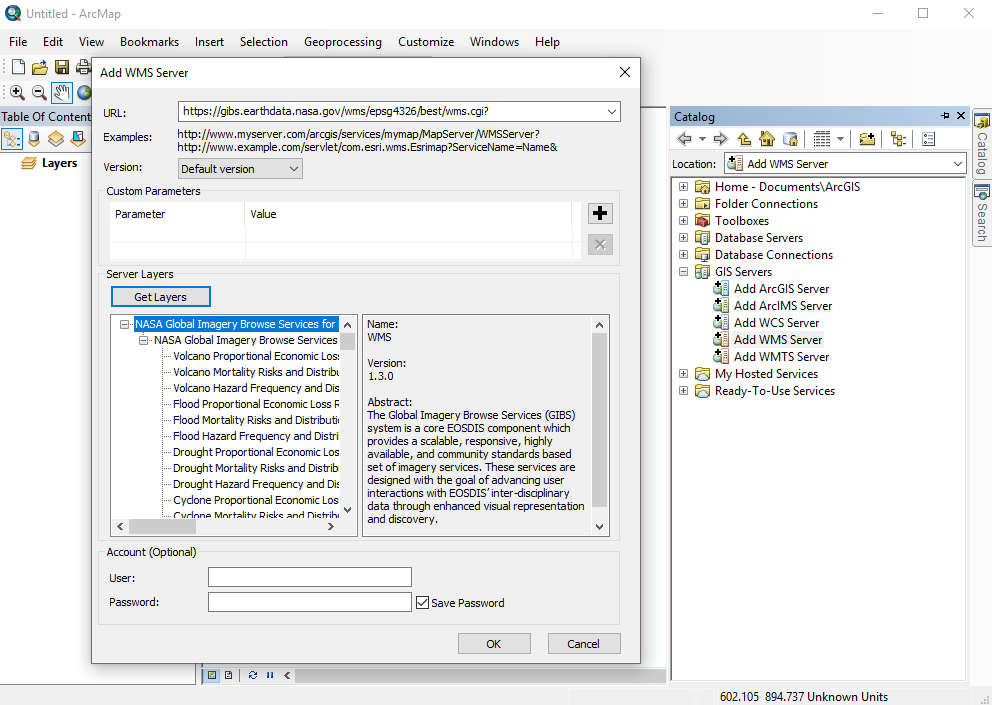
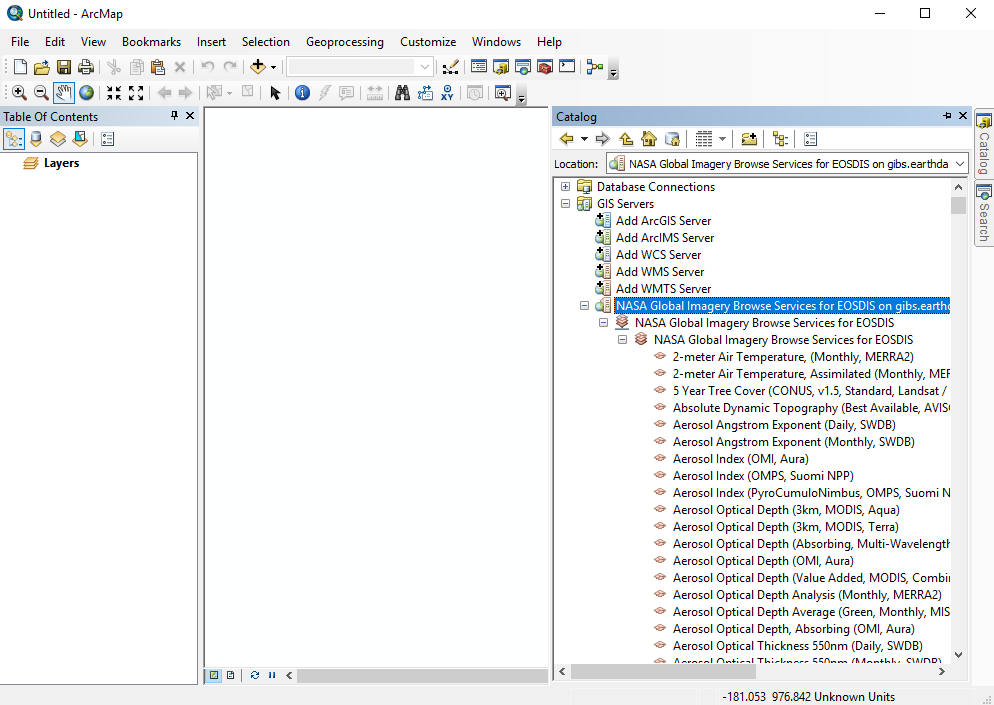
GIBS imagery layers can be directly imported into ESRI ArcGIS/ArcMap 10.2.1 or later |
...
using the WMS protocol. Requirements
Instructions |
...
|
...
|
...
|

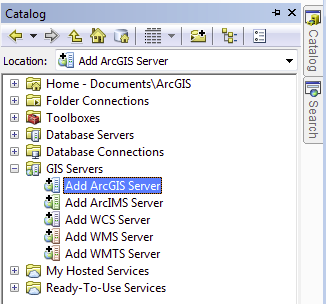
- Choose "Use GIS Services"
- Enter "http://modis.arcgis.com/arcgis/rest/services/MODIS/ImageServer" as the Server URL and click "Finish". A "MODIS" layer type should appear in your GIS server list:

- Drag that to your layer list:
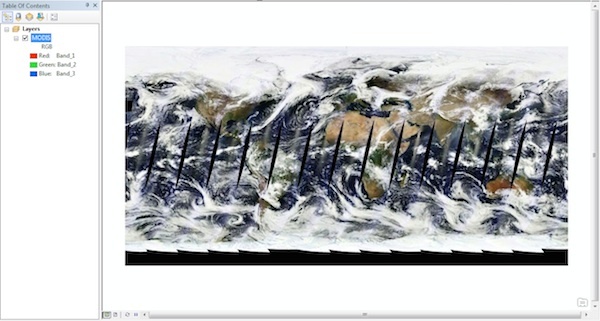
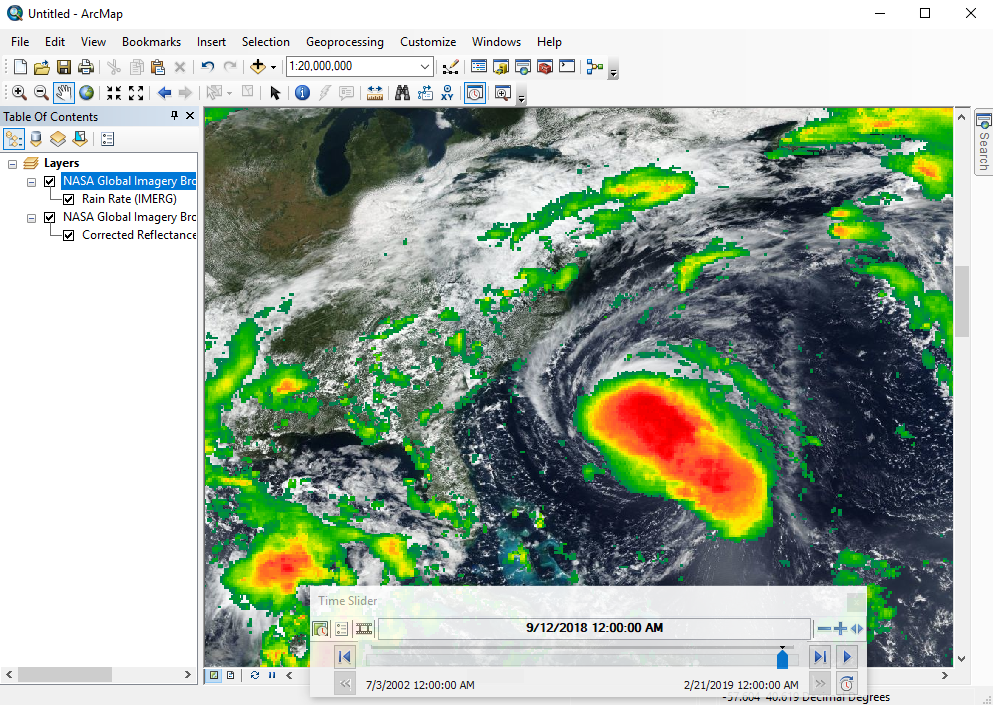
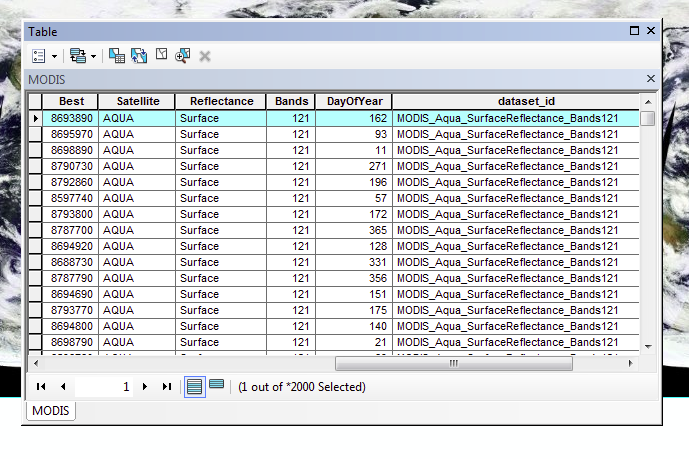
- To adjust the visible layer and selected time, right-click on "MODIS", then "Open Attribute Table".
- Select a row based on your desired product and time:
- Right-click on "MODIS", "Selection", and "Lock to Selected Rasters":
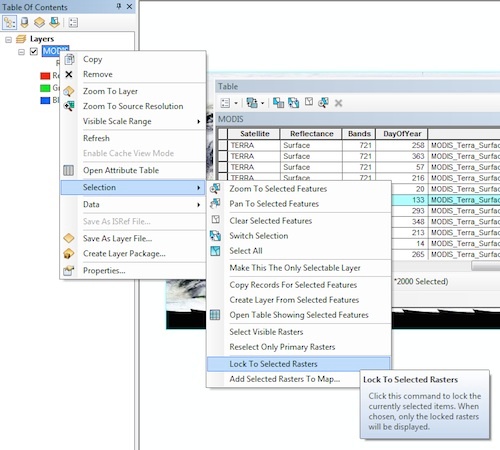
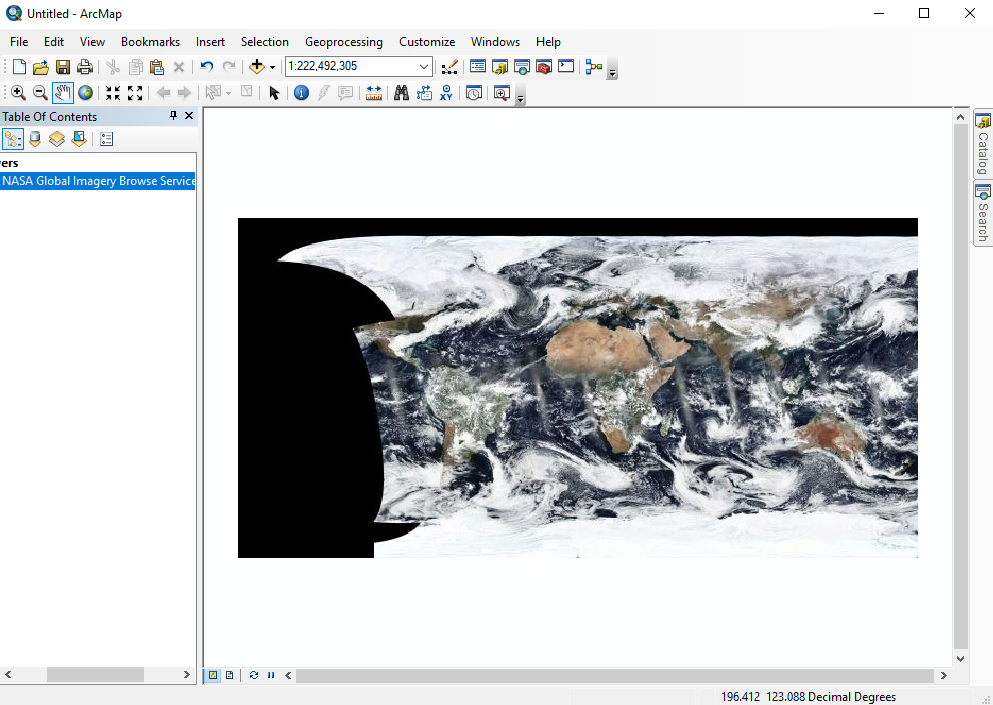
- The map should now be updated to your selections.
...
| UI Expand | ||
|---|---|---|
| ||
GIBS imagery layers can be imported into ESRI's ArcGIS Online in one of |
...
two ways: through the GIBS WMS or as a predefined layer from ESRI. Adding GIBS layers via WMS
|
...
|


Adding GIBS layers to ArcGIS Online as "A Tile Layer"
- Create a new map or open an existing one in ArcGIS Online
- Click the "Modify Map" button in the upper right corner
- Click the "Add" menu on the left, then "Add Layer from Web"
- Change the service drop down menu to "A Tile Layer"
- Use the RESTful GIBS WMTS Web Mercator endpoint as the base URL
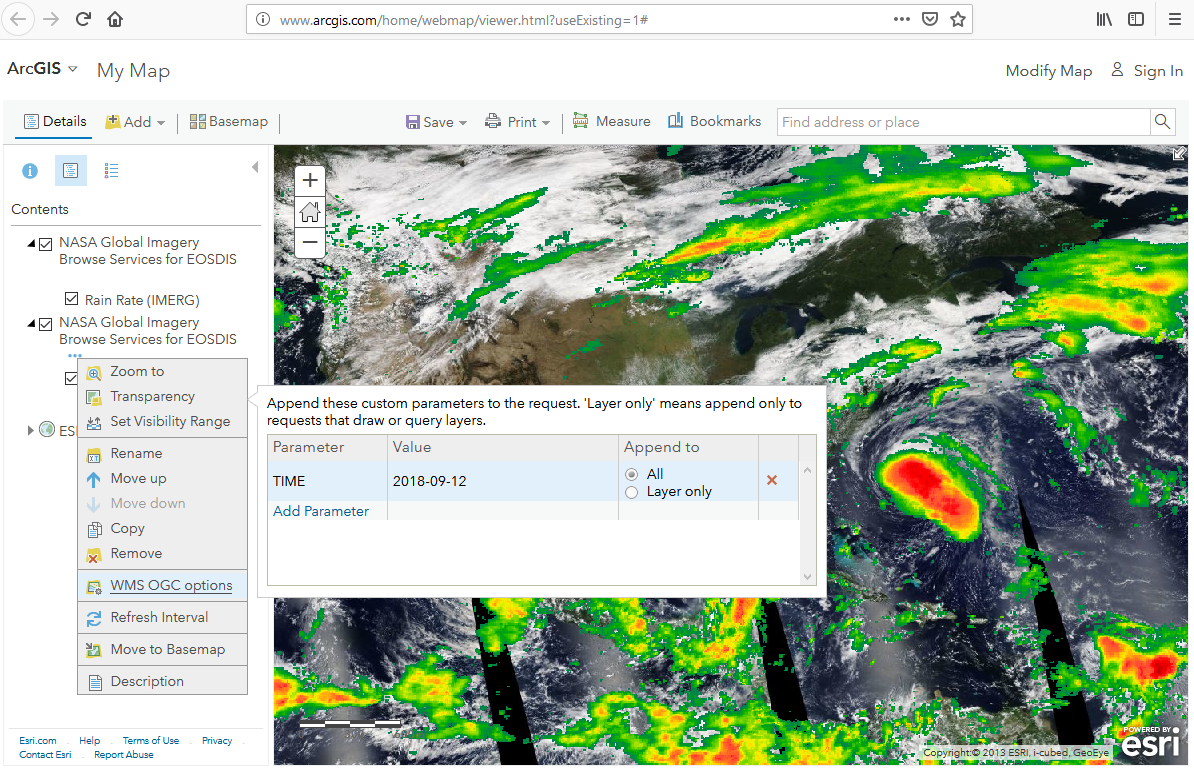
- Append the desired time, product, and other layer information to the URL
- Finally, add the generic "{level}", "{row}", and "{col}.format" entries to the end of the URL. Here is an example entry for displaying Terra/MODIS Aerosol Optical Depth on April 9, 2014:
- Give the layer a title and credits, then click "Add Layer"

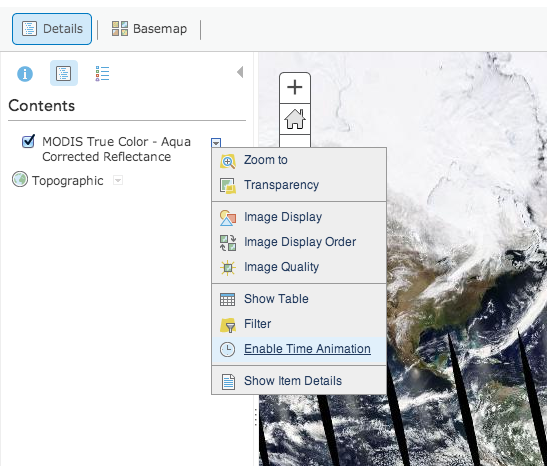
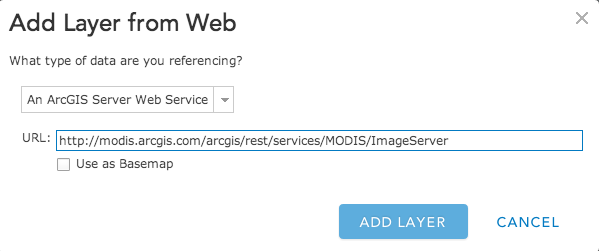
Adding GIBS layers to ArcGIS Online as "An ArcGIS Server Web Service"
- Create a new map or open an existing one in ArcGIS Online
- Click the "Modify Map" button in the upper right corner
- Click the "Add" menu on the left, then "Add Layer from Web"
- Change the service drop down menu to "An ArcGIS Server Web Service"
- Add the following URL: http://modis.arcgis.com/arcgis/rest/services/MODIS/ImageServer and click "Add Layer"
- The default layer is Terra/MODIS Corrected Reflectance and is... difficult to change to others. The time is adjustable at the bottom of the screen
| UI Expand | ||
|---|---|---|
| ||
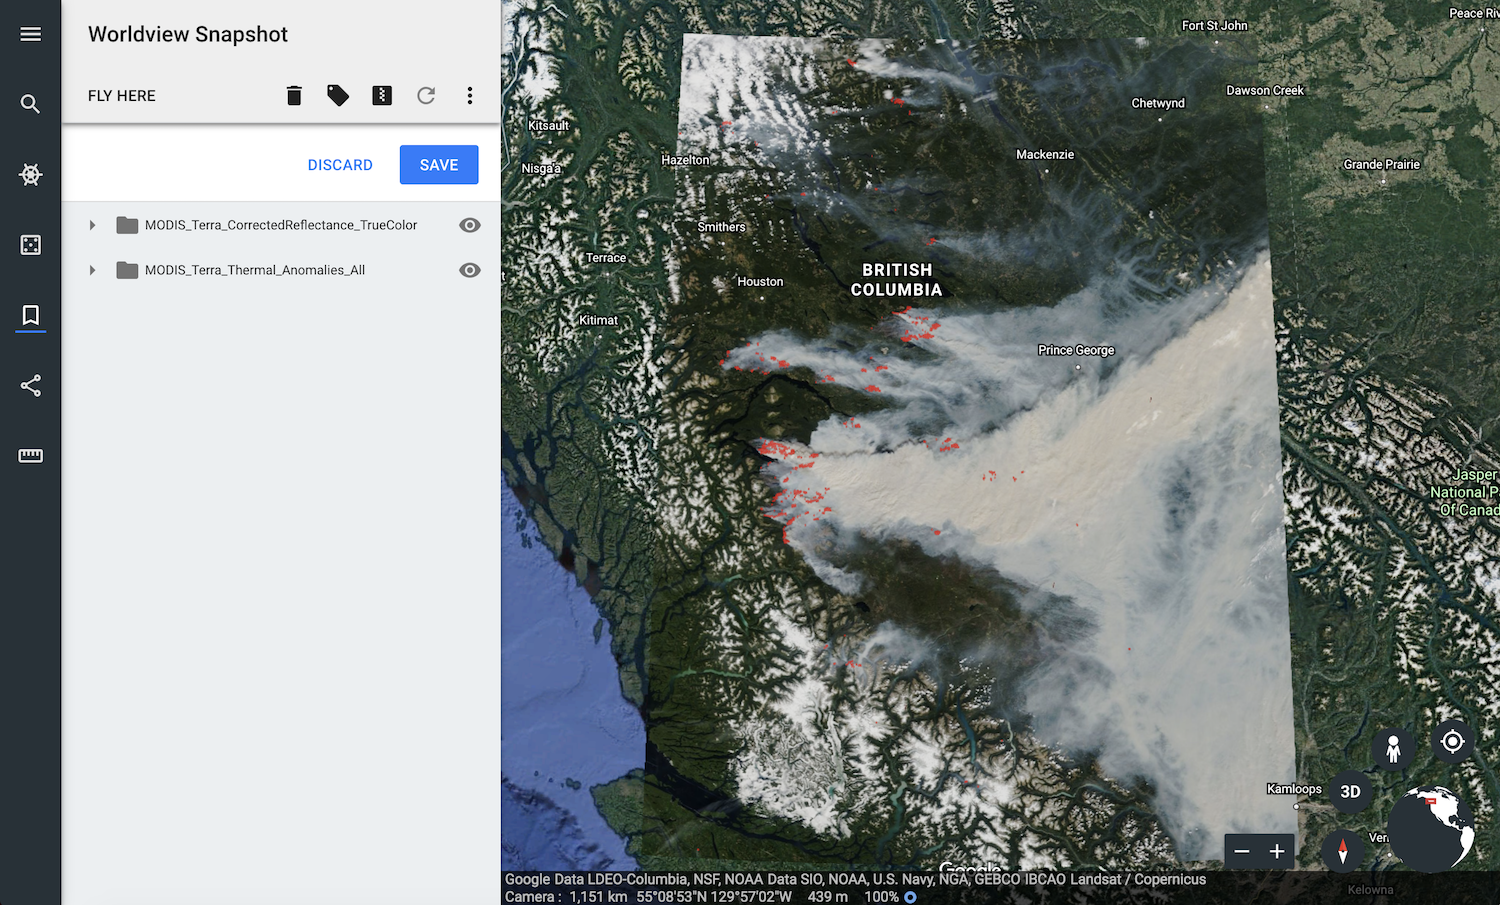
The web-based Google Earth experimentally supports loading of KML/KMZ files which allows you to import GIBS imagery via Worldview's KMZ download capability. Usage (Generate/Download KMZ file)
Limitations:
|
...
| title | Intergraph Geospatial Portal |
|---|
Requirements
- None
Usage
...
Screenshots
| UI Expand | ||
|---|---|---|
| ||
GIBS products can be used directly from within CartoDB. This can be done by adding a basemap from either “NASA” or a generic X/Y/Z template. Method 1: adding a "NASA" basemap:
Method 2: adding a GIBS layer from a generic X/Y/Z template
|

...
| title | SCISS Uniview |
|---|
...
| UI Expand | ||
|---|---|---|
| ||
GIBS can generate KML files to be used with Google Earth Pro. Those KMLs include pointers to GIBS imagery via the NetworkLink keyword. Users have two options on loading KML files into Google Earth Pro as described below. RequirementsUsage (Generate/Download KML file)Using the information on generating KMLs, you can load that downloaded file from within Google Earth (File | Open) or usually by simply double-clicking on the KML file itself. The layer will show up in the "Temporary Places" within the "Places" window. Usage (Load from within Google Earth Pro)After launching Google Earth Pro, choose the "Network Link" item from the "Add" menu. Choose whatever Name you wish and in the "Link" field, insert the appropriate link (e.g., |
...
...
...
...
/epsg4326/best/kmlgen.cgi?layers=MODIS_Terra_CorrectedReflectance_TrueColor&time=2012-06-21). The list of available layers can be found here. For more details on how to compose a proper KML generation request from the GIBS server, see here.
|
| UI Expand | ||
|---|---|---|
| ||
Perceptive Pixel, a company that makes high-end touch displays such as CNN's Magic Wall, includes a built in WMS client that can be configured to use TWMS. The FeltBoard application allows for a natural user interface to interact with maps and allows arbitrary map layer sizing, rotations, intersections, as well as annotations. Requirements
UsageThe FeltBoard application requires the server2.xml file to be updated with the WMS endpoint for each layer. The list of available layers can be found here. The <base_deg> is the size of the most coarse tile in degrees and must be a divisor of 180. The <depth> tag is set to the number of levels in the tile pyramid. This value may not be the entire tile pyramid, rather, the number of levels starting with the tile level that <base_deg> defines. The <wms_options> can be used to define a specific date.
Screenshots |
| Hide comments |
|---|
Overview
Content Tools