Page History
...
- Login to Kayako and click on 'Reports' in the purple banner, then 'Manage Reports' in the white banner underneath. Type in "earthdata search" to find all EDSC reports.

- You'll need to get 3 metrics: number of tickets, time to first response, and tags. The reports with "Auto" in the name will get you all of the information you need for the monthly ops deep dive. However, if you find there are missing tags or you need to get those metrics for a special report covering a different time period, you can use the other "Between Dates" reports. For those reports the time has to be reported in Unix Time. I typically use this website for time conversion: https://www.epochconverter.com/
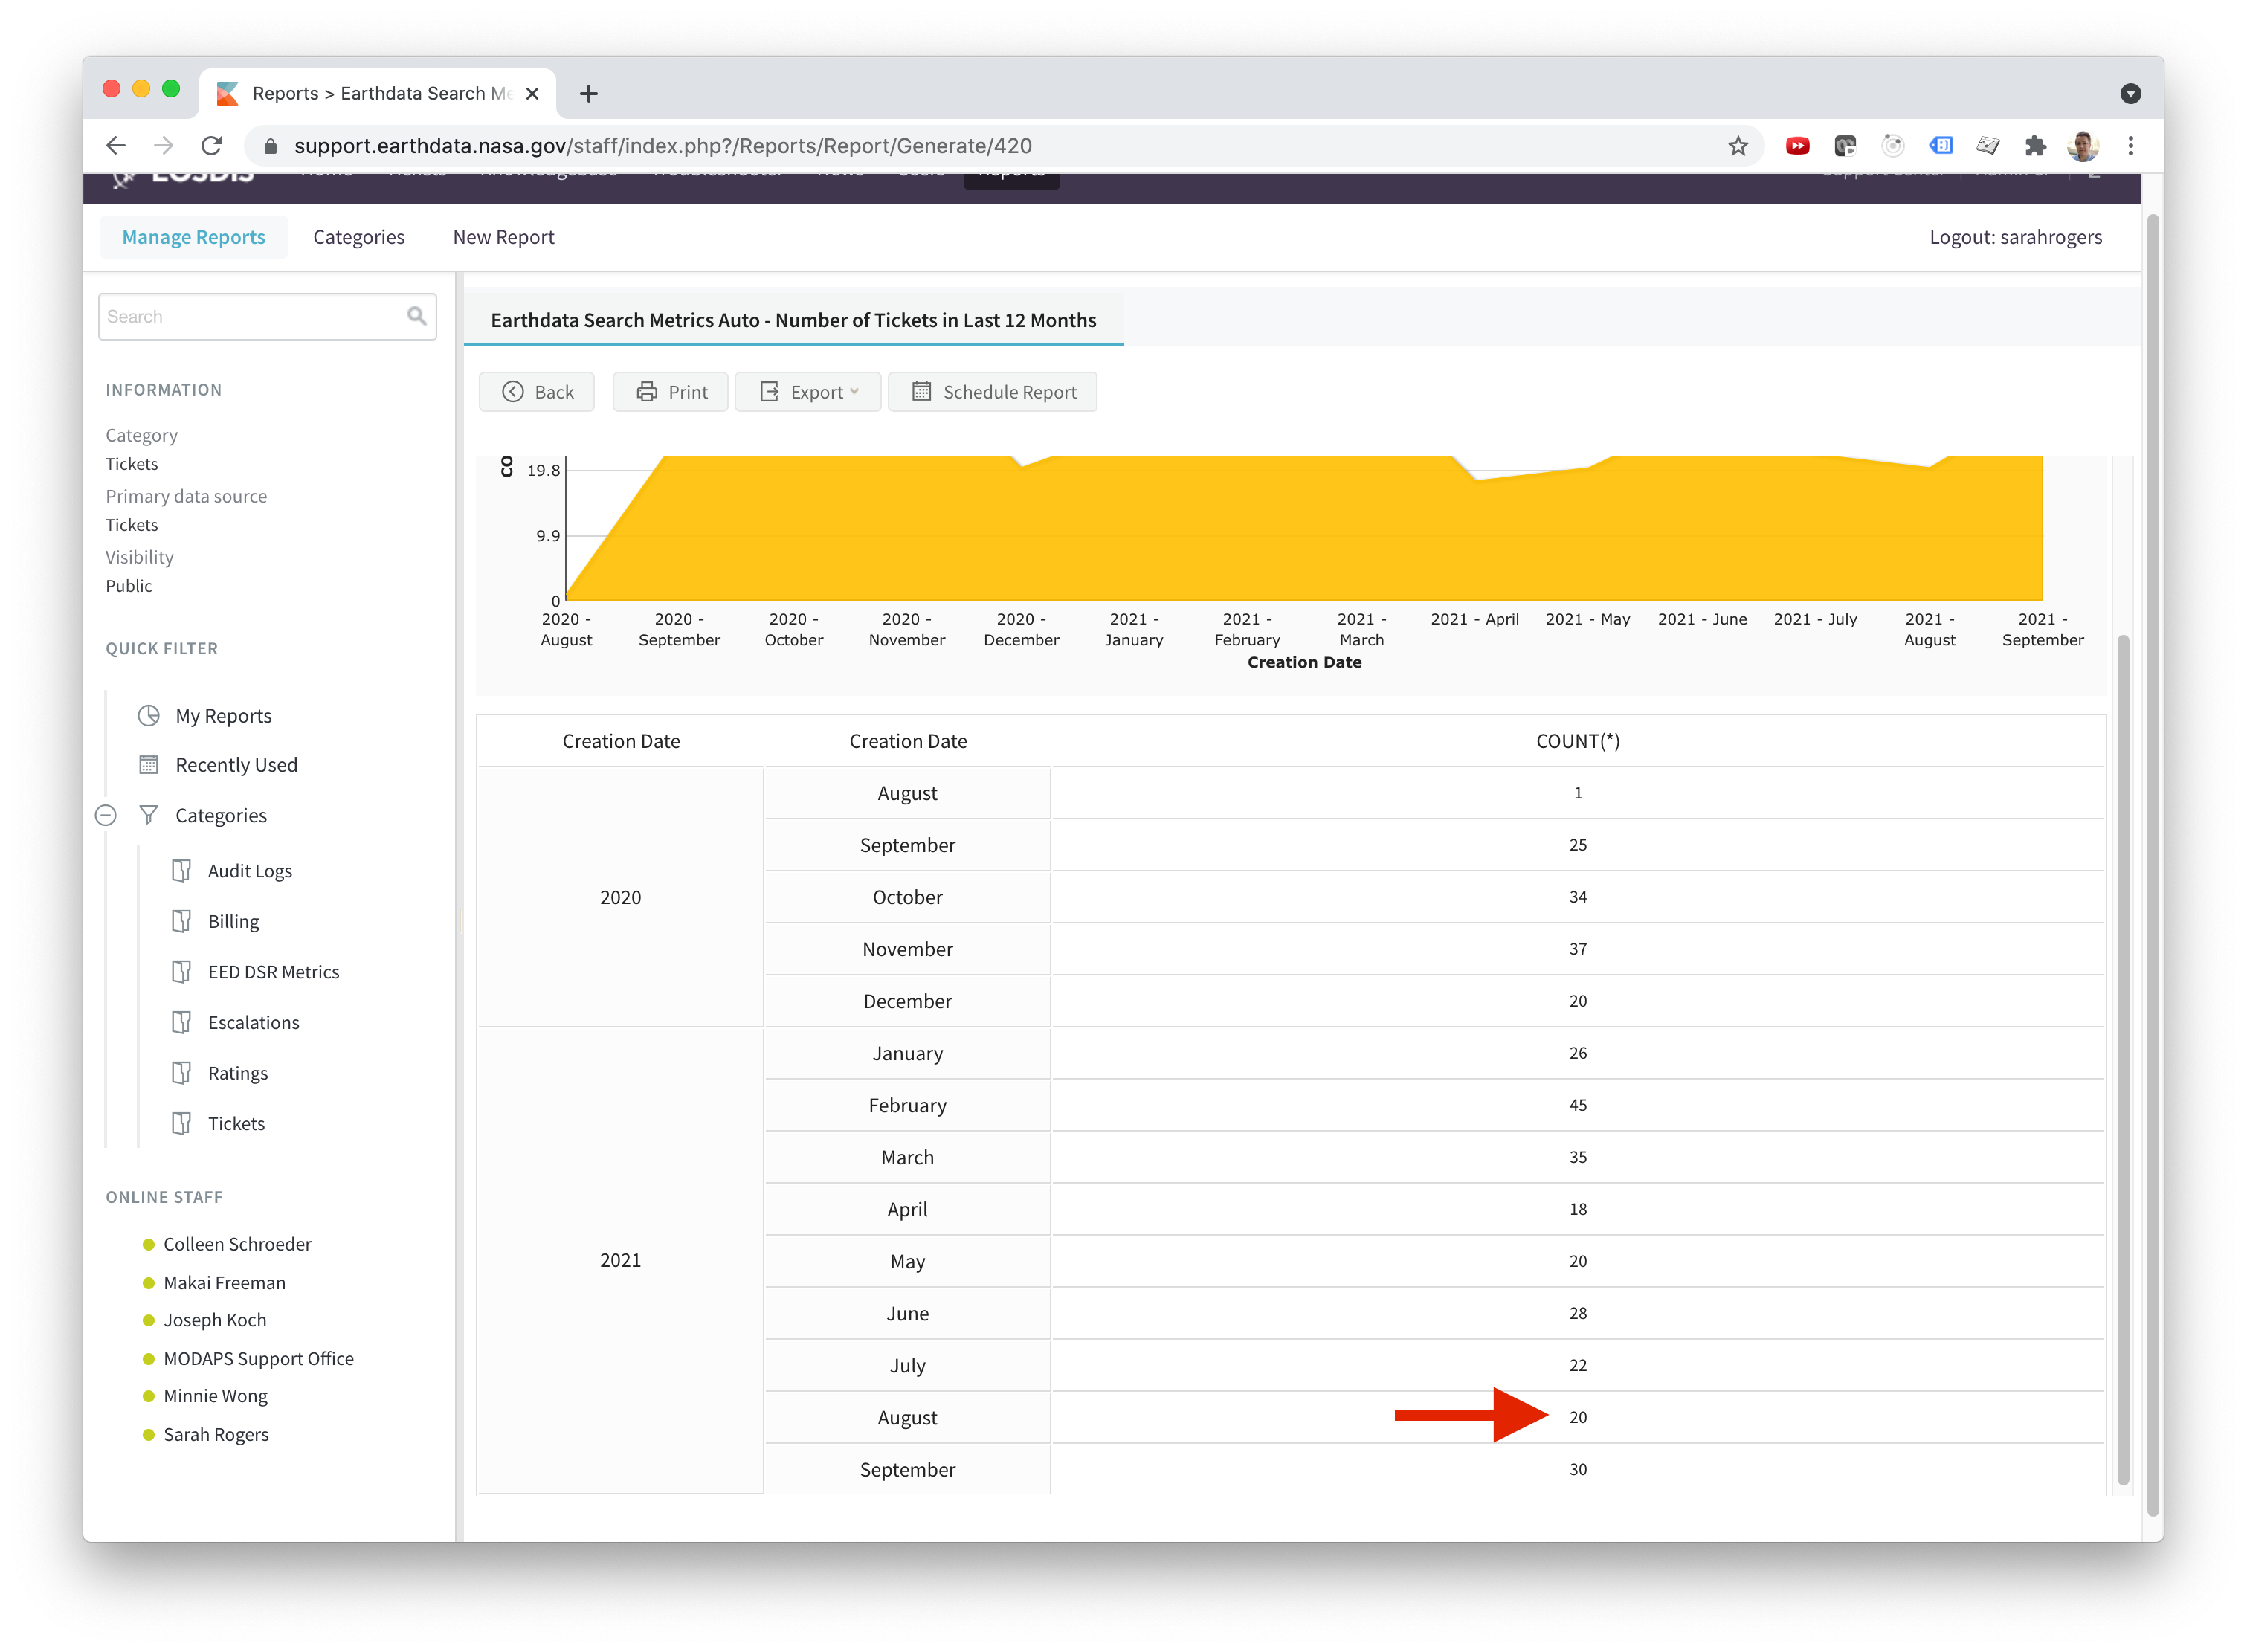
- Click on "Earthdata Search Metrics Auto - Number of Ticket in Last 12 Months" to view the report query. If you're using one of the "Between Dates" reports, this is where you would put in the Unix Time. The "Auto" reports will automatically give you data by month for the last 12 months. Click 'Run Report'.

- When prepping for deep dive, remember to pull the numbers for the previous month (i.e. for September's deep dive presentation you'll be reporting metrics for August). Take that number and upload it into the CSV file included at the top of this page ("EDSCKayakoMetrics.csv"). You'll also need to add a new date to the CSV file in the format of YYYYMMYYYY/MM.


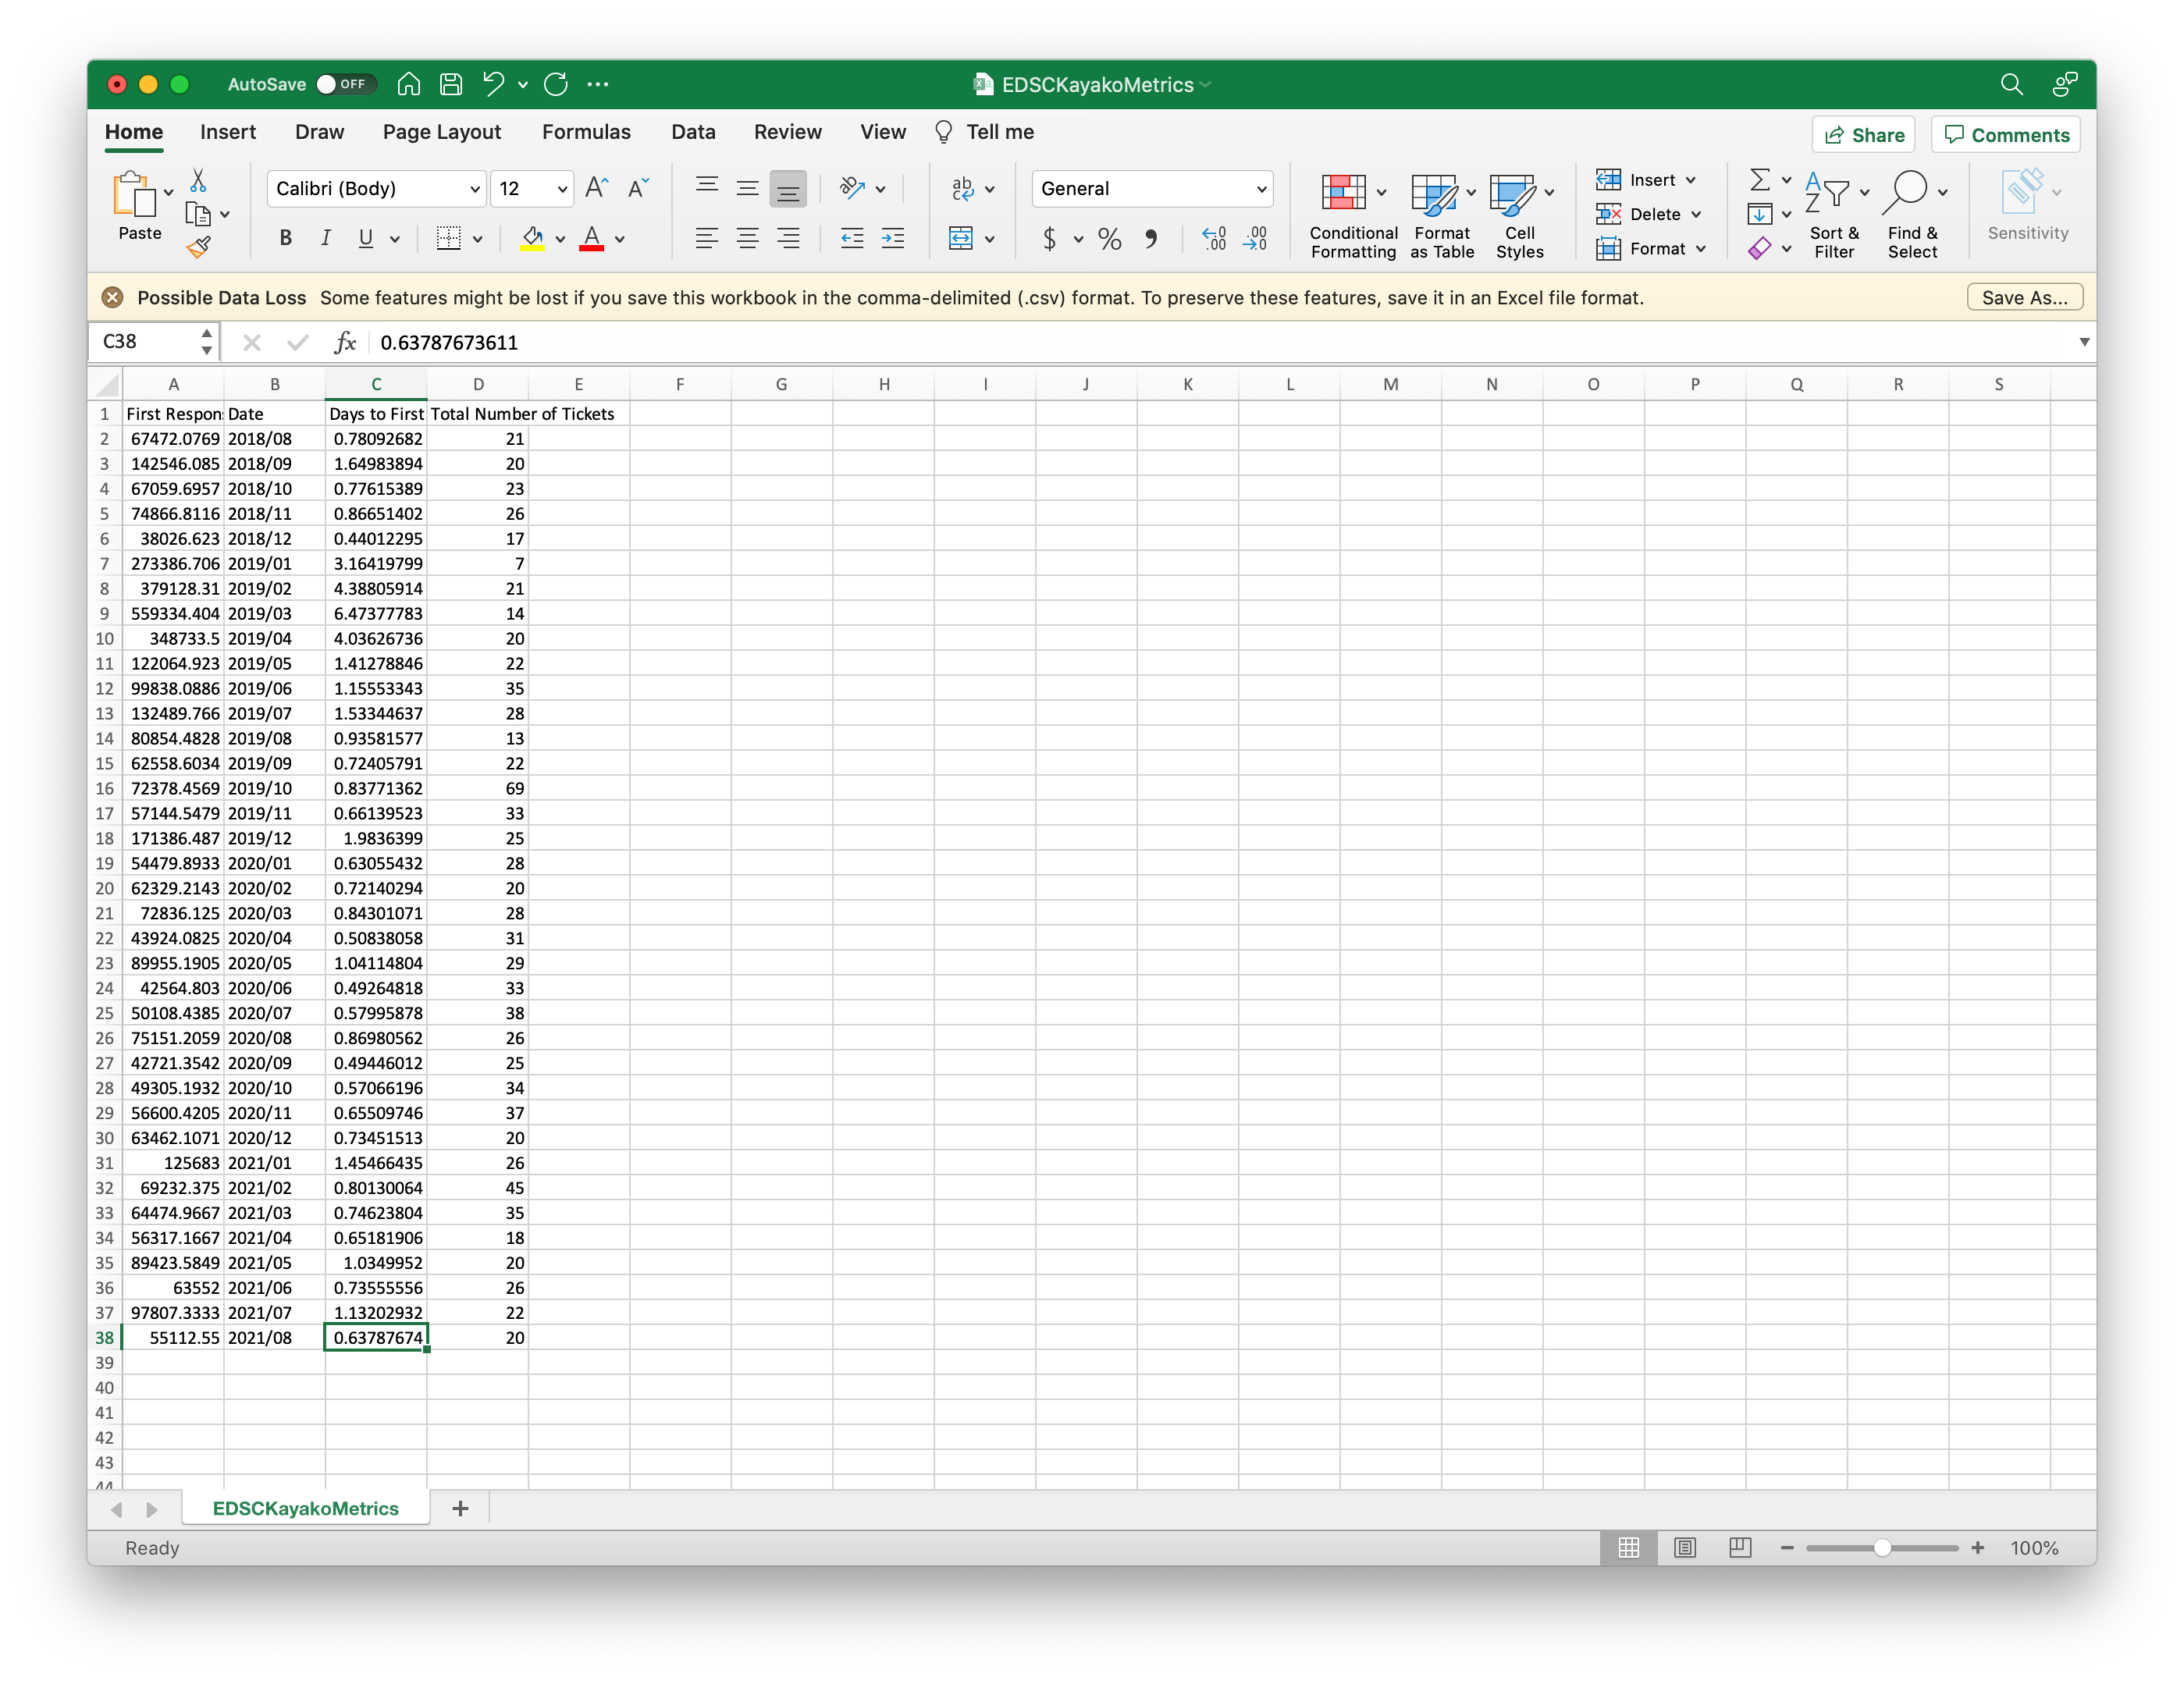
- Next you'll need to get the time to first response metric. On the Kayako reports page, click on "Earthdata Search Metrics Auto - Time to Respond in Last 12 Months". For this report, you'll need to export as a .csv file to get the correct number.

- The CSV will export the metric in seconds. Copy that number and put it in the "EDSCKayakoMetrics.csv file. Then take it and type into Google to convert seconds to days, and add that number to the "EDSCKayakoMetrics.csv" file as well.


- Save and close the "EDSCKayakoMetrics.csv" file.
- Now we can get the tag information. On the Kayako reports page open "Earthdata Search Metrics Auto - Tags" and click 'Run Report'.
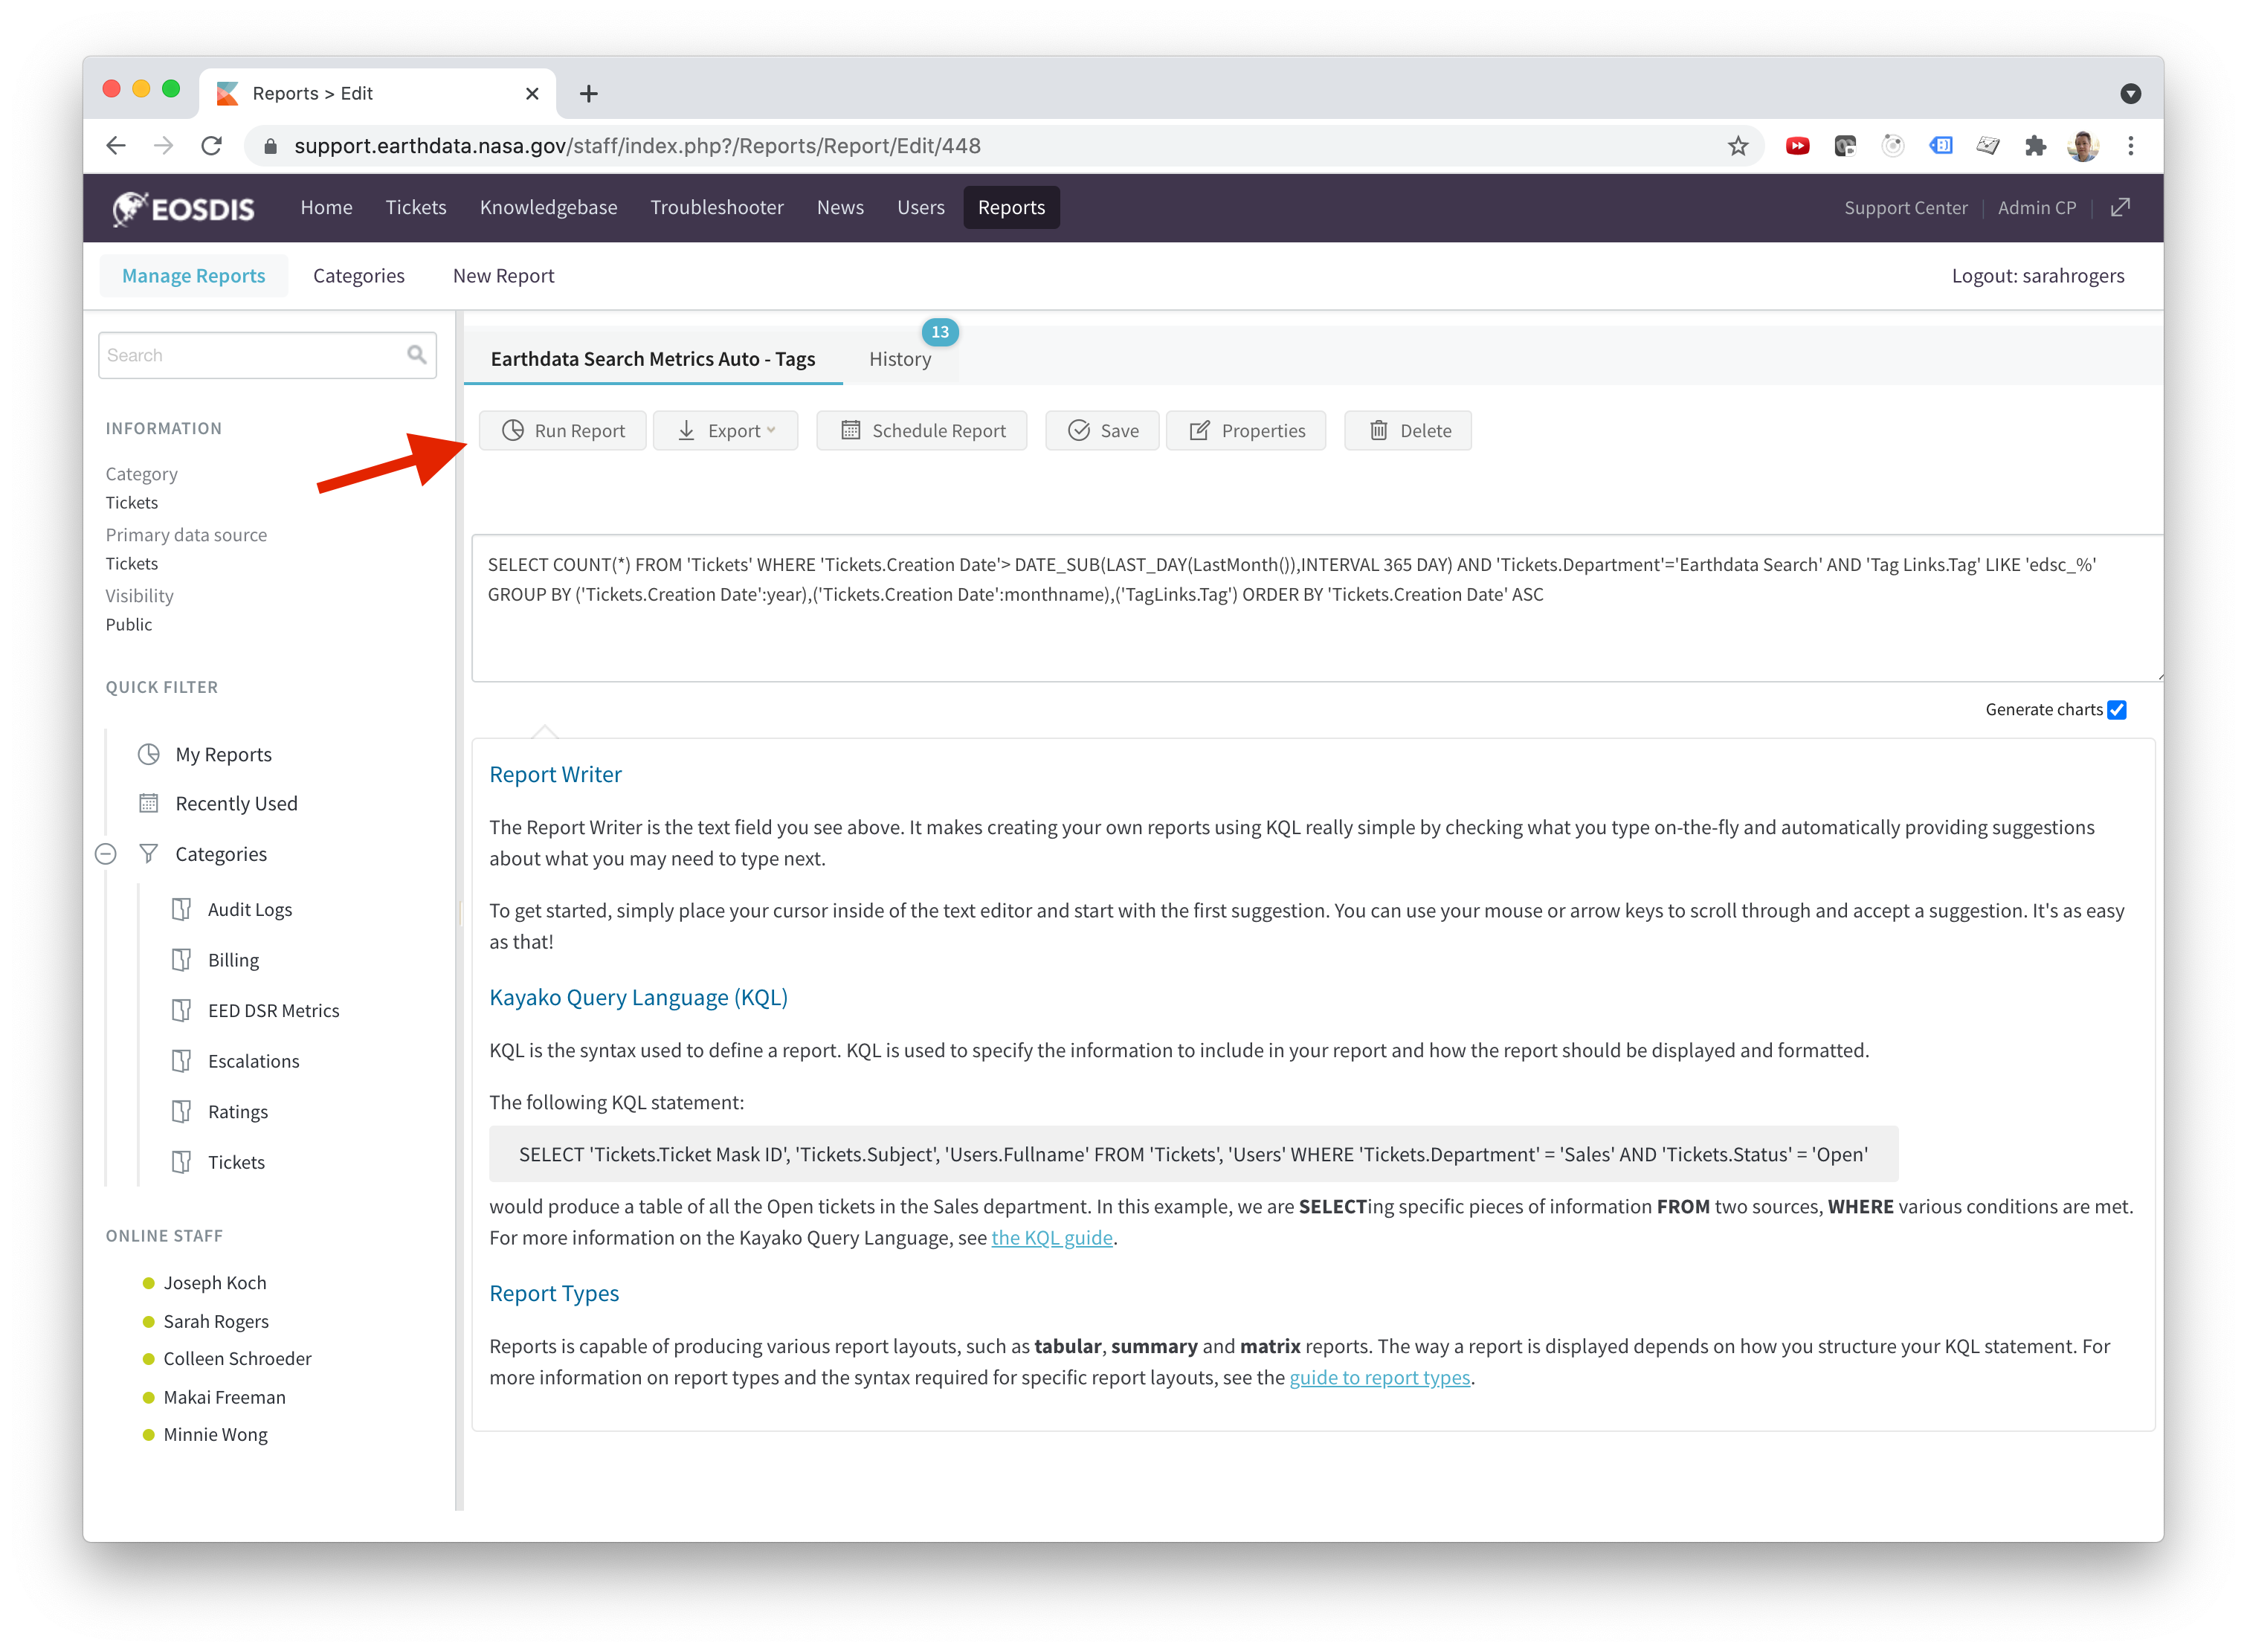
- You need to make sure the total number of tagged tickets for the month adds up to the total number of tickets you got from the previous reports. If not, use the "Earthdata Search Find Missing Tag Between Dates" Kayako report (with Unix time) to add tags to any missing tickets. Use the tag buckets from the top of this page.
- Open the "EDSCKayakoTags.csv" file from the top of this page. Add a new date to the CSV file in the format of YYYYMMYYYY/MM. Copy the number of tickets for each tag group over from the Kayako report. Make sure to put zero's in the CSV file for anything that didn't have a tag (if there are missing zero's the Data Studio report will break).


- Save and close the "EDSCKayakoTags.csv" file.
...
- Now that you have the updated data saved in the CSV files, they need to be uploaded into the Google Data Studio data sources. Go to https://datastudio.google.com/ and click on 'Data sources'.

- Click on the 'EDSCKayakoMetrics.csv' data source first. Once open, click on 'EDIT CONNECTION'.

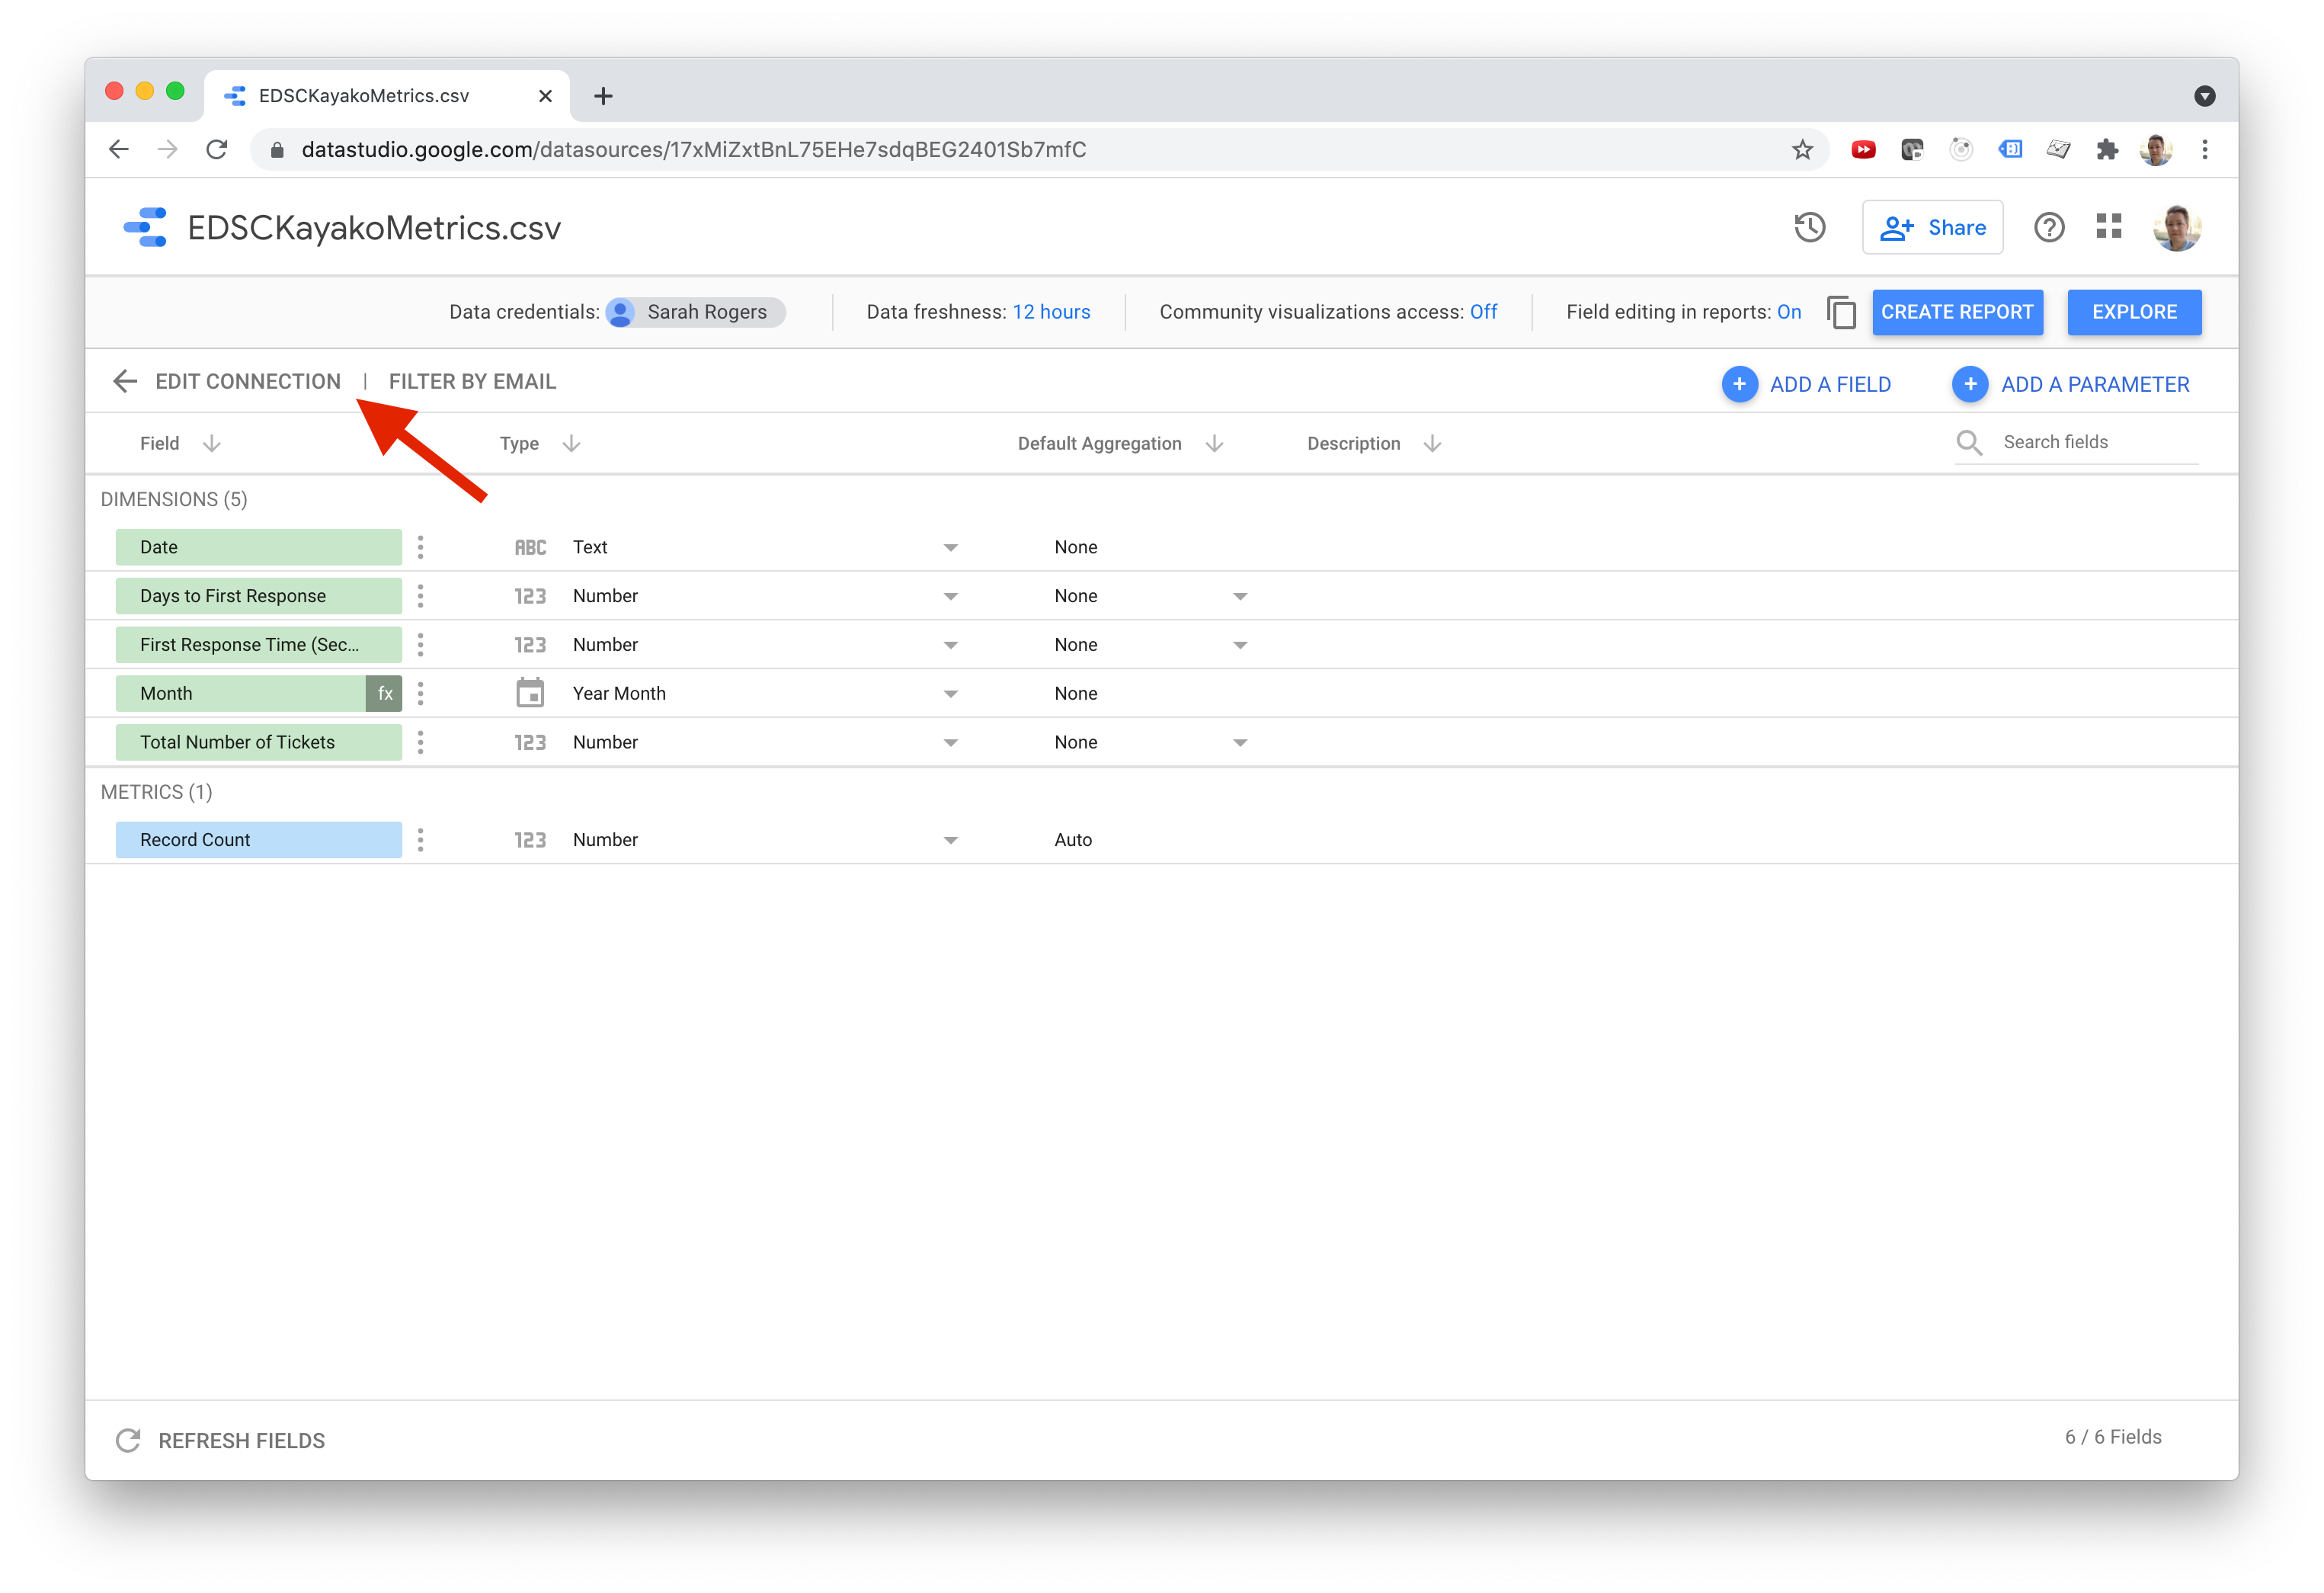
- Click on 'ADD FILES' and upload the "EDSCKayakoMetrics.csv" file you saved in previous steps. It will take a few seconds to process, then the status will turn to green and say "Uploaded". Remove the old file with an older "Uploaded at" time by hovering over the file name and clicking 'Delete Upload'.

- Click on 'RECONNECT' in the upper-right. You should get a popup that says "No connection changes were found". Click 'Continue'.

- Return to the Data Studio data sources and repeat the same steps for the "EDSCKayakoTags.csv" data source and file.
...
- Now that the Data Studio data sources have been updated, the two Data Studio reports need to be updated to show the new data. In Data Studio, click on 'Reports' and search for "User Support".

- The "EDSCKayakoMetrics.csv" data will be used in "EDSC User Support". The "EDSCKayakoTags.csv" will be used in "EDSC User Support 2". Click on 'EDSC User Support'. Once open, click on 'Edit'.

- Click on the chart to open the edit panel for the data. Scroll down in the edit panel and click on the pencil icon in the filter section labeled 'Date filter'.


- The report is set to show the previous 6 months of data. Update both of the dates by adding one month, then click 'SAVE'.


- Repeat the same process for the "EDSC User Support 2" report.
- Both reports will now be updated with the new data. They automatically save and update. They have been embedded on the Earthdata Search Metrics wiki page and can be screenshot there for the ops deep dive presentation. I've kept a copy of all past deep dive presentations on the wiki here: Operations Deep Dive Presentations.
Overview
Content Tools