Page History
...
2. Search for Orders for your provider either by: a) entering an Order GUID and clicking on the Submit button below the Order GUID; or b) entering a combination of order state, user ID, and date/time filters and clicking on the Submit button below the date/time filters.
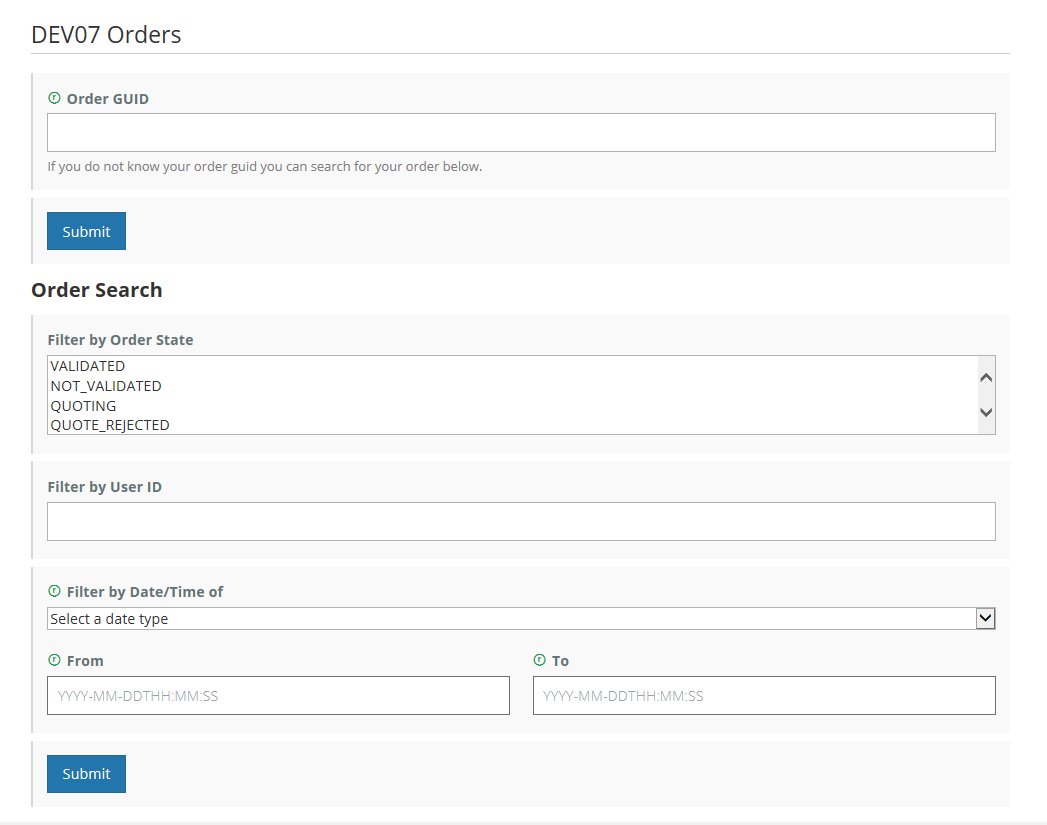
3. The MMT will display a table of orders for your provider which satisfy the search criteria.
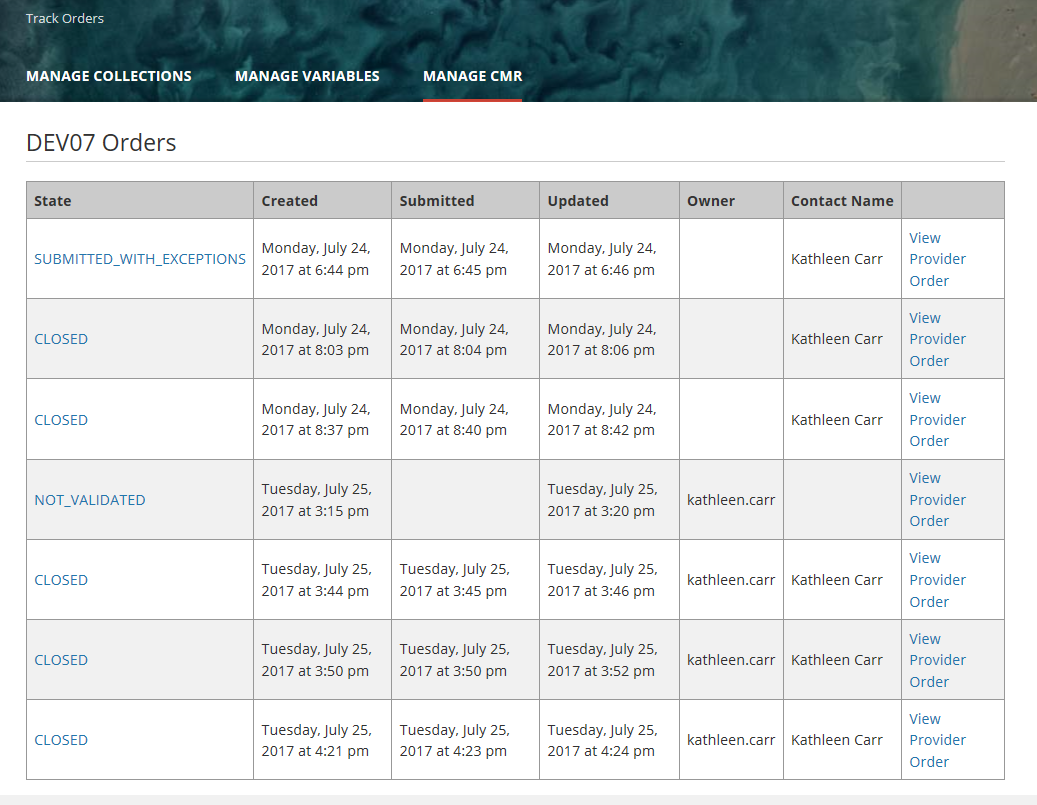

4. Click on Order GUID in the 'View Provider Order' column for any order in the table, to get more information about that order.


Resubmit a Closed Order for my provider
...
2. On the Order Option creation page, fill in all required fields for the Order Option, including the Order Form XML, and click on Submit.
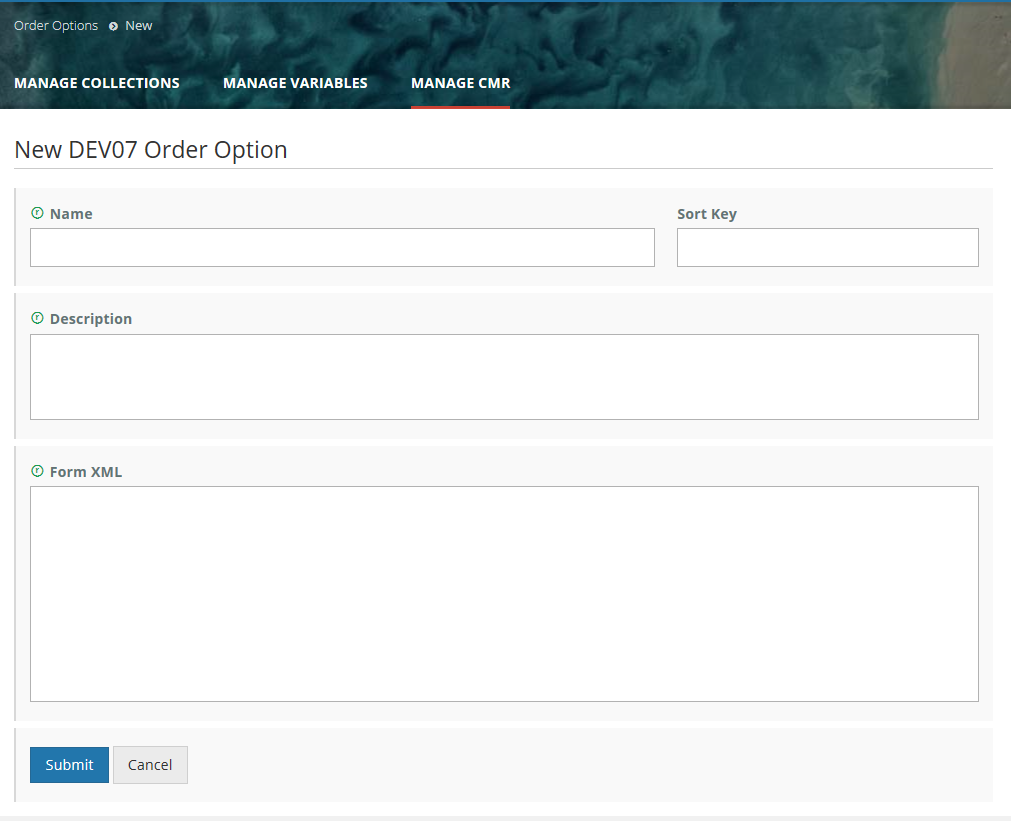

3. The MMT will display a status message which indicates the success or failure of your order option creation.
...
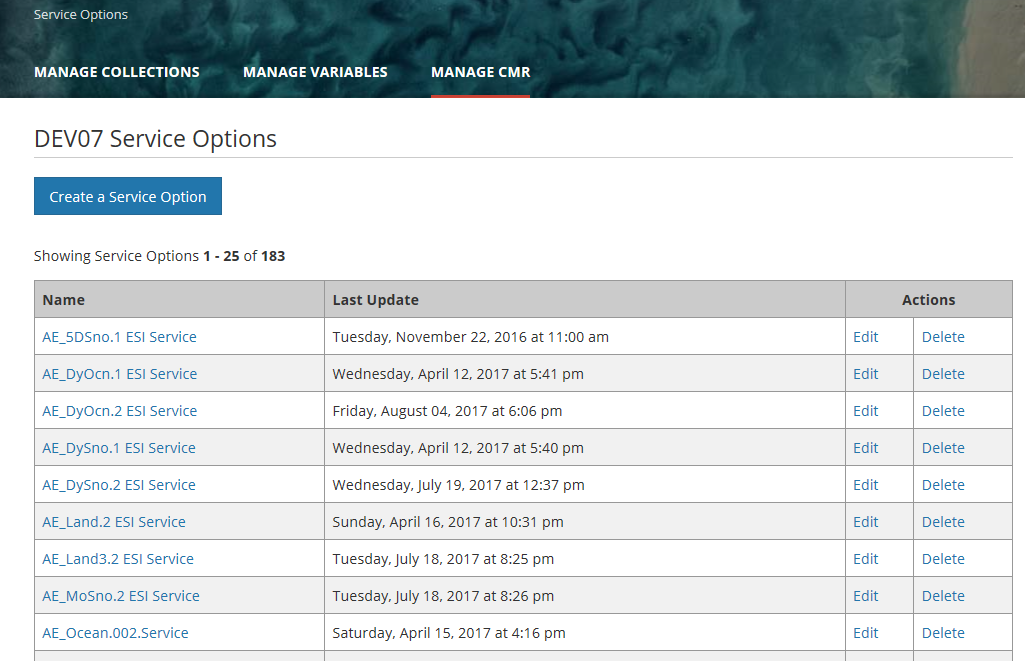
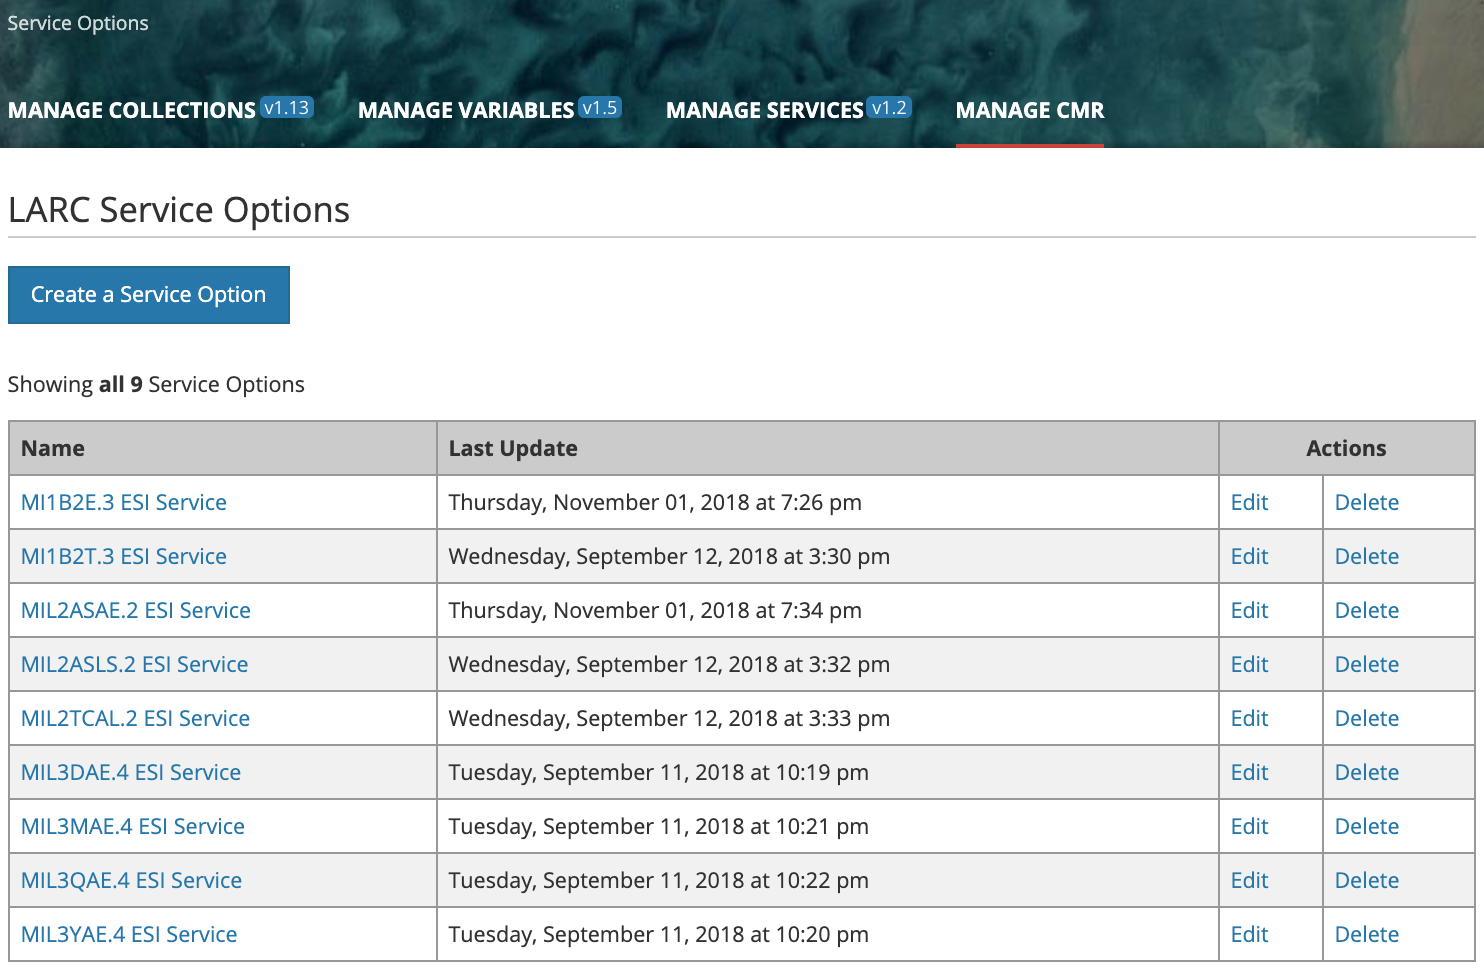
2. A table of Order Options for your provider will be displayed.
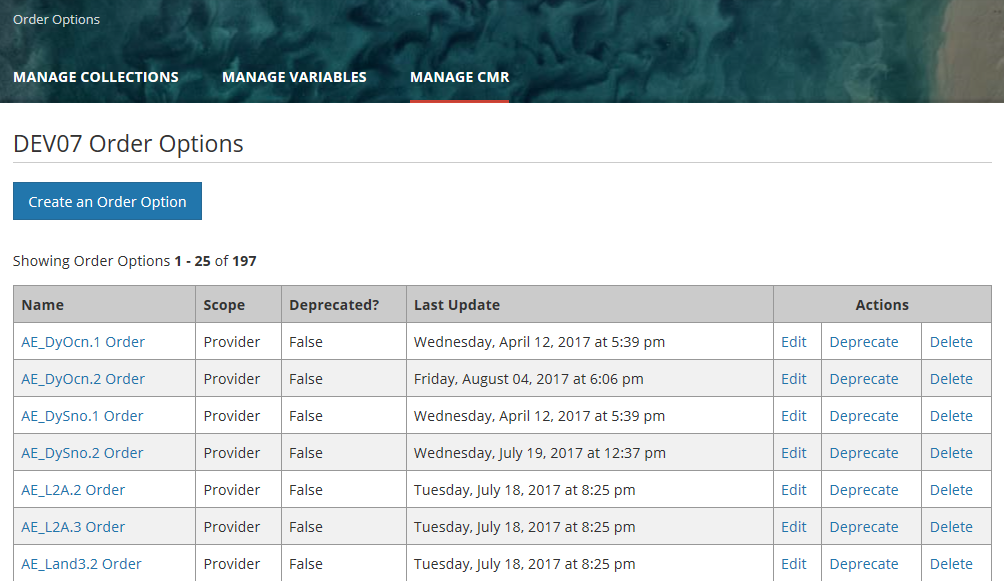

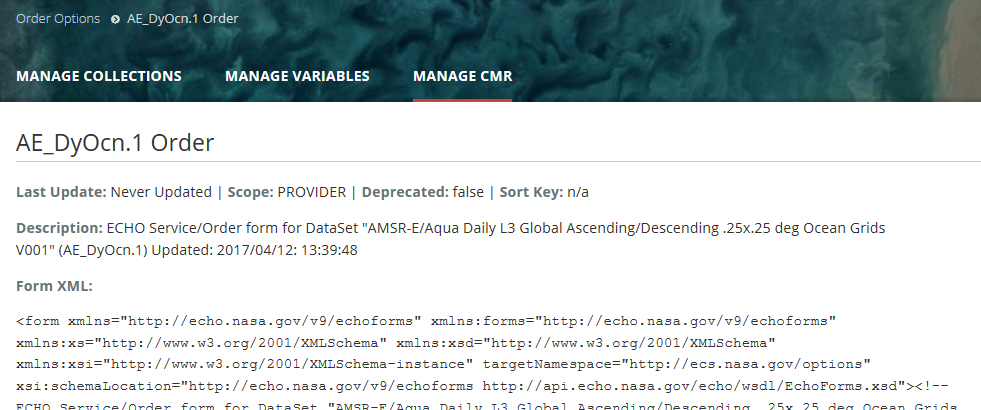
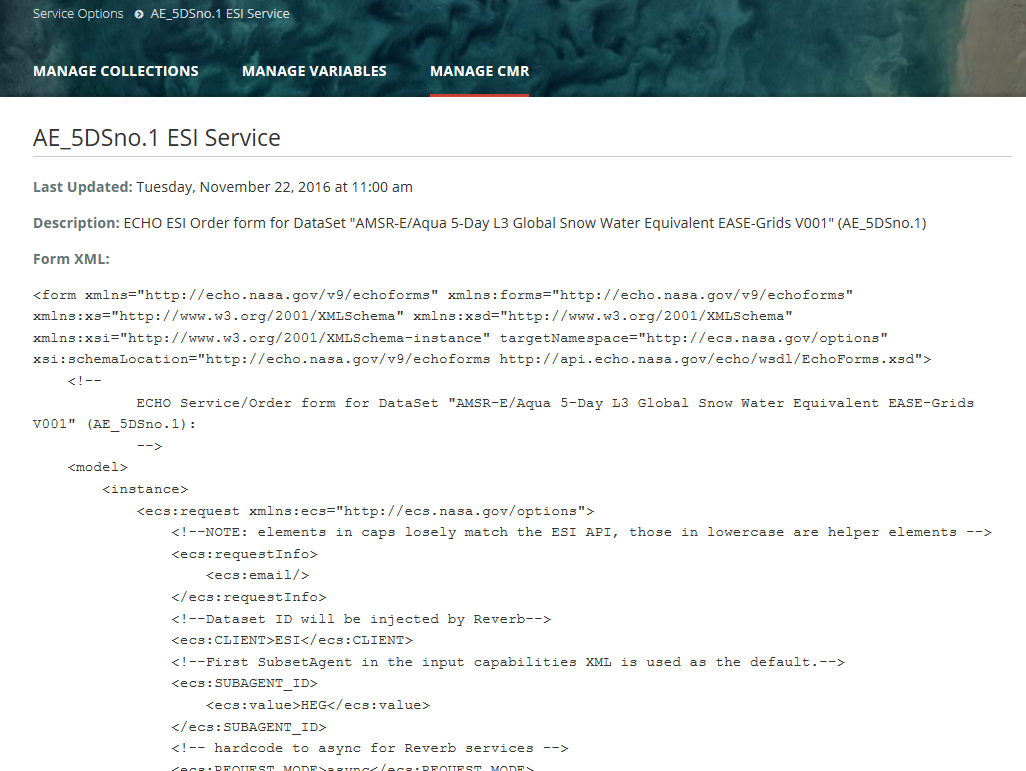
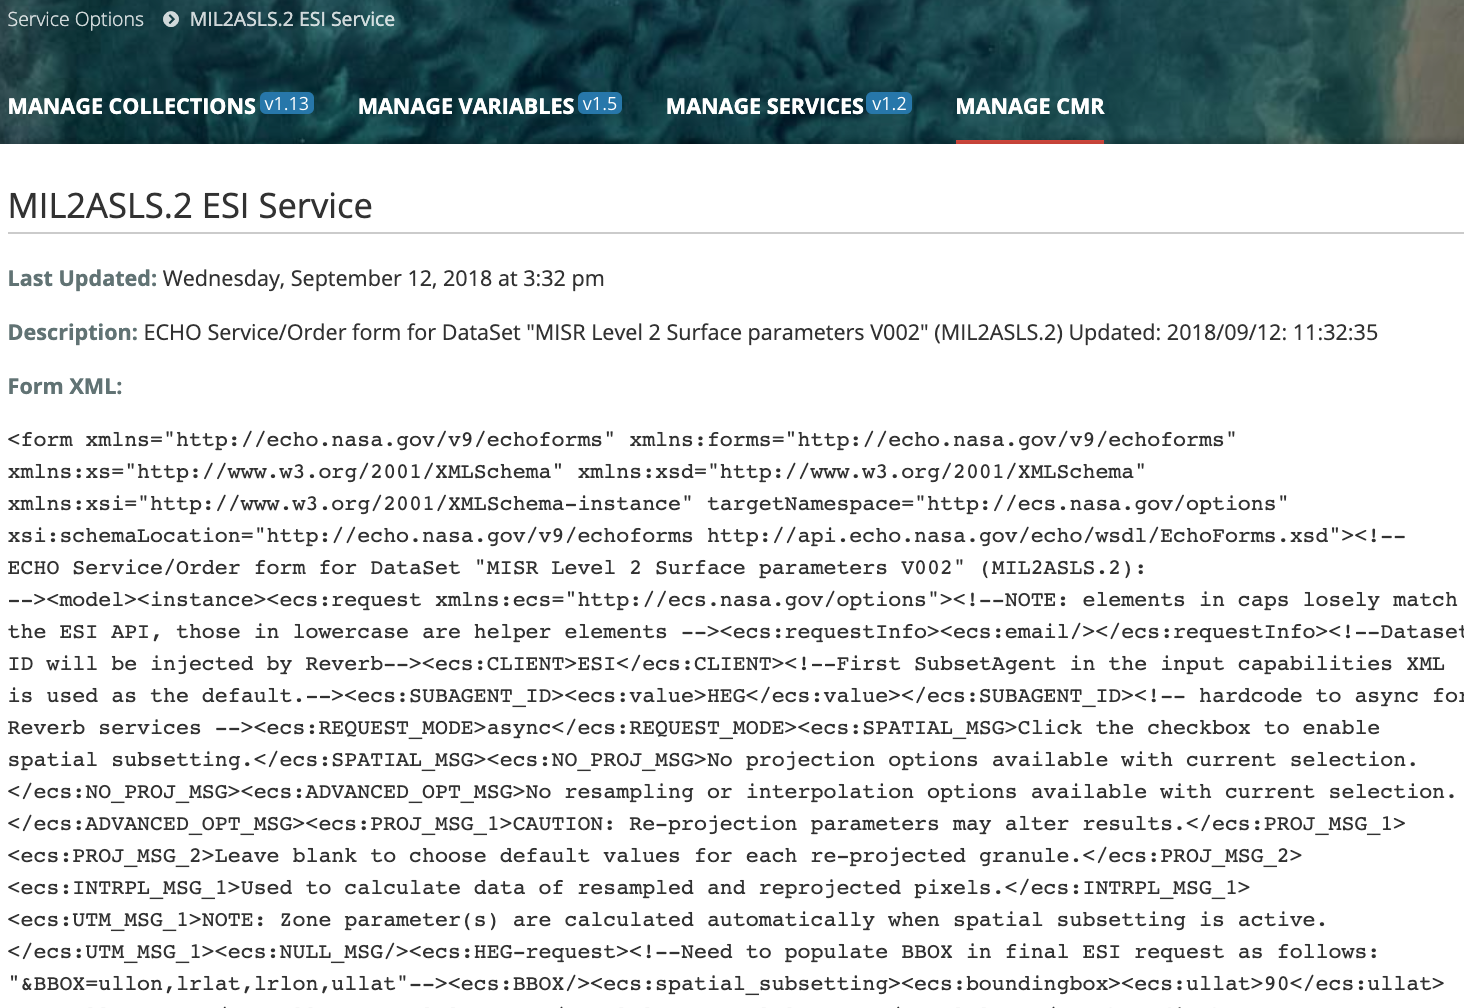
3. Click on the Order Option name to see the display page for that Order Option.

Update an Order Option
- Find order options for your provider using the instructions for 'Find an Order Option' above.
- Click on the 'Edit' action in the row for the Order Option you wish to edit, or click on the name of the Order Option you wish to edit, and then click on the Edit button on the Order Option display page.
- The Edit page for the Order Option will be displayed.
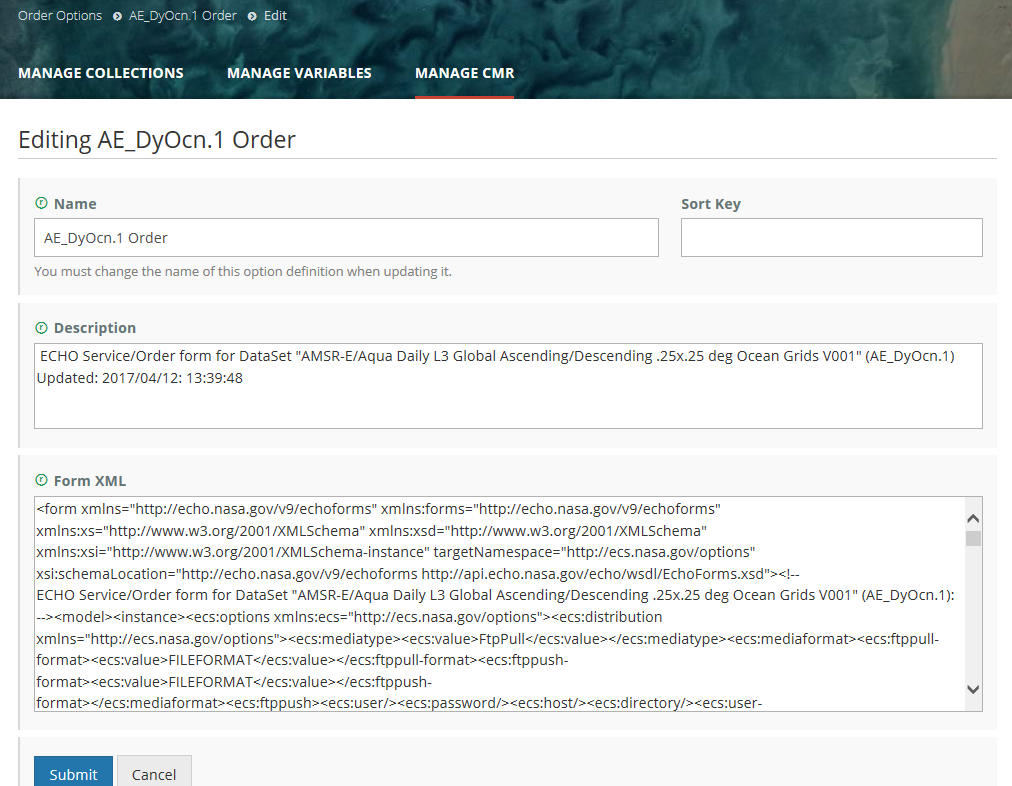

- Edit the fields you wish to change, and click on Submit to save the changes. NOTE: YOU MUST CHANGE THE NAME OF THE ORDER OPTION WHEN EDITING IT. THE ORDER OPTION WITH THE ORIGINAL NAME WILL BE DEPRECATED.
- The MMT will display a status message which indicates the success or failure of your order option update.

...
Click Submit to associate the selected Order Option with the selected collection(s).
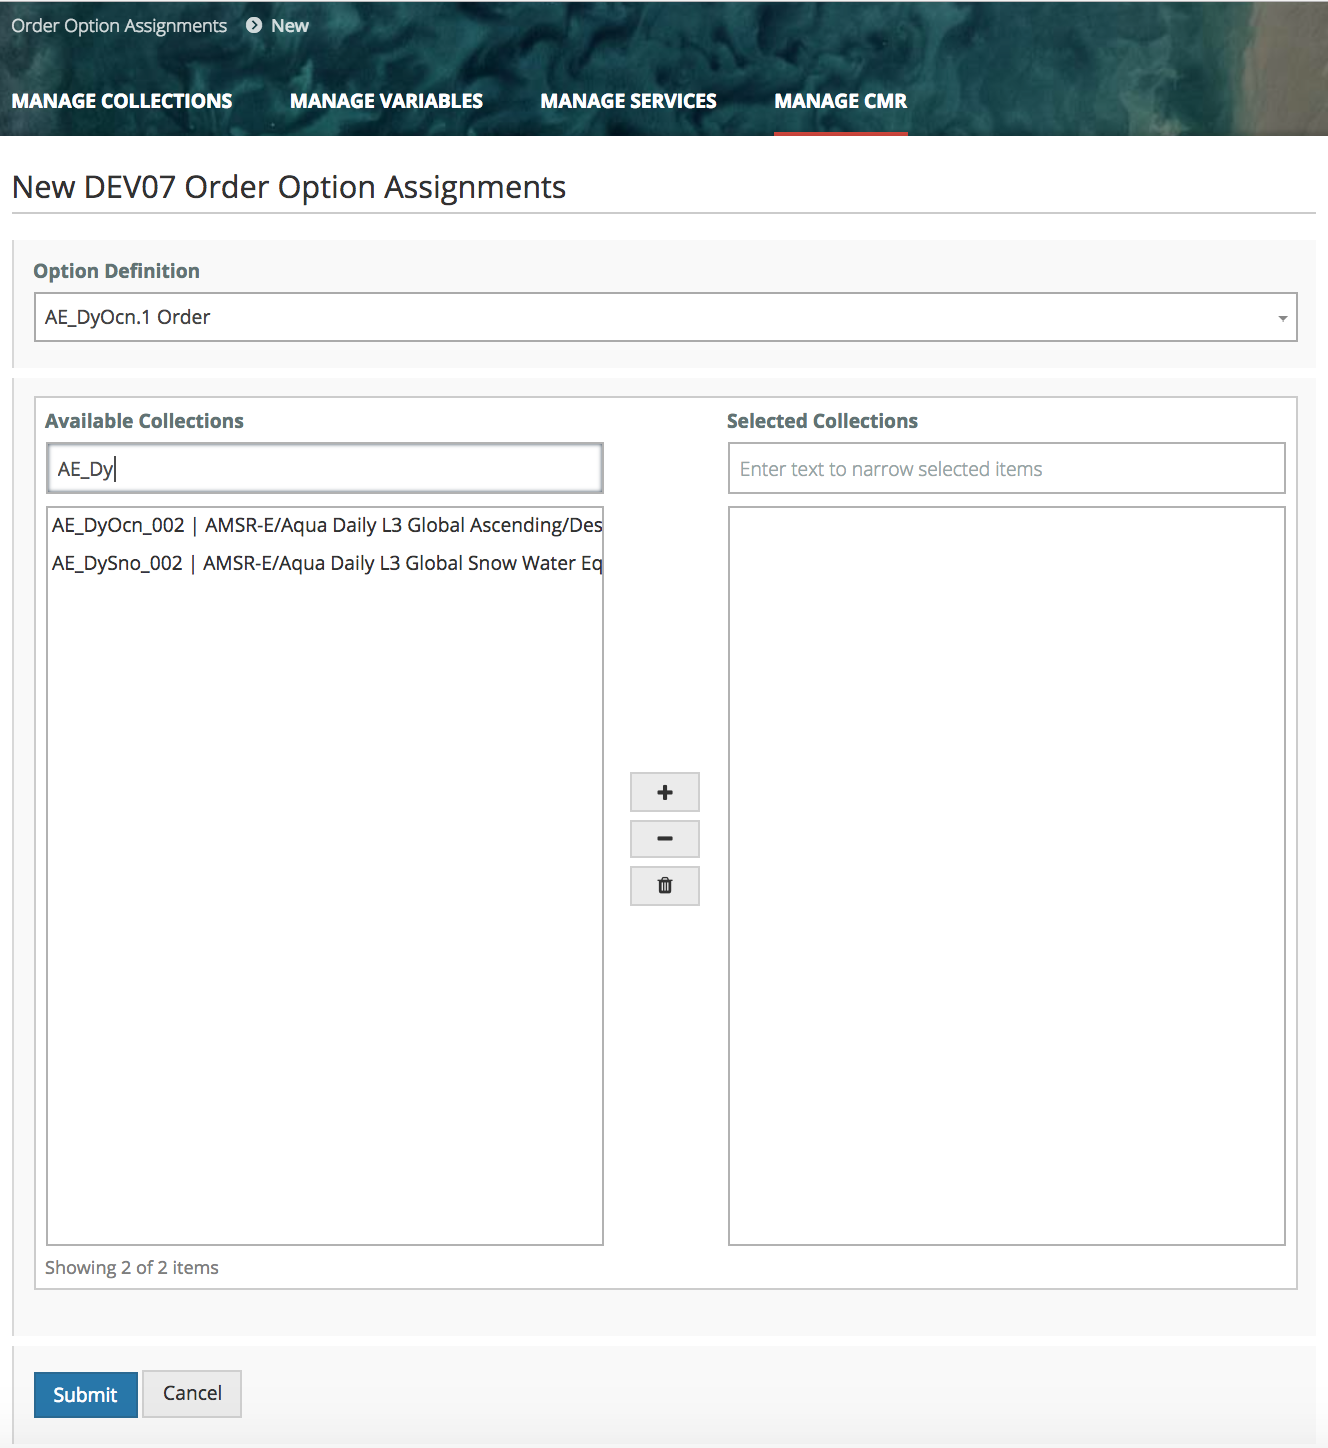

3. The MMT will display a status message which indicates the success or failure of your order option assignment.
...
2. On the Order Option Assignments page, select collections whose Order Option Assignments you wish to view, using the Available Collection chooser, and click on 'Display Assignments'.
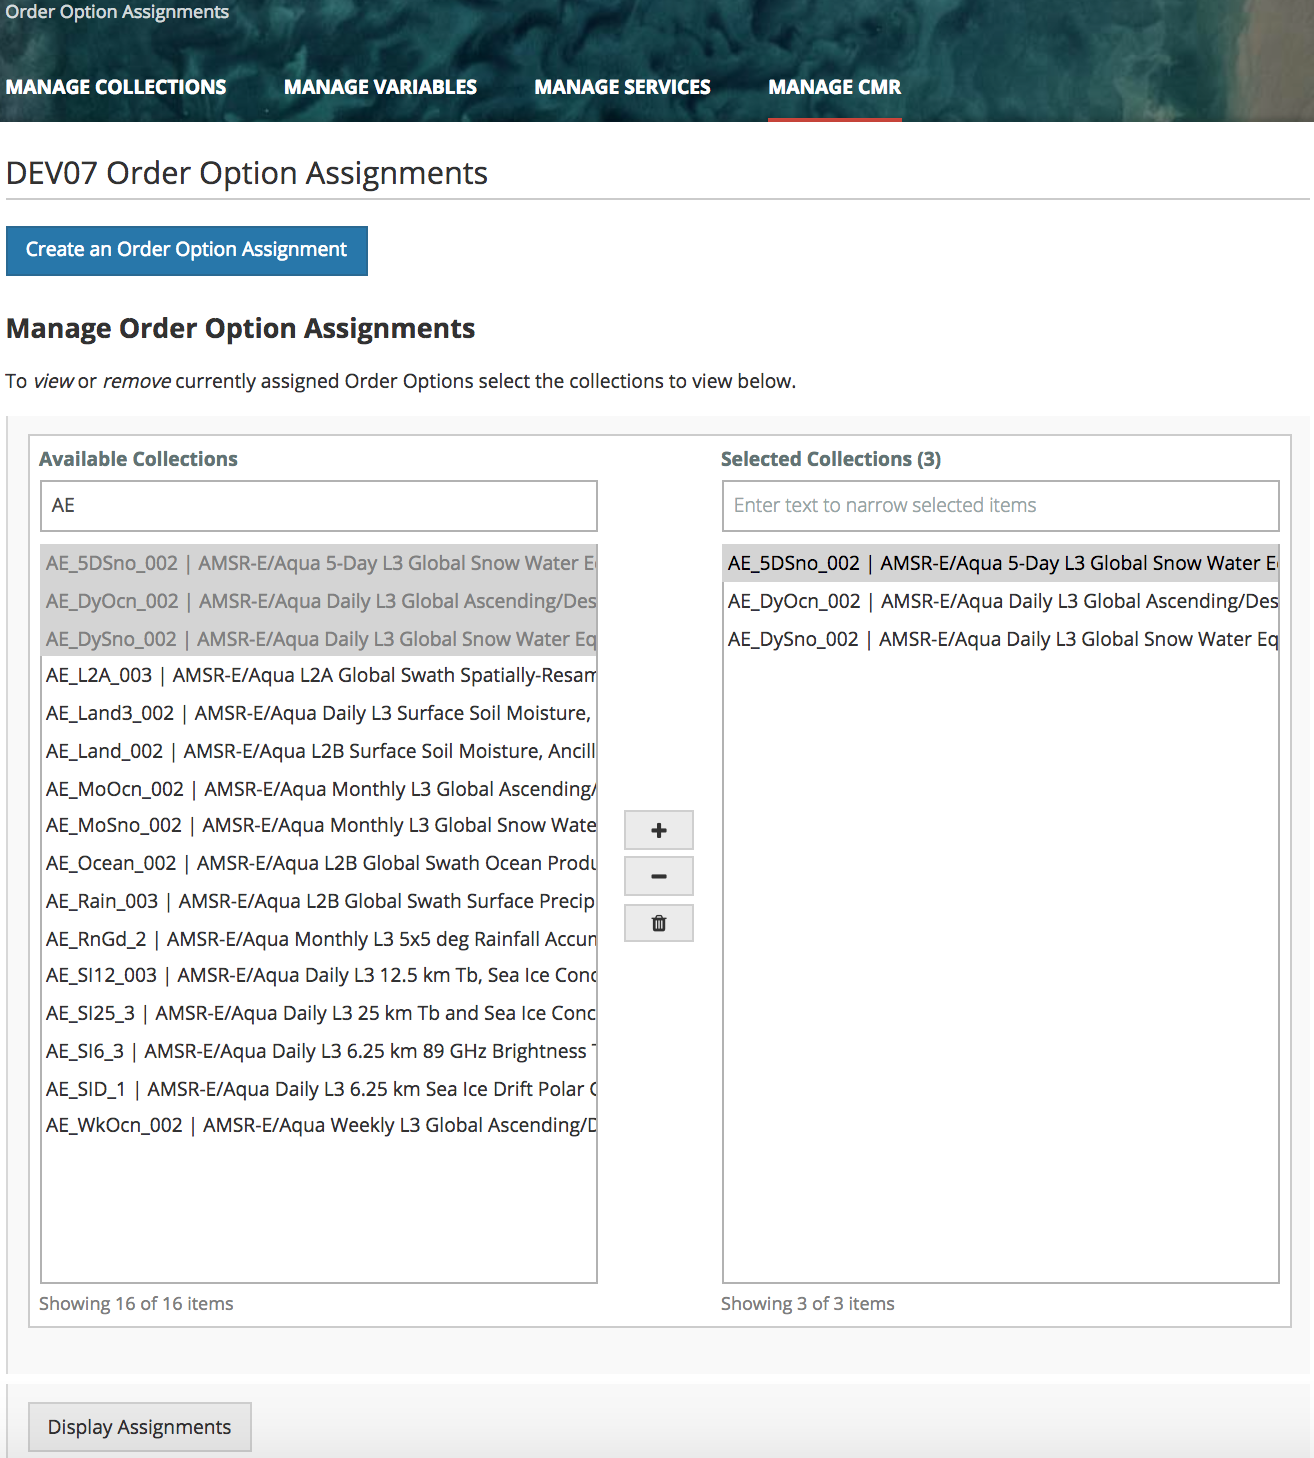
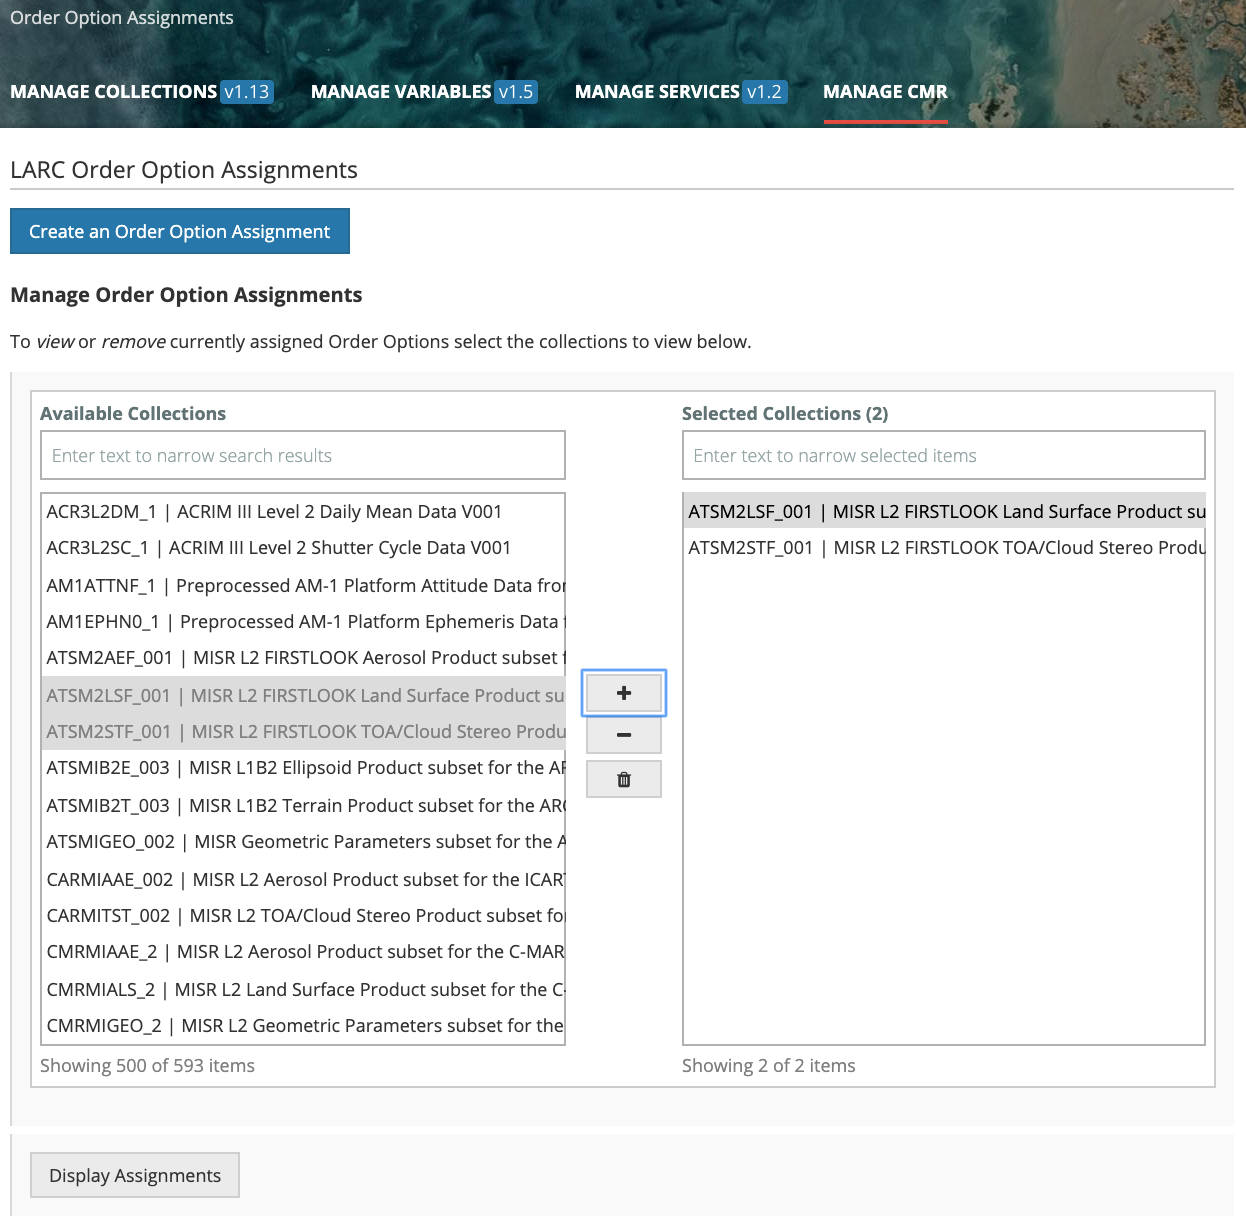
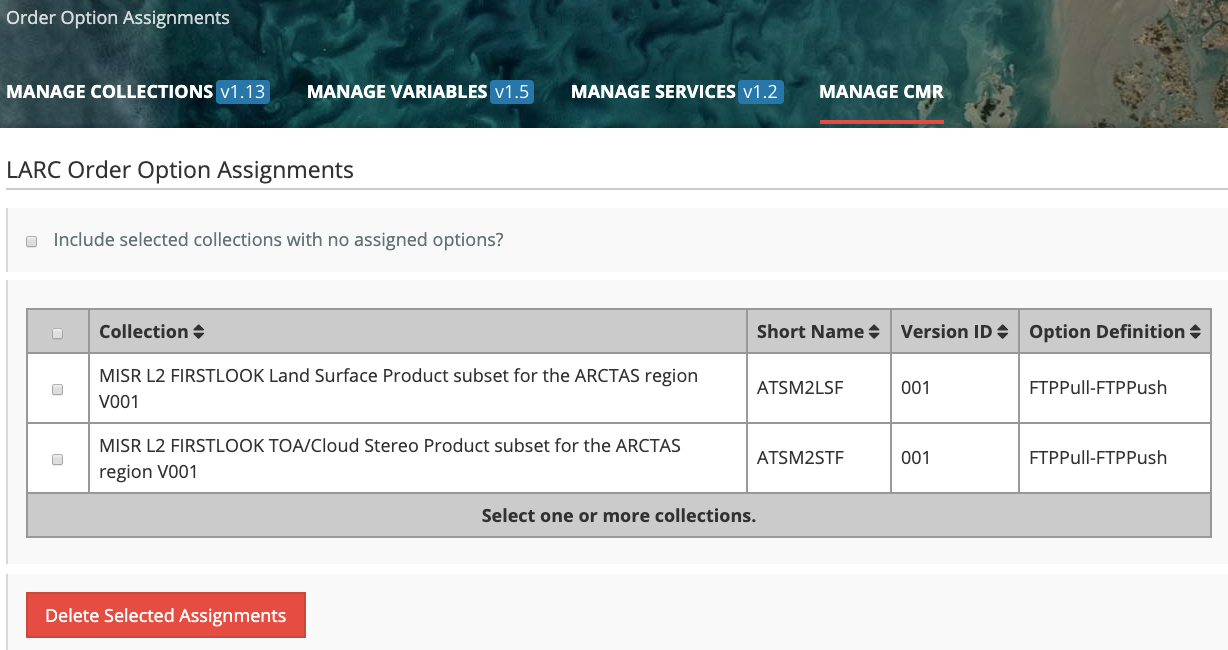
3. A table of selected Collections with their Order Option assignments will be displayed. Only selected collections which have Order Option assignments will be initially displayed in the table. Click the checkbox beside 'Include selected collections with no assigned options?' to see all selected collections in the table.
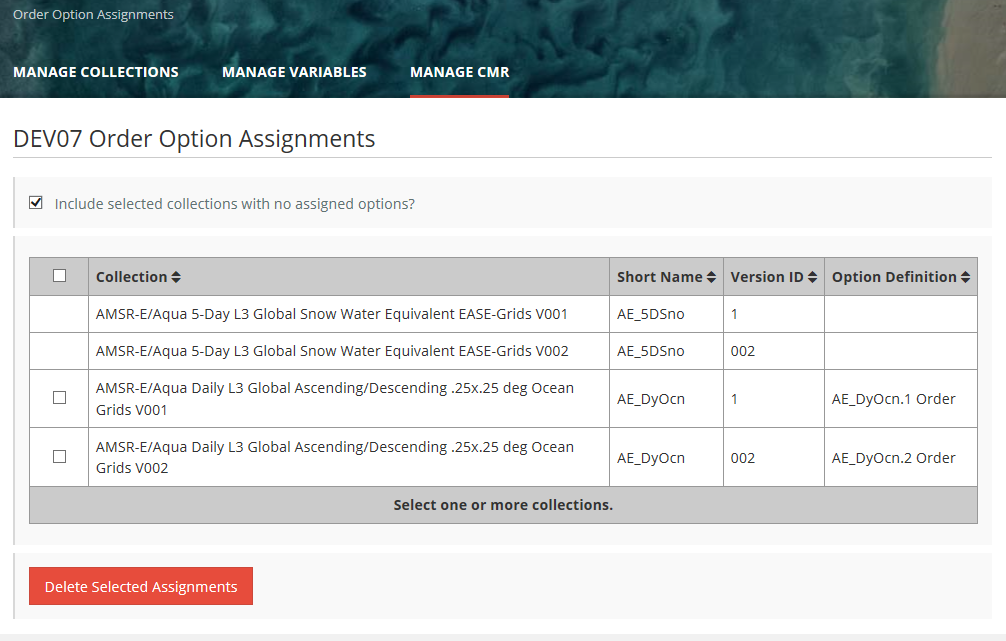
Delete Order Option to Collection Assignments
...
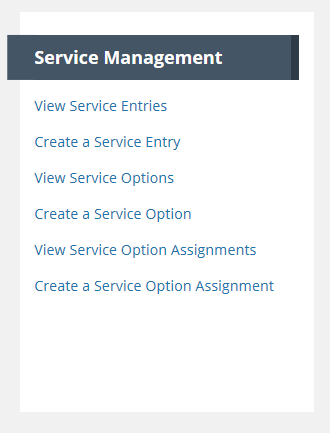
- On the 'Manage CMR' dashboard, under 'Service Management', click on 'Create a Service Entry'
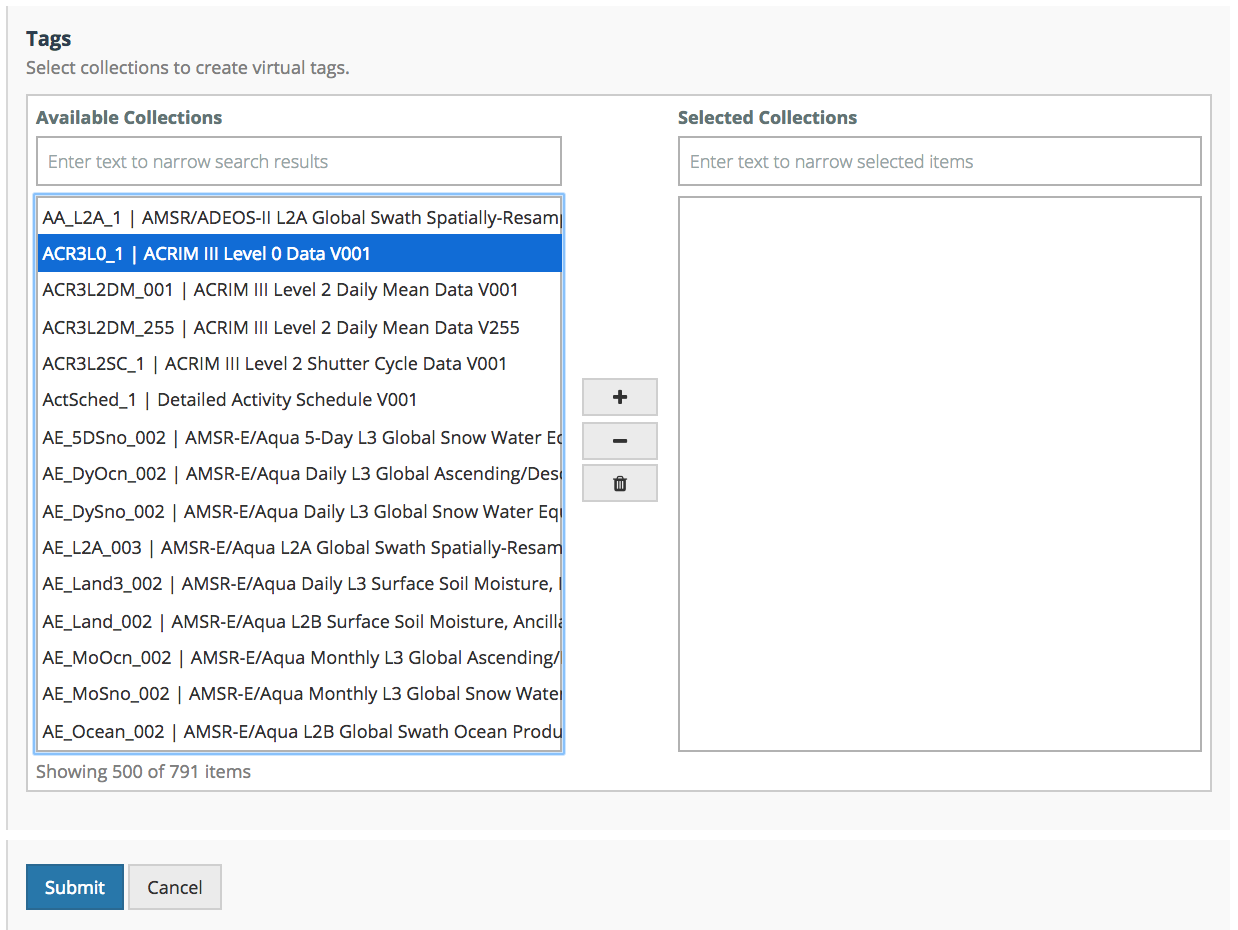
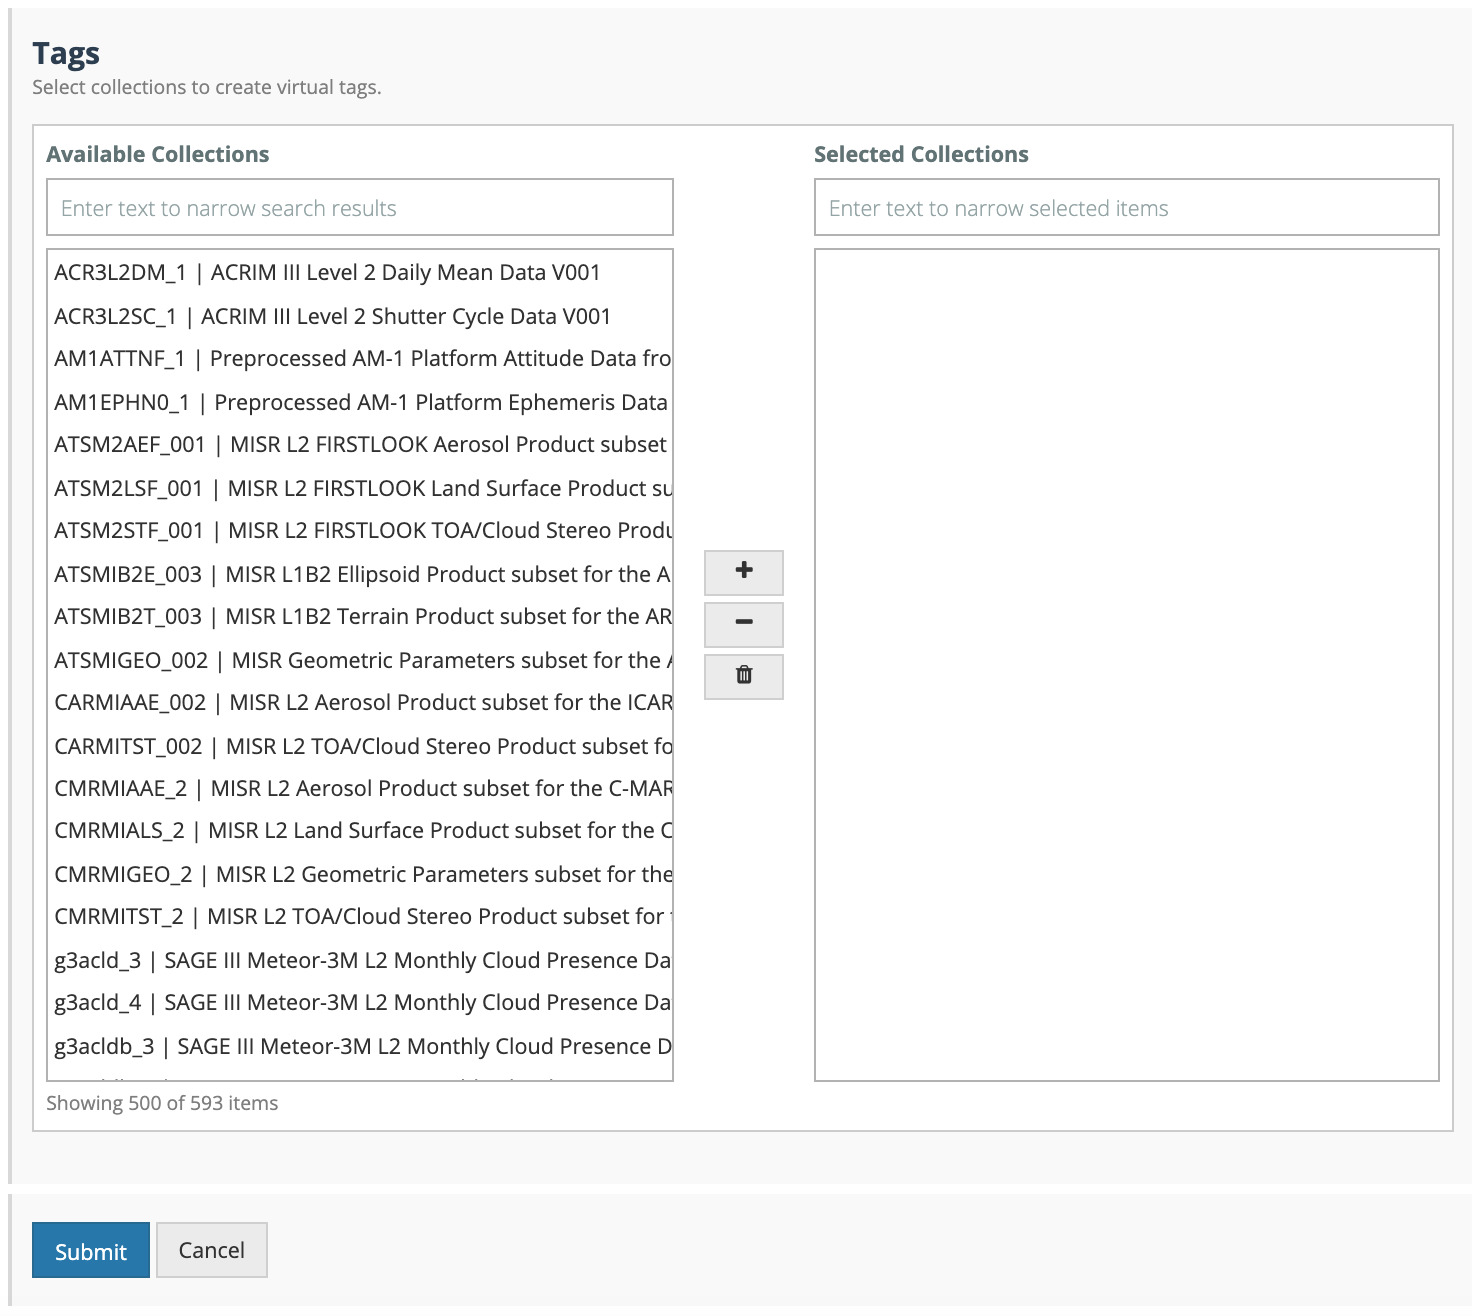
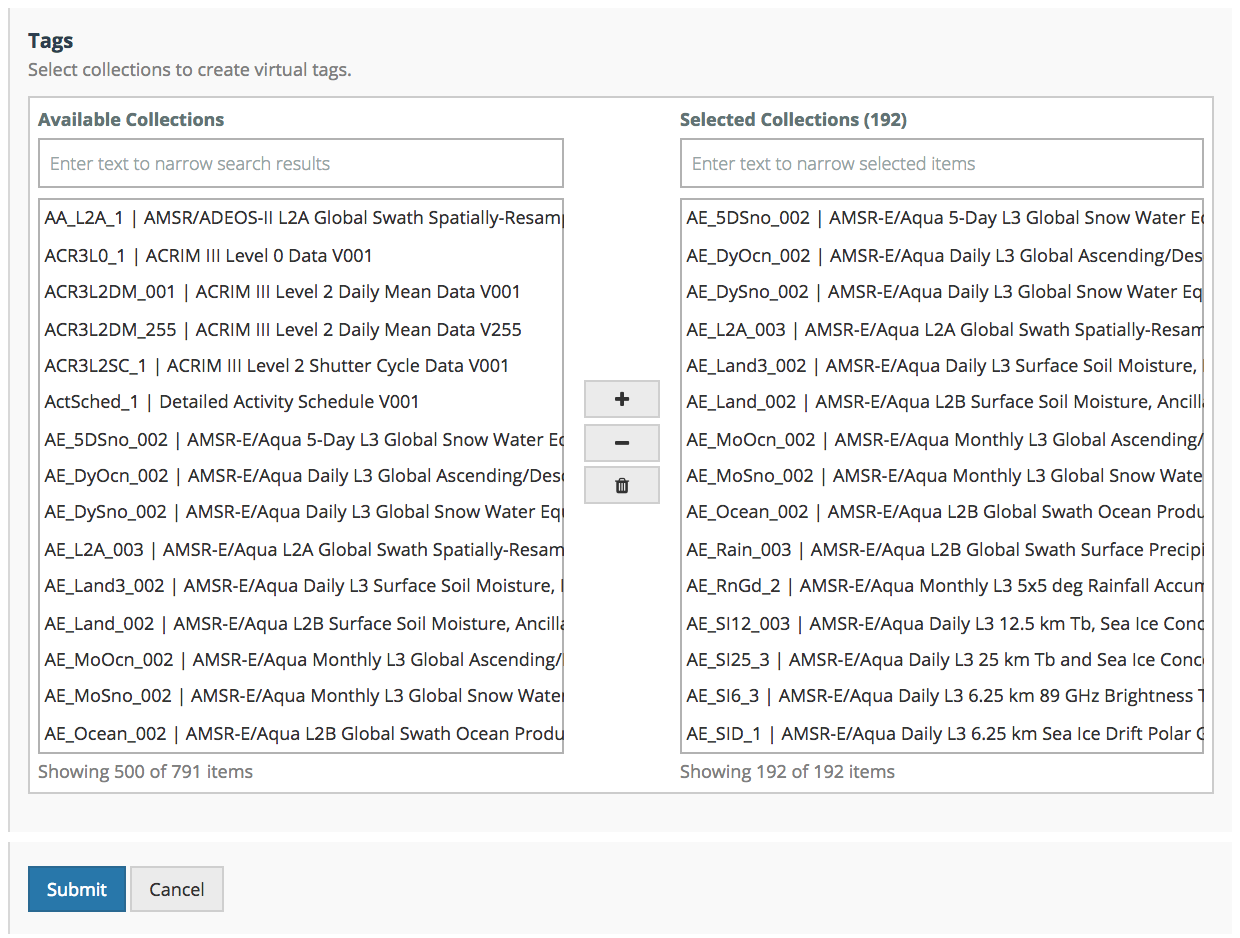
- On the Service Entries creation page, fill in the Name, URL, and Description of the Service Implementation, choose a Type of 'Service Implementation', choose an existing (system-controlled) Service Interface, and optionally associate Collections with the Service Implementation using the Available Collections chooser. Click on Submit to create the Service Implementation.
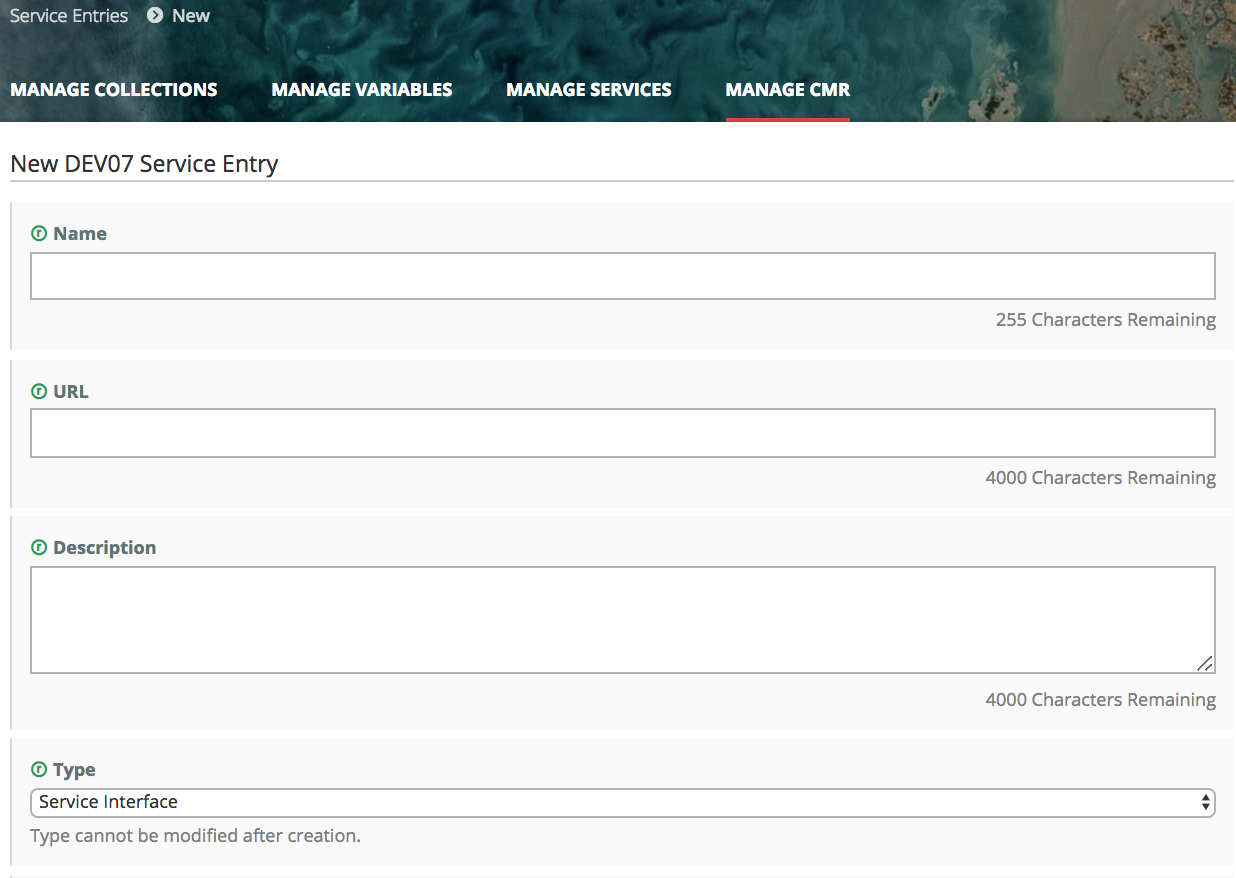

- The MMT will display a status message which indicates the success or failure of your service implementation creation.
...
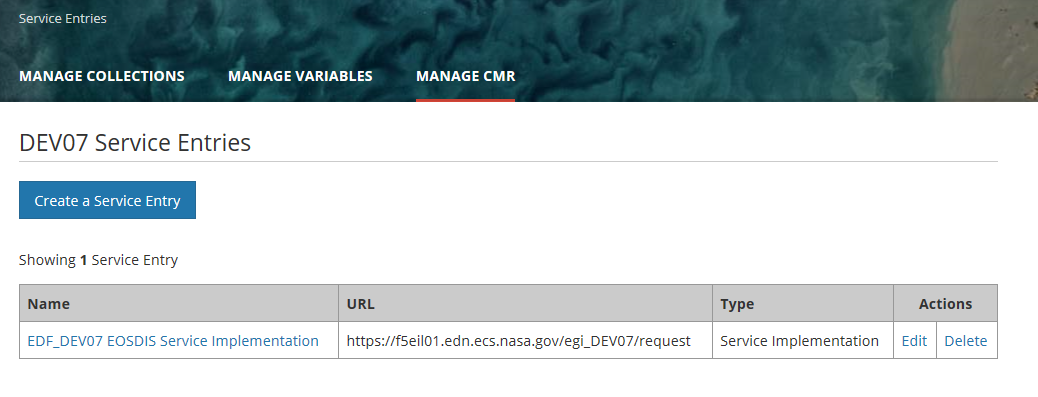
2. Service Entries for your provider will be displayed.

Update a Service Entry
- Find service entries for your provider using the instructions for 'View Service Entries for my provider 'above.
- Click on the 'Edit' action in the row for the Service Entry you wish to edit, or click on the name of the Service Entry you wish to edit, and then click on the Edit button on the Service Entry display page. NOTE: Providers are responsible for maintaining Service Entries of Type = Service Implementation. Service Entries of Type = Service Interface are system-controlled.
- The Edit page for the Service Entry will be displayed.
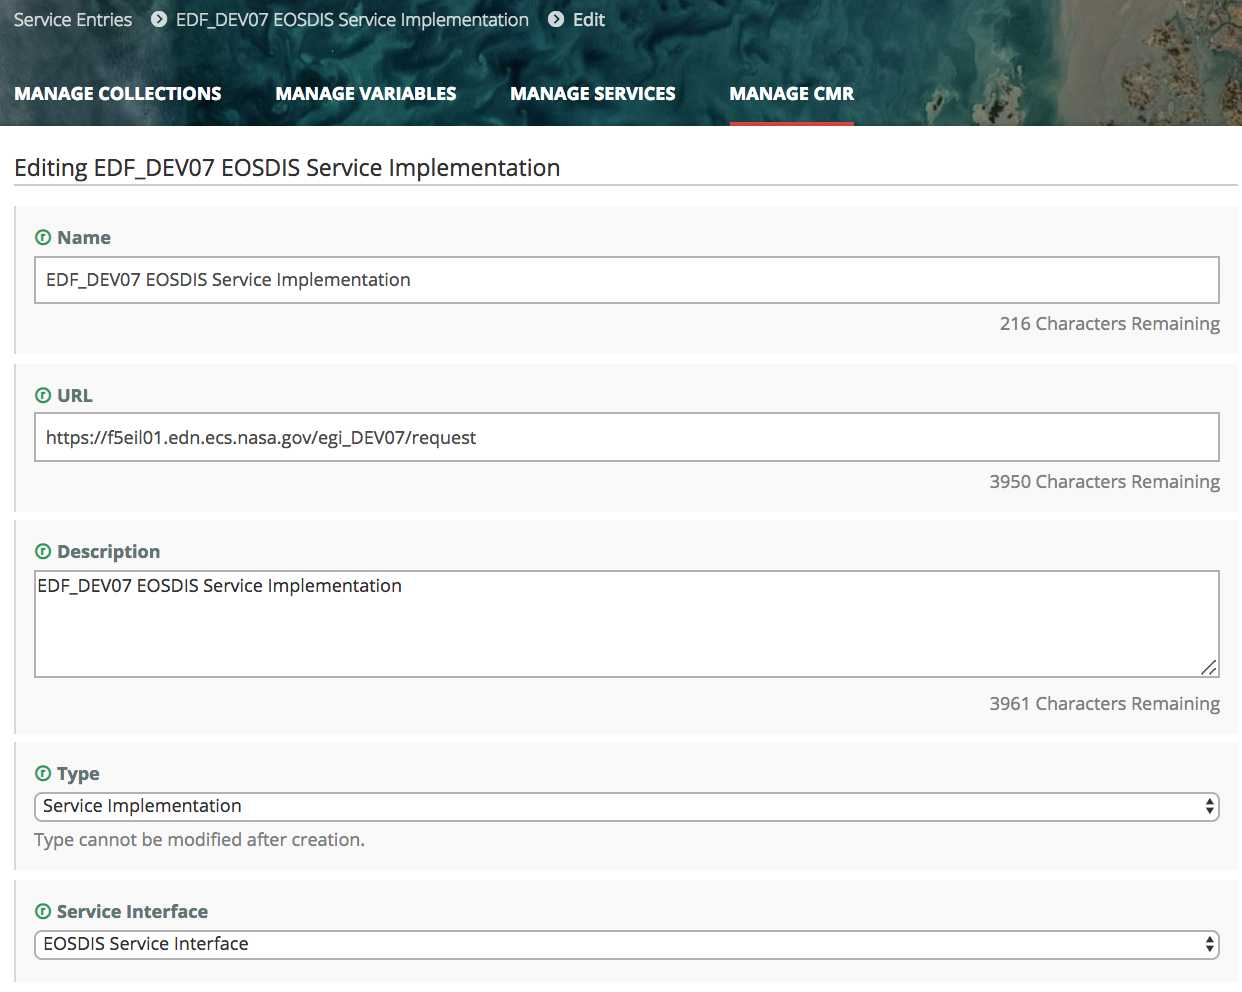


- Edit the fields you wish to change, and click on Submit to save the changes.
- The MMT will display a status message which indicates the success or failure of your service entry update.
...
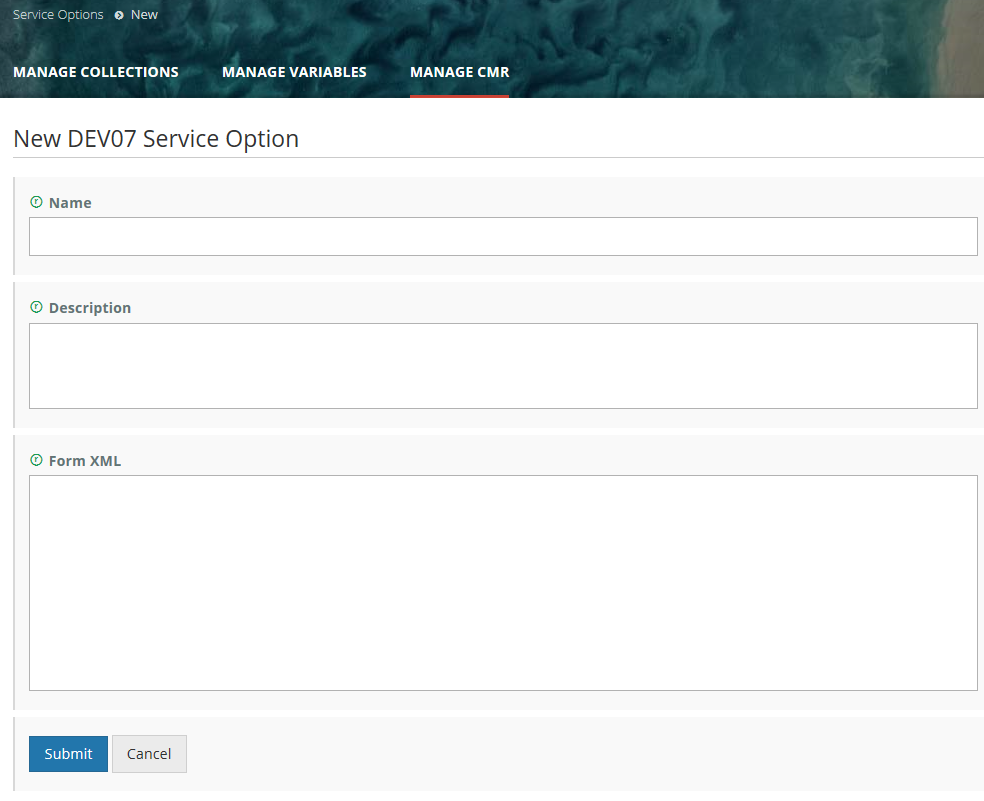
2. On the Service Option creation page, fill in all required fields for the Service Option, including the Service Form XML, and click on Submit.

3. The MMT will display a status message which indicates the success or failure of your service option creation.
...
2. A table of Service Options for your provider will be displayed.
3. Click on the Service Option name to see the display page for that Service Option.
Update a Service Option
...
- Find service options for your provider using the instructions for 'Find a Service Option' above.
- Click on the 'Edit' action in the row for the Service Option you wish to edit, or click on the name of the Service Option you wish to edit, and then click on the Edit button on the Service Option display page.
- The Edit page for the Service Option will be displayed.
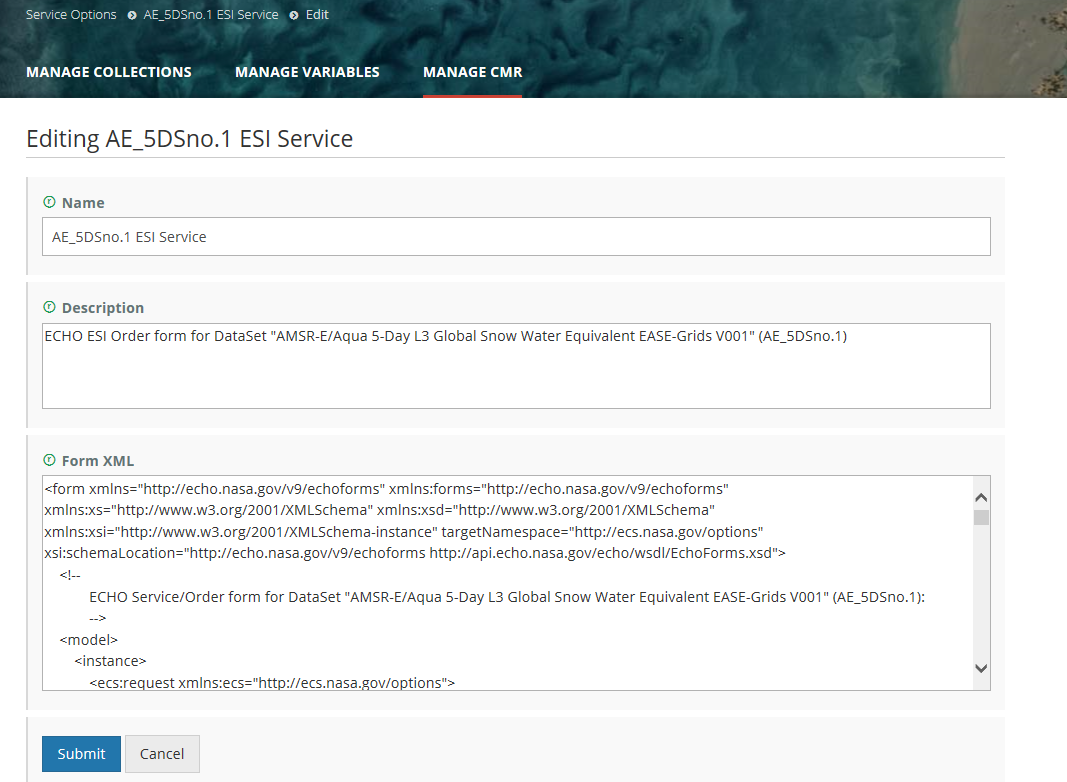

4. Edit the fields you wish to change, and click on Submit to save the changes.
...
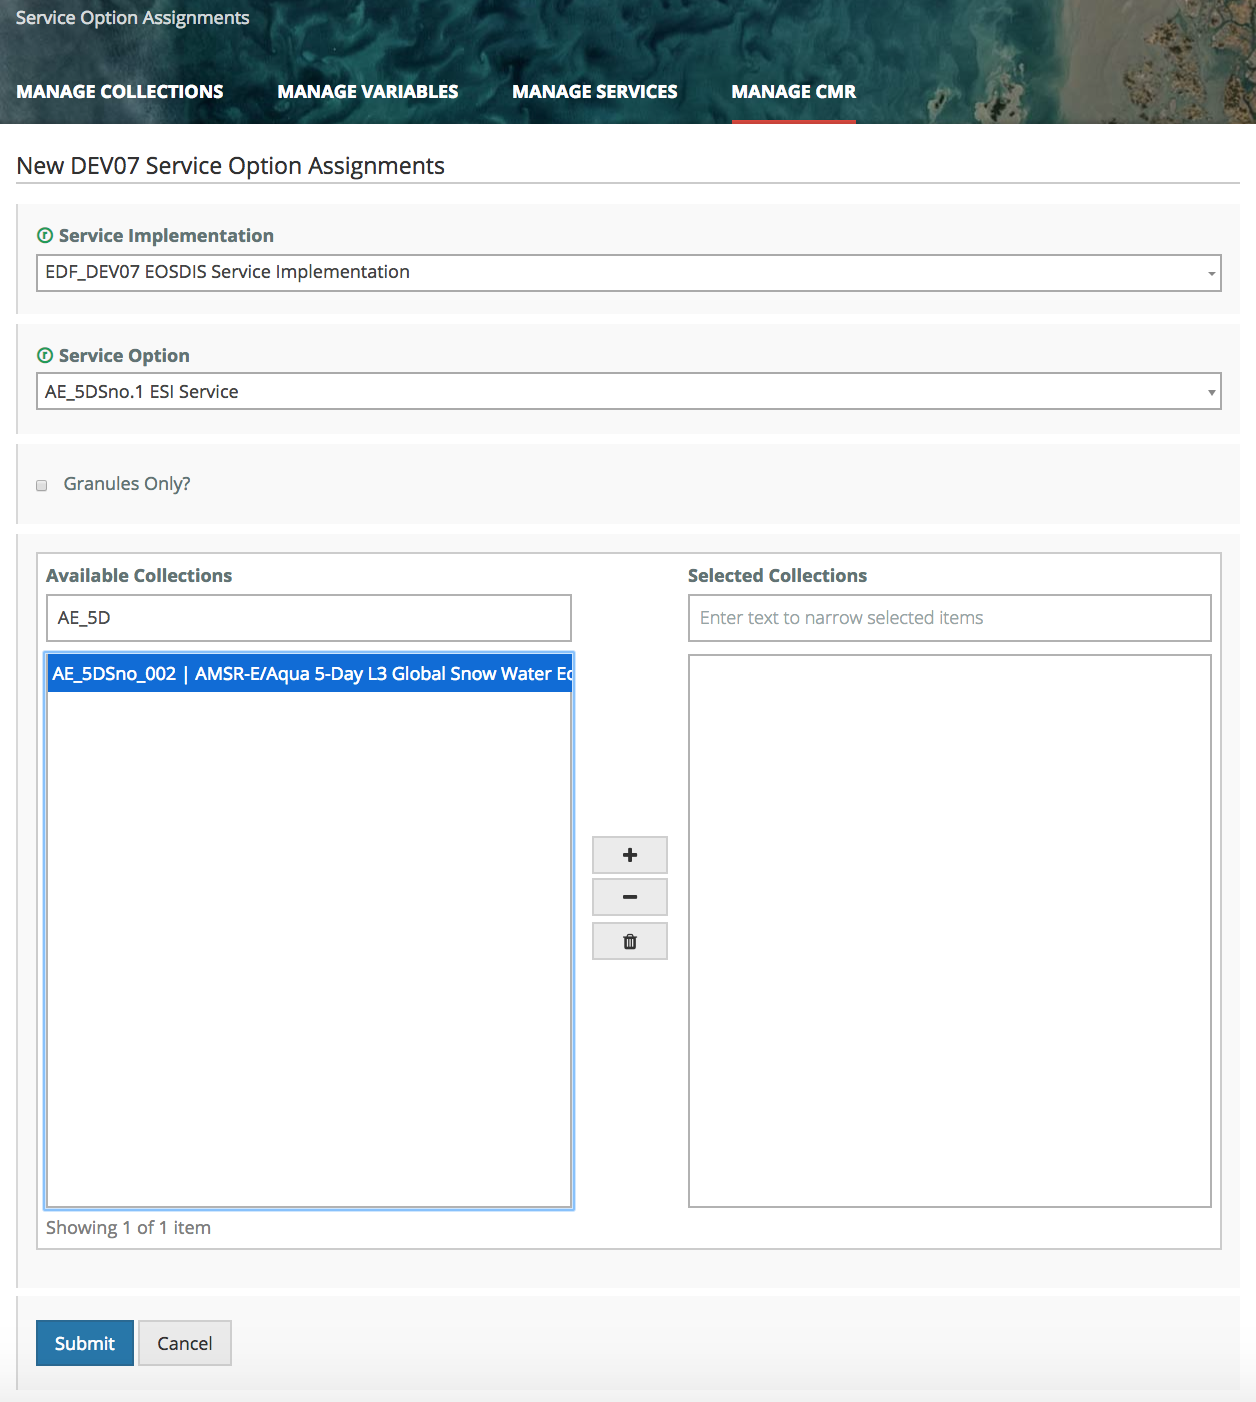
Click Submit to associate the selected Service Option with the selected collection(s).

3. The MMT will display a status message which indicates the success or failure of your order option assignment.
...
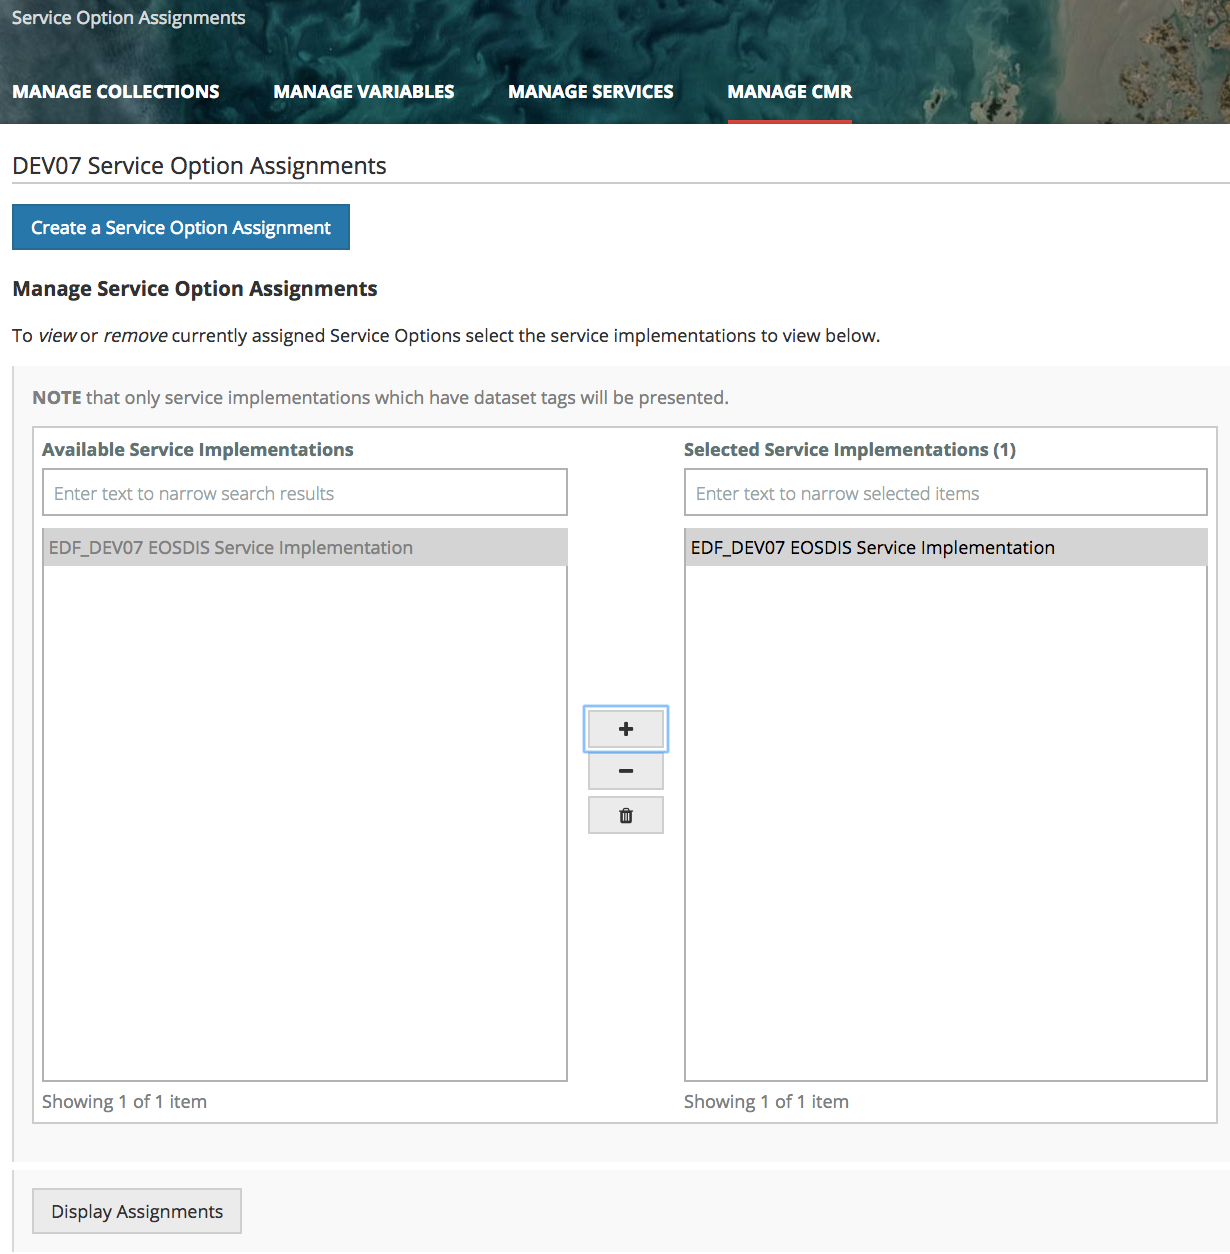
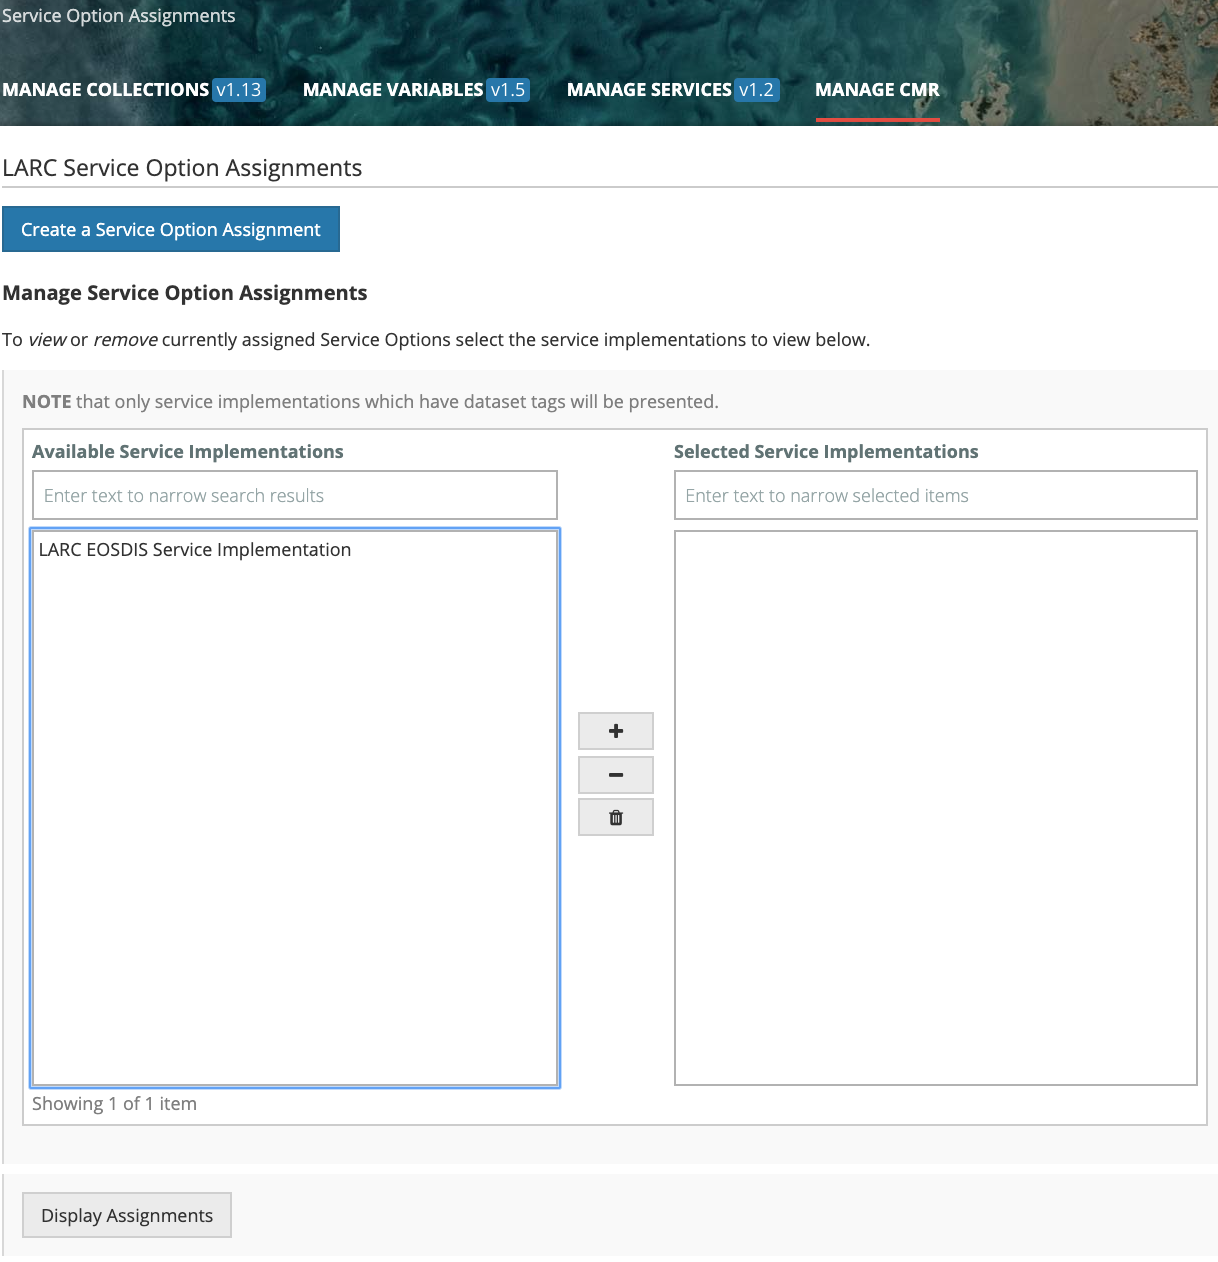
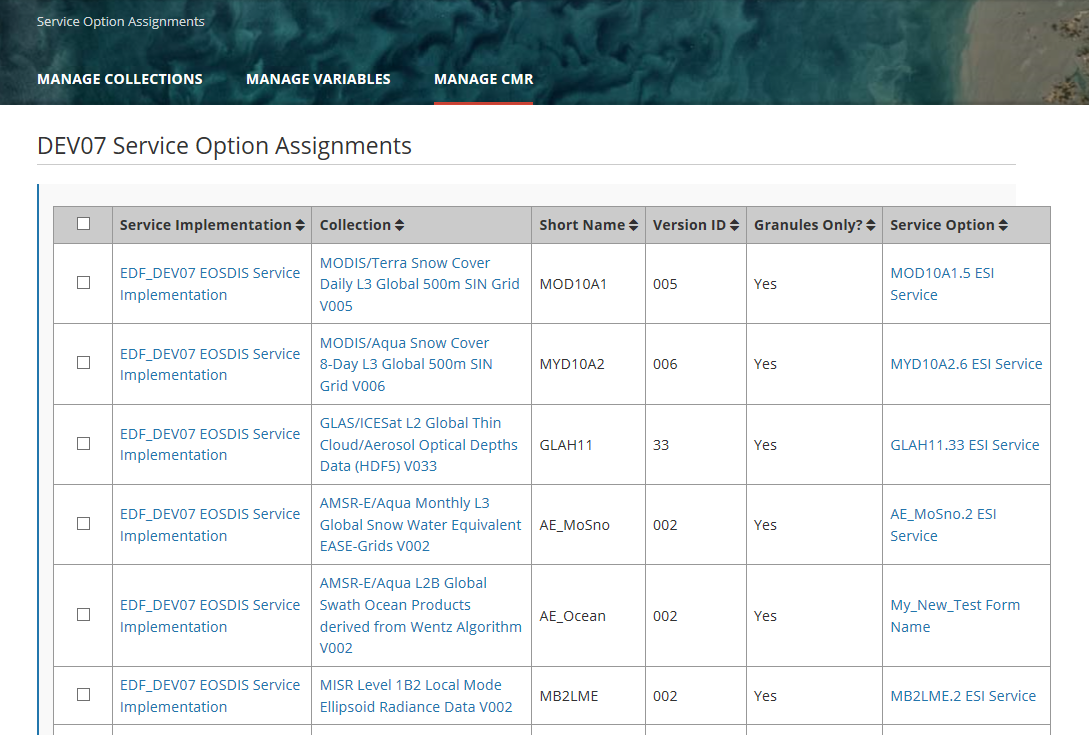
2. On the Service Option Assignments page, select a Service Implementation, and click on 'Display Assignments'.
3. A table of selected Service Option/Collection assignments for the selected Service Implementation will be displayed. Each row in the table represents a three-way association of Service Implementation, Collection (Entry Title, Short Name, and Version) and Service Option. The row also indicates if the Service Option / Collection association was created with the 'Granules Only' box checked.

Delete Service Option to Collection assignment
...
- Find service option assignments to specific collections using the instructions for 'View existing Service Option to Collection Assignments' above.
- On the display table of Service Option to Collection Assignments, click the checkbox beside any Service Option to Collection Assignments that you wish to delete, and then click on 'Delete Selected Assignments' at the bottom of the table:
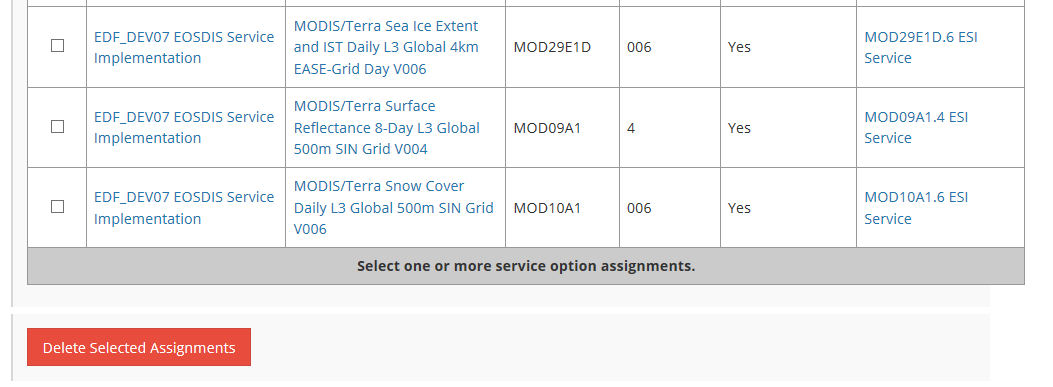

- You will be prompted to confirm the deletion of the order option assignments. Click Yes to delete, or click No to avoid the deletion.

...
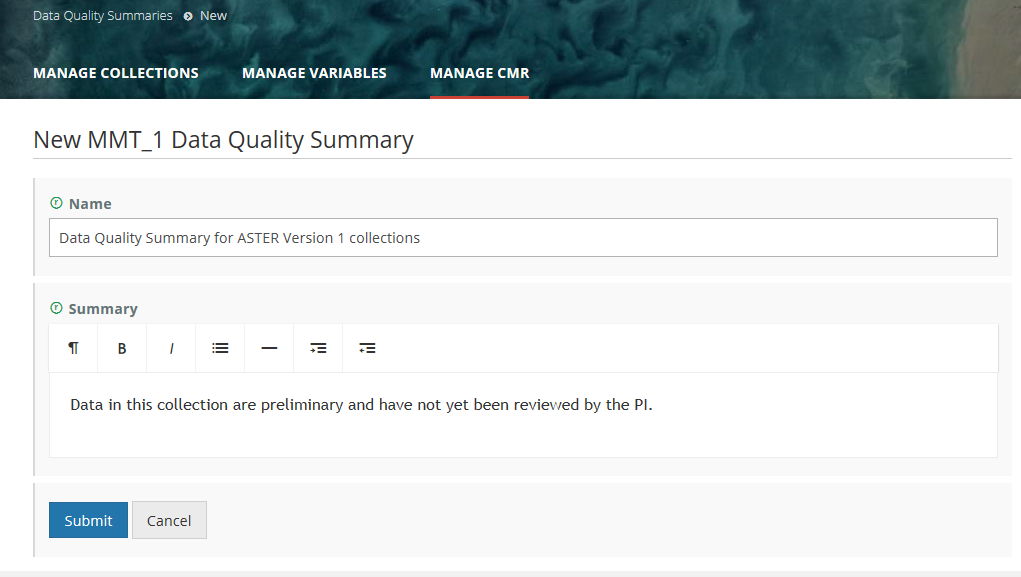
- On the 'Manage CMR' dashboard, under 'Data Quality Summaries', click on 'Create a Summary'.

- On the Data Quality Summaries page, enter a Name for your Data Quality Summary, and enter the Data Quality Summary text. Click on Submit.

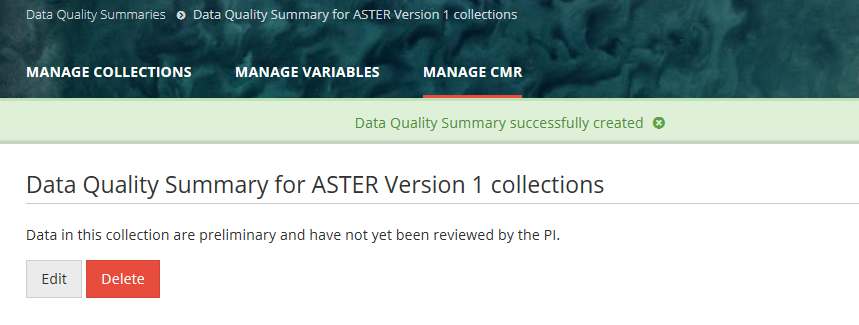
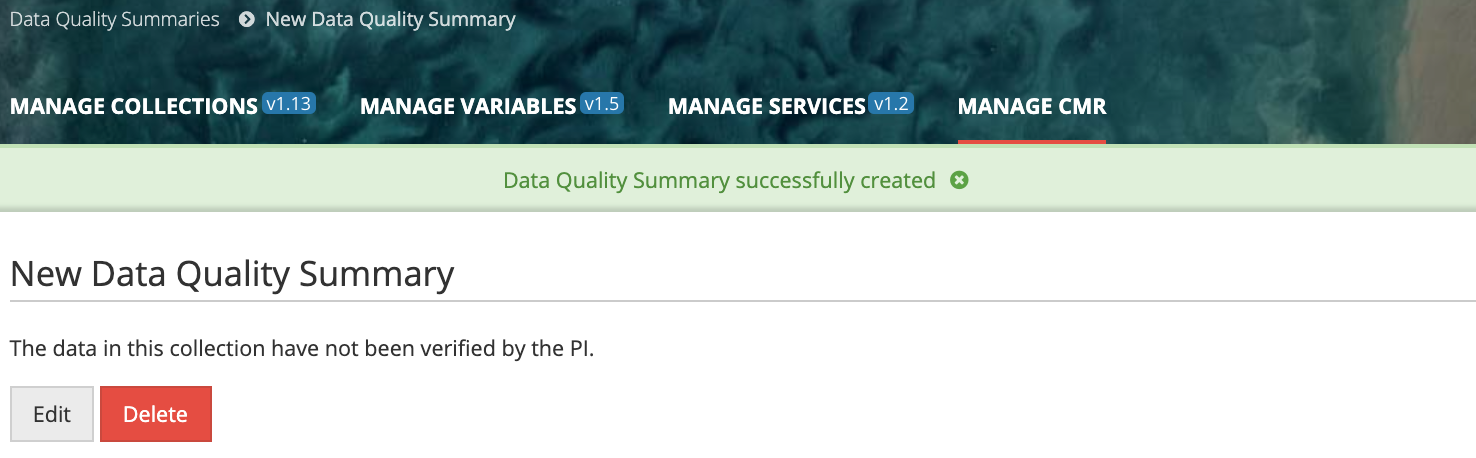
3. The MMT will display the Data Quality Summary display page, with a green banner indicating that the Data Quality Summary was created successfully (or a pink banner indicating a failure creating the Data Quality Summary).
Update a Data Quality Summary
...
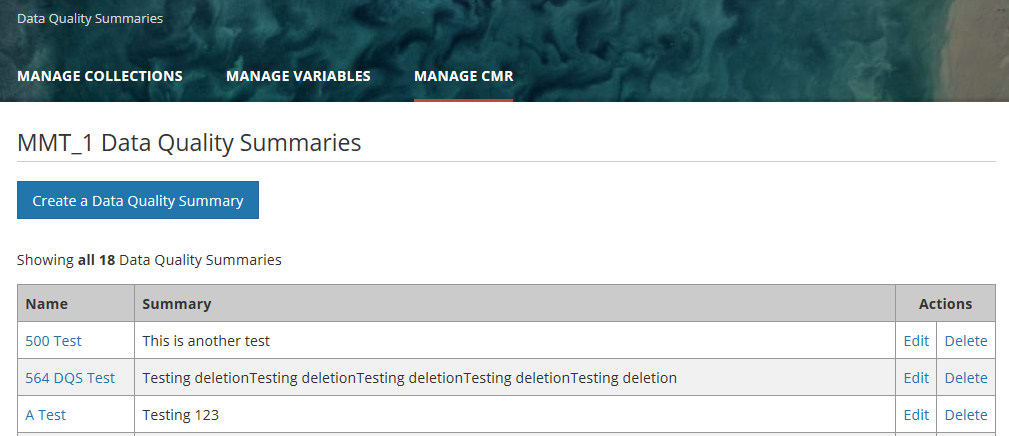
2. The MMT will display a table of Data Quality Summaries for your provider.

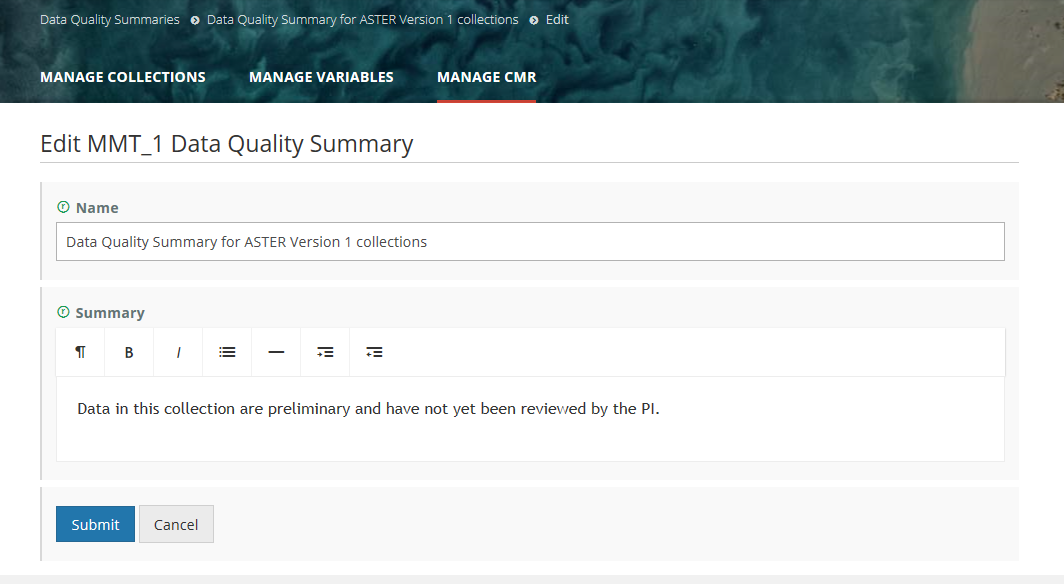
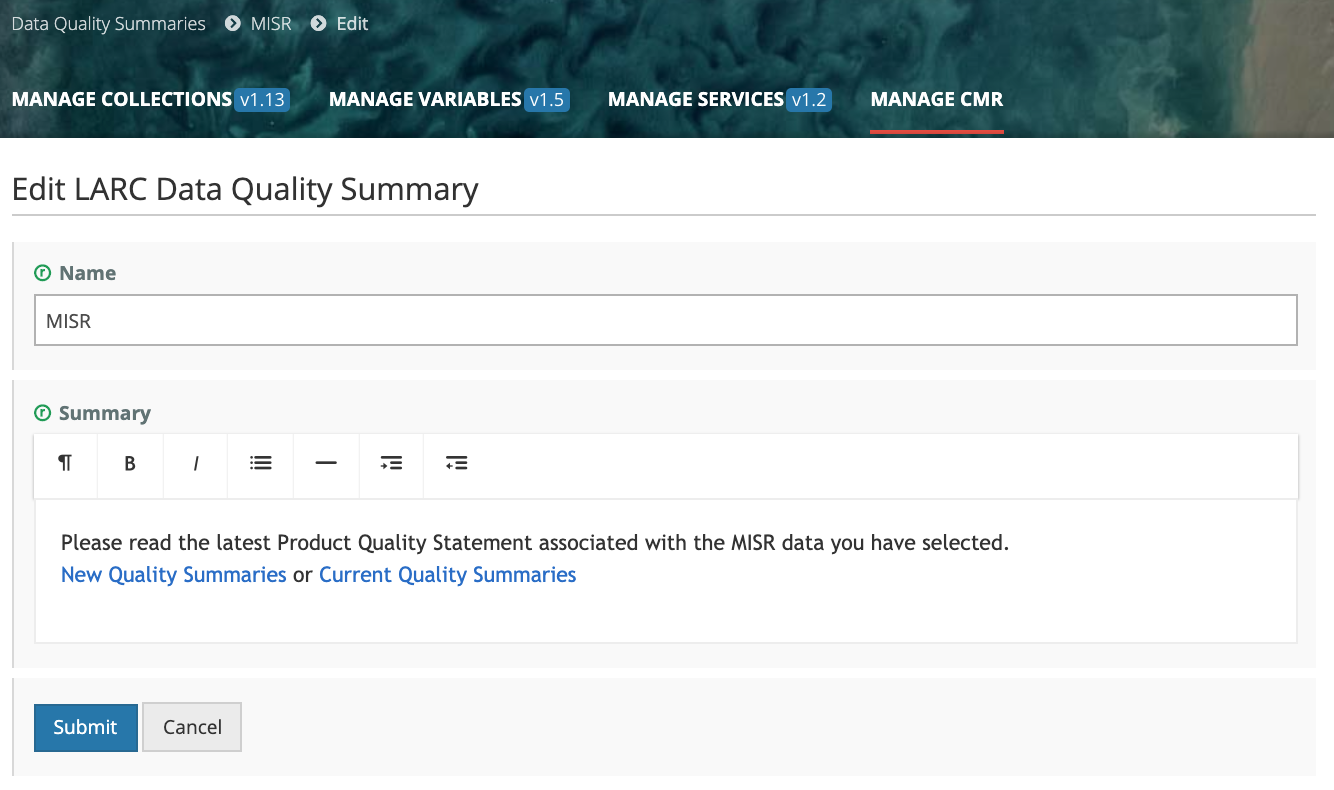
3. Select the Data Quality Summary you wish to update and click on the Edit action for that Data Quality Summary. (or you may click on the Name of the Data Quality Summary, and then click on the Edit button on the display page for that Data Quality Summary).
4. On the Edit page for the Data Quality Summary, update the Name and/or Summary fields as needed, and click Submit.
Delete a Data Quality Summary
...
2. The MMT will display a table of Data Quality Summaries for your provider.
3. Select the Data Quality Summary you wish to update and click on the Delete action for that Data Quality Summary. (or you may click on the Name of the Data Quality Summary, and then click on the Delete button on the display page for that Data Quality Summary).
...
2. On the page for creating the Data Quality Summary Assignment, choose a Data Quality Summary for your provider from the drop down list, and then use the collection chooser to select one or more collections to associate with the Data Quality Summary. Click on Submit to assign the Data Quality Summary to the selected collections.
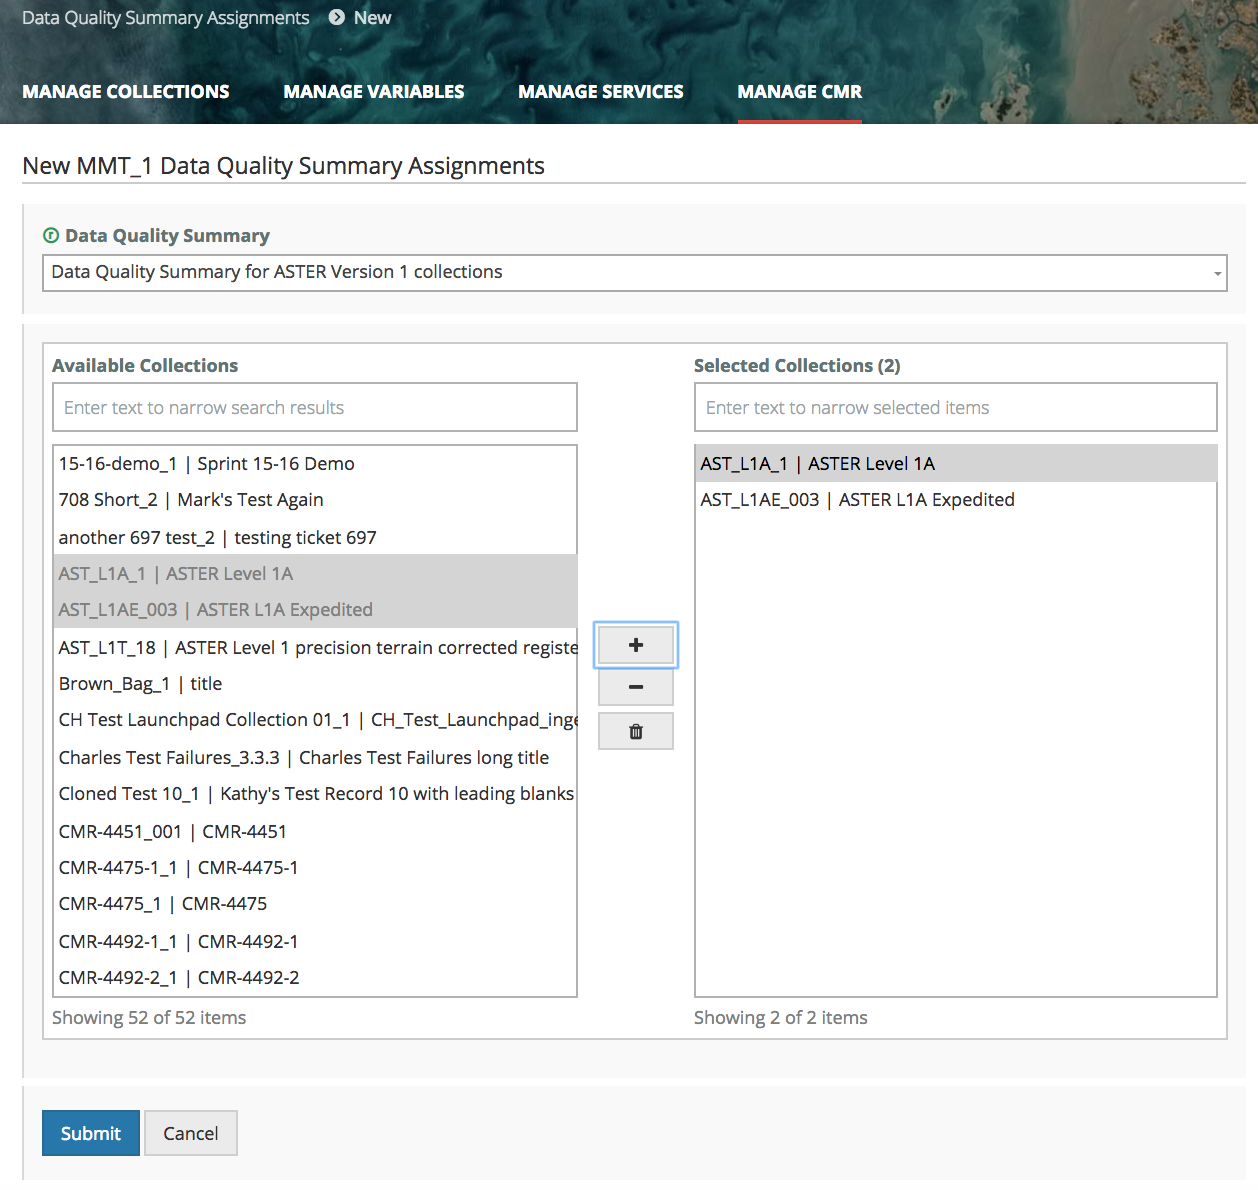

3. MMT will display a success or failure message for the Data Quality Summary assignment operations.
...
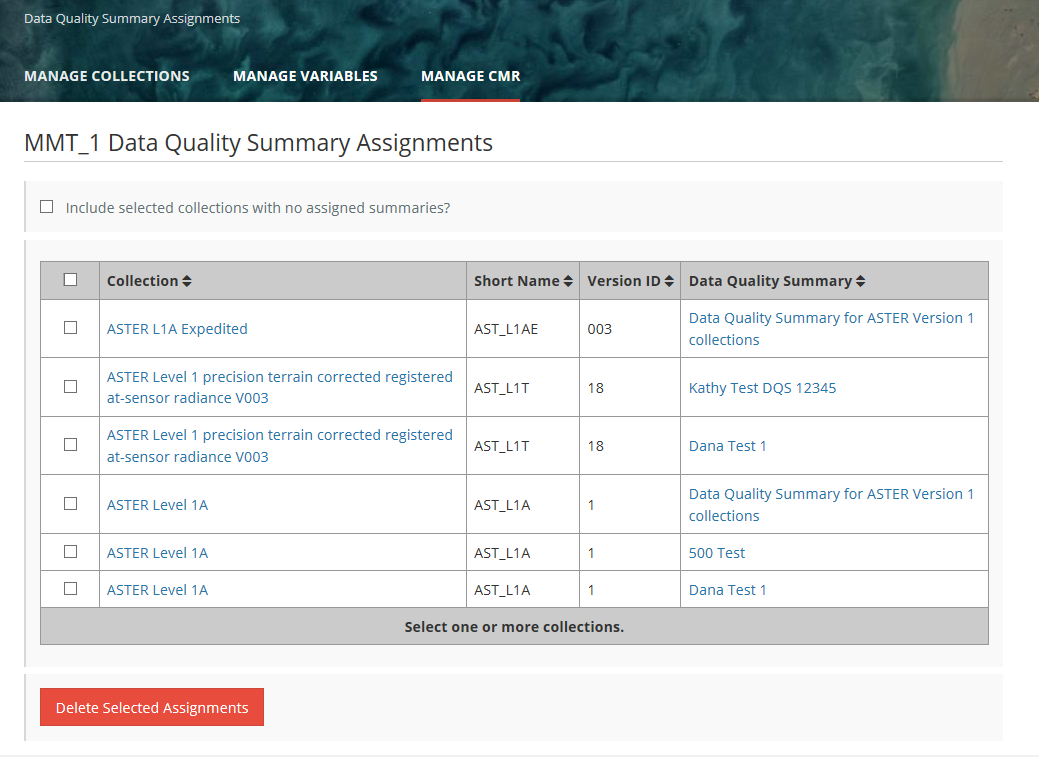
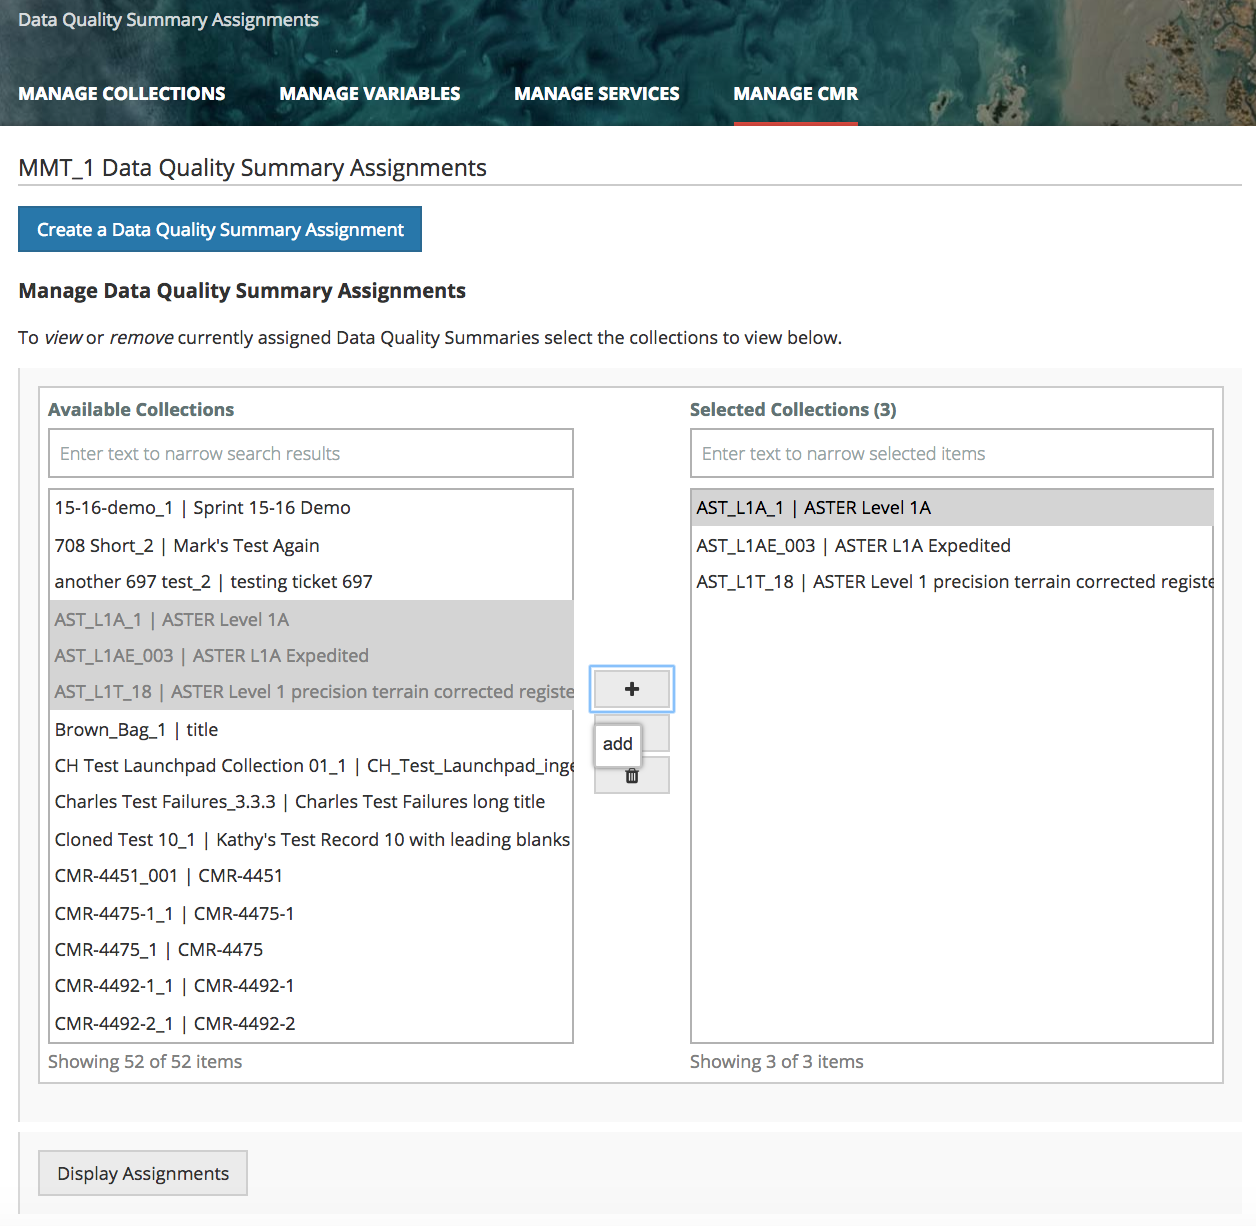
2. On the Data Quality Summary Assignments page, use the Collection Chooser to select collections whose Data Quality Summary assignments you wish to see.


3. Click 'Display Assignments'. A table of the selected collections with their Data Quality Summary assignments will be displayed. Each selected collection will appear in one row per Data Quality Summary assigned to it. If a selected collection has no Data Quality Summary assignments, it will not appear in the table unless you check the 'Include selected collections with no assigned summaries?' box at the top of the page.

Delete assignments of Data Quality Summaries to Collections
...
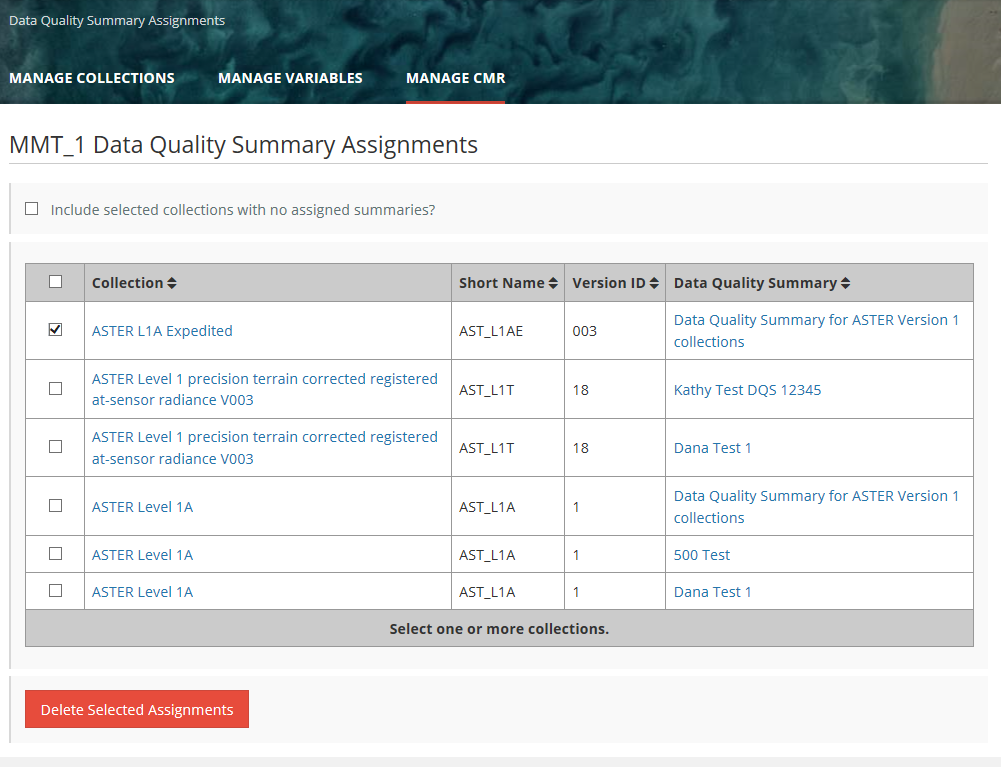
2. On the Data Quality Summary Assignments page, use the Collection Chooser to select collections whose Data Quality Summary assignments you wish to see.
3. Click 'Display Assignments'. A table of the selected collections with their Data Quality Summary assignments will be displayed. Each selected collection will appear in one row per Data Quality Summary assigned to it. If a selected collection has no Data Quality Summary assignments, it will not appear in the table unless you check the 'Include selected collections with no assigned summaries?' box at the top of the page.
4. Click on the check box beside any Collection/Data Quality Summary assignment you wish to delete, or click on the check box in the table header to delete all assignments in the table. Click on 'Delete Selected Assignments'.

5. The MMT will prompt you to confirm the deletion(s):
...
Overview
Content Tools