- perform functions related to Create/Read/Update/Delete of CMR Metadata Records
- perform functions related to managing permissions and usage of CMR metadata.
Log In to the MMT
URLs for the Metadata Management Tool
SIT environment: https://mmt.sit.earthdata.nasa.gov
UAT environment: https://mmt.uat.earthdata.nasa.gov
PROD environment: https://mmt.earthdata.nasa.gov
Ensure your Earthdata Login userid for the appropriate environment (SIT, UAT, PROD) is a member of a provider group that has both 'Provider Context' and 'Provider Object ACLs' permissions for your provider.
(see the Administrator for your provider, or contact the CMR OPS team support@earthdata.nasa.gov)
Login using your Earthdata Login userid and password for the appropriate environment (SIT, UAT, PROD)

Manage Metadata for my provider
Create a collection record in the CMR for my provider
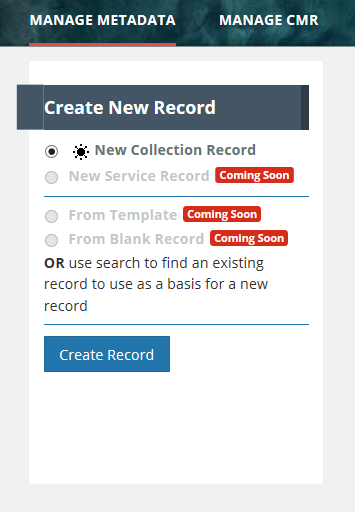
1. On the 'Manage Metadata' dashboard, choose 'New Collection Record', and click on 'Create Record'. A draft collection record will be created.
2. Begin filling in metadata fields for your draft collection record. Use the information icons (blue 'i') to get information about what fields mean and how to format their values.
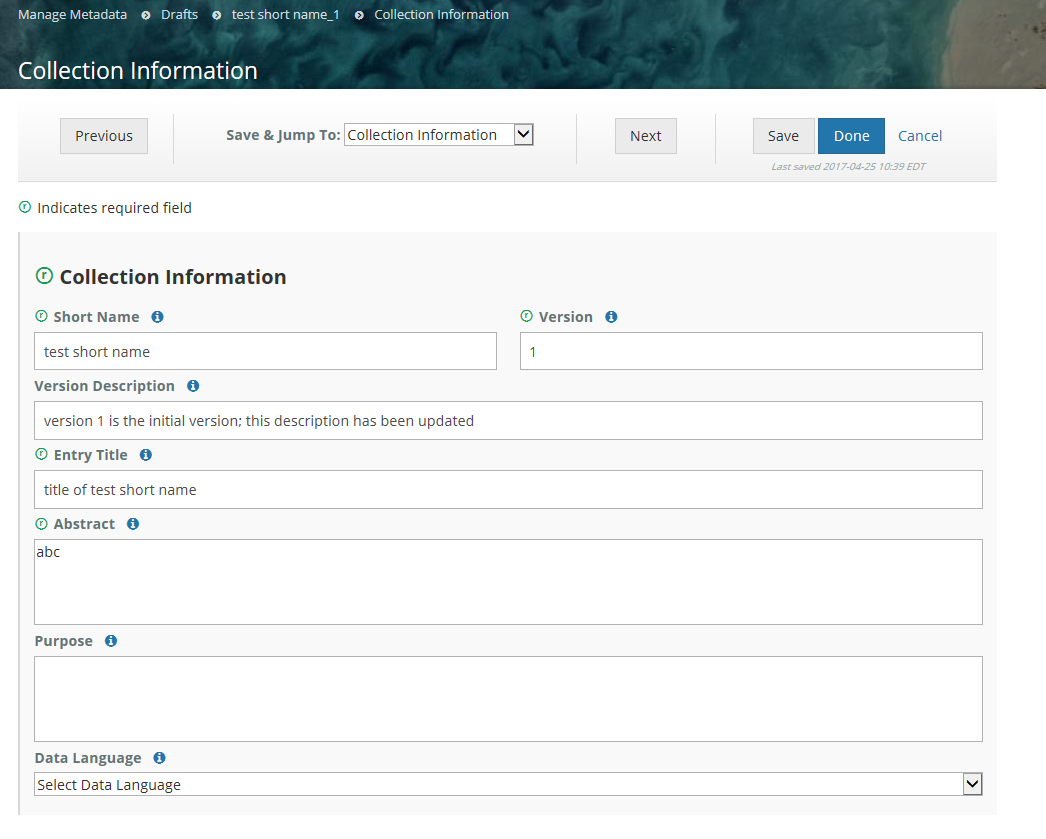
3. Navigate from form to form using the Previous or Next buttons, or by choosing the next form to edit from the pull-down list at 'Save & Jump To:'. When you move from one form to another, your input from the previous form will be saved in your draft record.

4. Explicitly Save form input (within a session or at the end of a session) with the 'Save' button; Finish editing your draft record using the 'Done' button.

NOTE: When you are working with a draft collection record, all 'Save' and 'Done' operations update the draft record in the MMT database, not in the CMR, i.e., DRAFT records are not stored in the CMR. Your draft collection record will not be ingested into the CMR until you click on the 'Publish Draft' button in step 7 below.
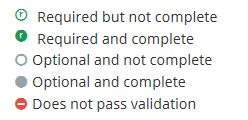
5. Follow progress of your draft record on the progress panel:
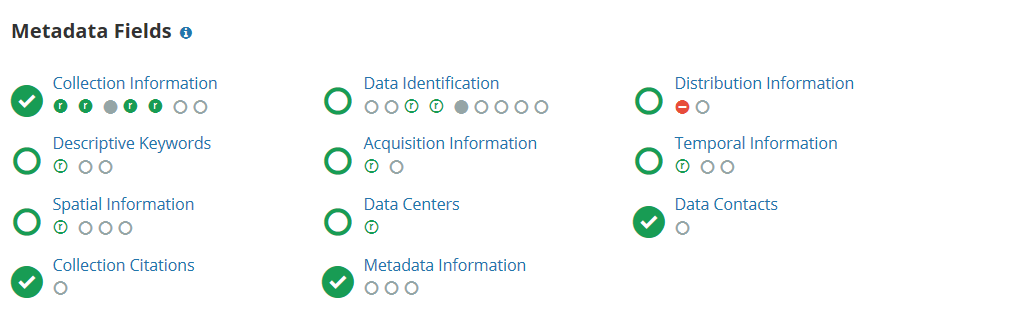
The icons on the progress panel have the following meanings:
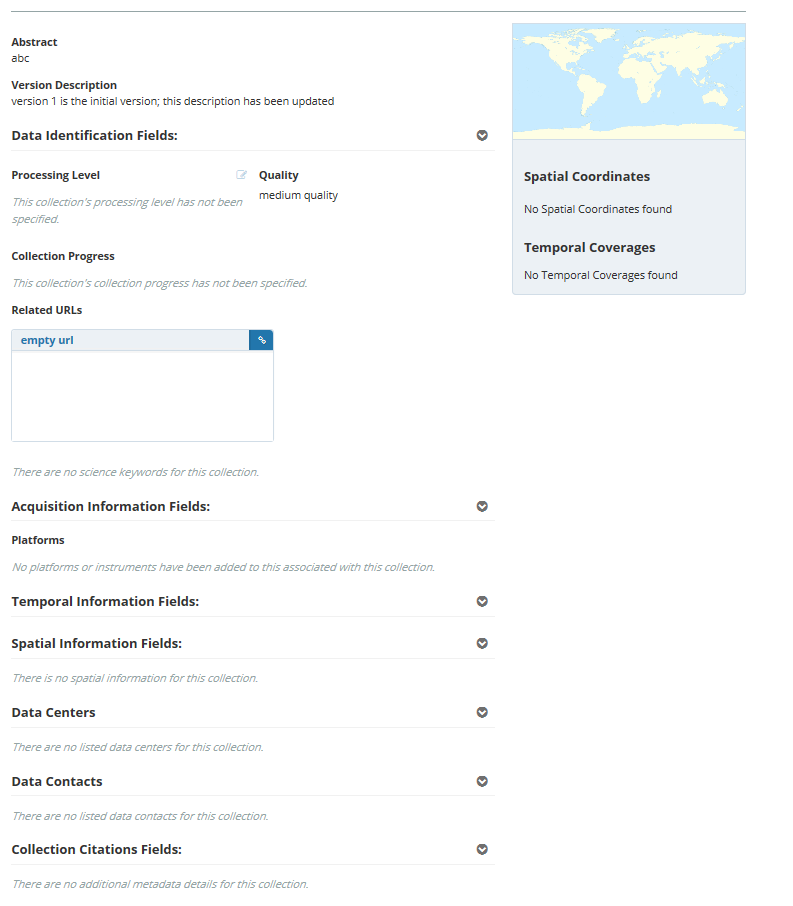
6. View a HTML rendering of your collection record on the 'preview panel':
7. Special NOTES when creating or editing a collection level record:
a. To have the NRT (Near Real Time) badge appear for the collection on the EDSC, set Collection Type = Near Real Time on the Data Information Form.
b. On the Temporal Extent form, Ends at Present should be set to False if there is an end date for the collection.
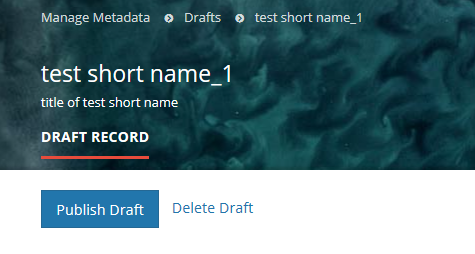
8. When all Required fields are complete with no validation errors (red icon) showing on the progress panel, you are ready to Publish your record to the CMR.
Click on the 'Publish Draft' button above the Progress Panel on the draft record page:
Find and view collection records in the CMR
Use the Find interface in the upper right corner of the MMT banner:

Find records based on a keyword
Enter a search term (e.g., a Shortname, a CMR concept id, a science keyword) in the white 'Enter Search Term' box, and click on 'Find'.
A table of CMR records which match the search term will be presented (sorted by Entry Title).
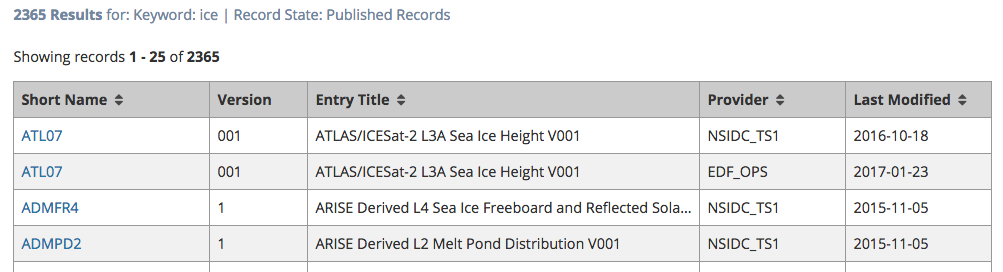
To view an html representation of the metadata for any collection record in the search results table, click on the Short Name of the collection.
Find all collection records for a provider
Click on 'Full Metadata Record Search'.
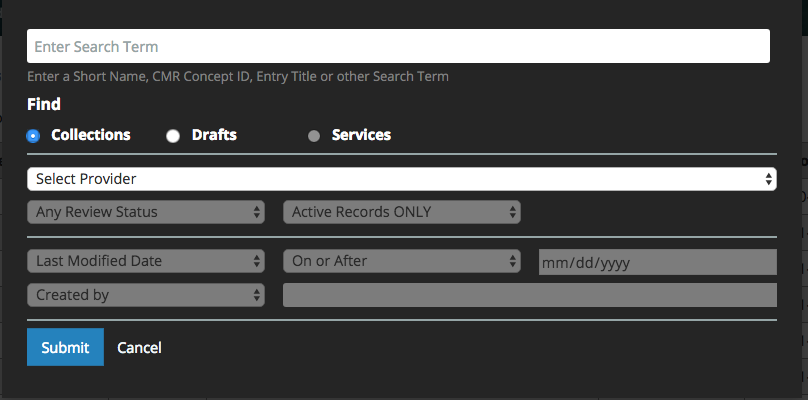
Select 'Collections', then select a provider from the 'Select Provider' drop-down list, and then click on the blue 'Submit' button.
A table of all CMR collection records for that provider will be presented (sorted by Entry Title).

To view an html representation of the metadata for any collection record in the search results table, click on the Short Name of the collection.
Update a collection record in the CMR for my provider
Delete a collection record in the CMR for my provider
Clone and edit a collection record in the CMR for my provider
Bulk Update collection records in the CMR for my provider
Produce a Holdings Report for my provider
Manage Collection and Granule Permissions for my provider
Recommended set-up for a provider:
Groups:
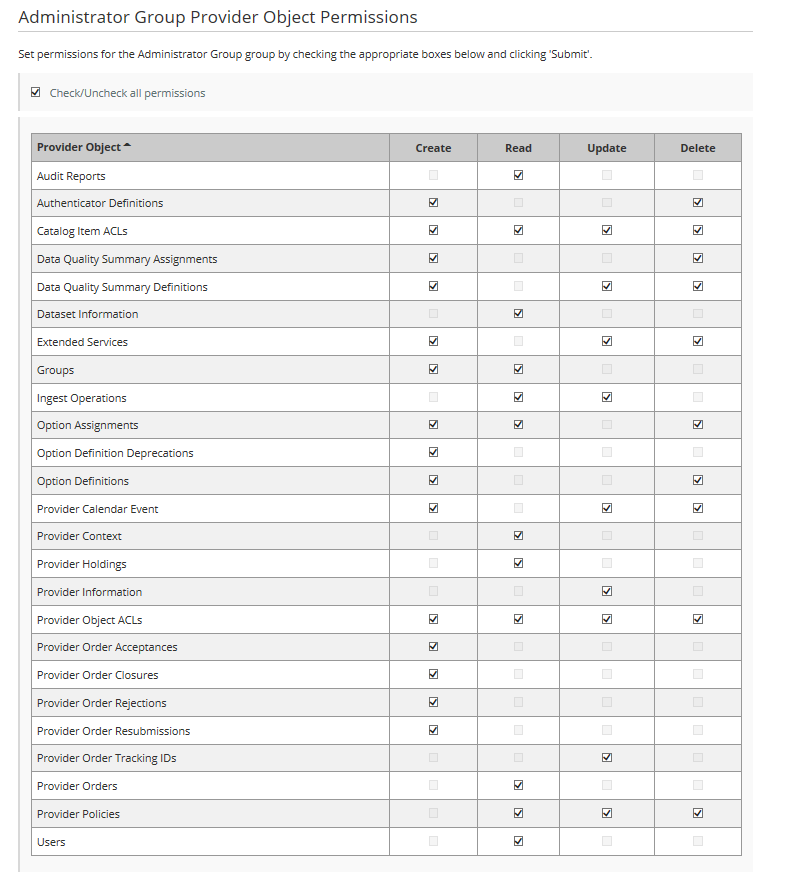
- A group called 'Administrator Group' - the CMR OPS team will establish this group and its Provider Object Permissions when they set up your provider.
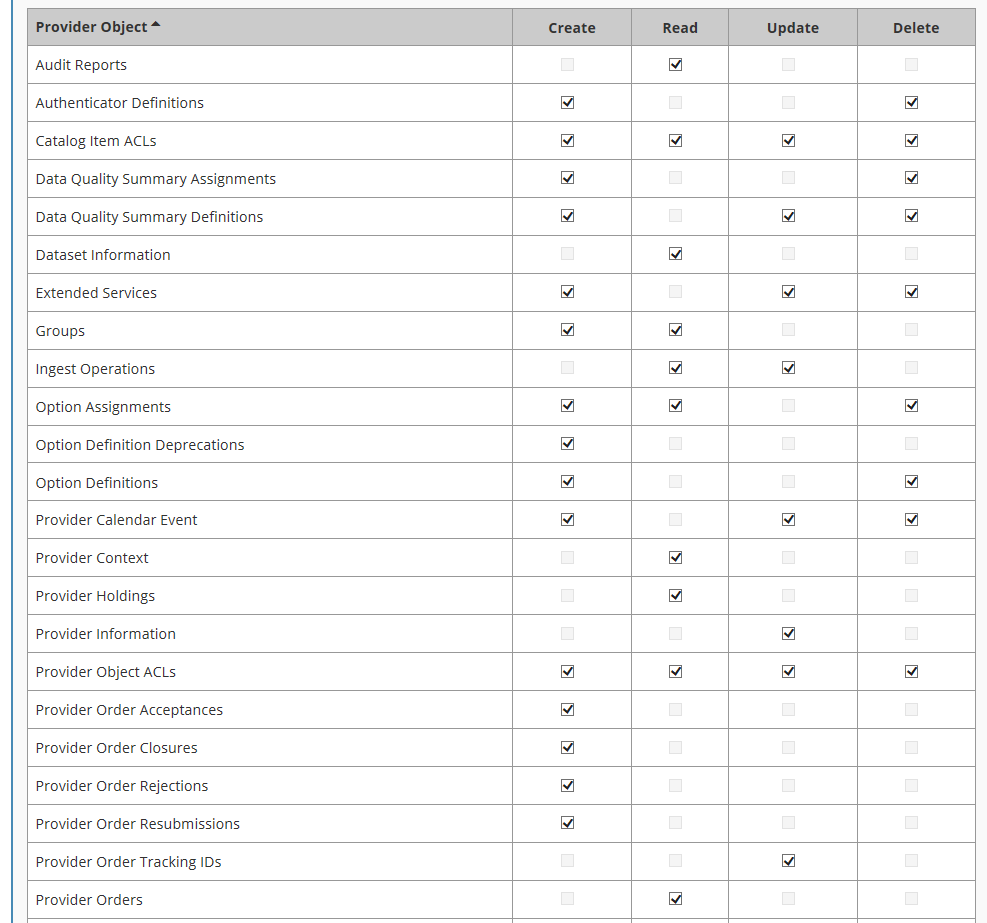
Provider Object Permissions for the Administrator Group as follows:
2. Groups of registered users who will have Search and Order access to sets of your collections
(e.g., instrument team group with access to collections from that instrument)
Collection Permissions
a. 'All Collections' permission
b. 'All Granules' permission
c. 'Selected Collections' permissions as needed
Manage User Groups for my provider
- Create a New User Group
- Update Membership of a User Group
- Delete a User Group
- Manage collection and granule permissions for my provider
- Define user permissions for a set of collections for my provider
- Update user permissions for a set of collections for my provider
- Manage 'Provider Object Permissions' for a user group
- Manage 'System Object Permissions' for a user group
Manage Ordering for my provider
Define Order Policies for my provider
- Track Orders for my provider
- Manage Order Options for my provider
- Create an Order Option
- Find an Order Option
- Update an Order Option
- Delete an Order Option
- Assign an Order Option to Collections
- View existing Order Option to Collection assignments
- Manage Service Options for my provider
- Create a Service Implementation
- Create a Service Option
- Find a Service Option
- Update a Service Option
- Delete a Service Option
- Assign a Service Option to Collections
- View existing Service Option to Collection assignments
Manage Data Quality Summaries for my provider
Create a Data Quality Summary
Update a Data Quality Summary
Delete a Data Quality Summary
- Assign a Data Quality Summary to Collections
- View existing Data Quality Summary to Collection assignments
Related articles