This page describes how to use the Metadata Management Tool (MMT) to:
- perform functions related to Create/Read/Update/Delete of CMR Metadata Records
- perform functions related to managing permissions and usage of CMR metadata.
Step-by-step guide, by use case:
A. Log In
URLs for the Metadata Management Tool
SIT environment: https://mmt.sit.earthdata.nasa.gov
UAT environment: https://mmt.uat.earthdata.nasa.gov
PROD environment: https://mmt.earthdata.nasa.gov
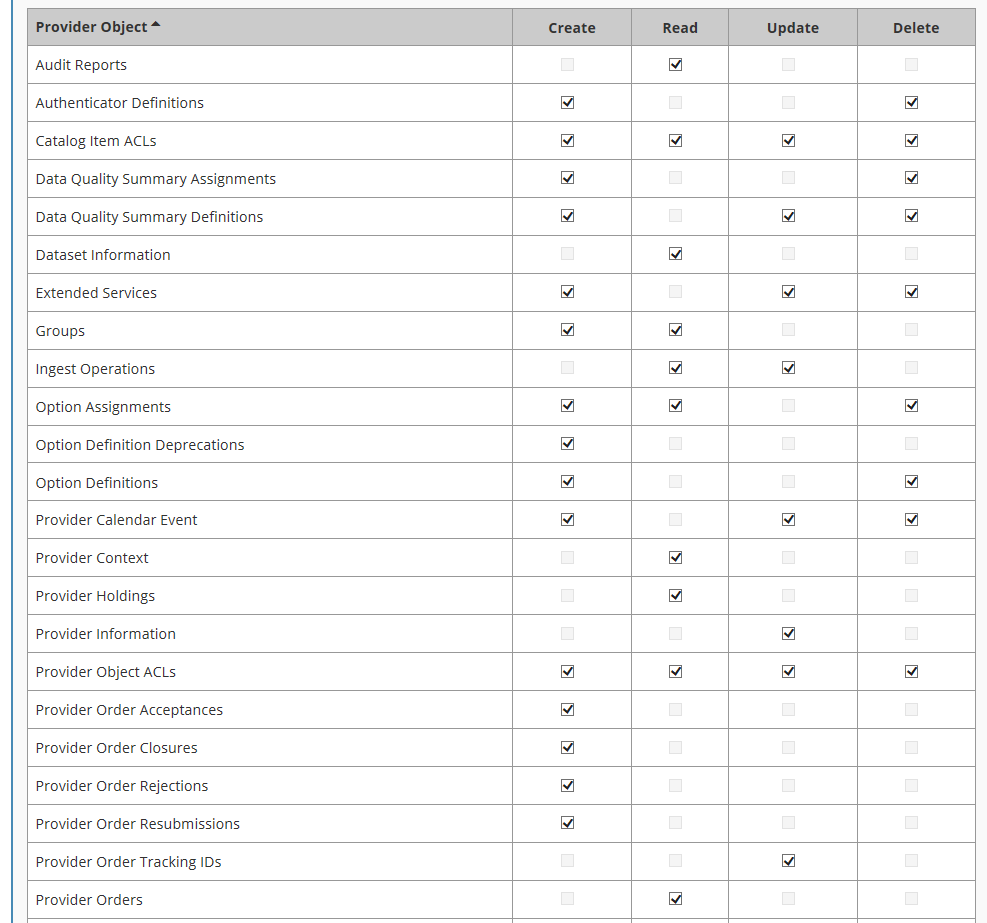
2. Ensure your Earthdata Login userid for the appropriate environment (SIT, UAT, PROD) is a member of a provider group that has both 'Provider Context' and 'Provider Object ACLs' permissions for your provider.
(see the Administrator for your provider, or contact the CMR OPS team support@earthdata.nasa.gov)
3. Login using your Earthdata Login userid and password for the appropriate environment (SIT, UAT, PROD)

B. Manage Metadata for my provider
Create a collection record in the CMR for my provider
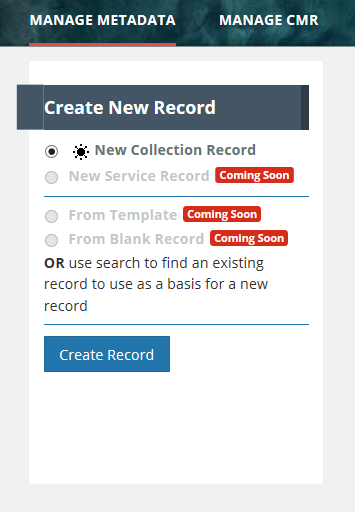
On the 'Manage Metadata' dashboard, click on 'Create Record' to create a draft collection record.
Begin filling in metadata fields for your draft collection record. Use the information icons (blue 'i') to get information about what fields mean and how to format their values.
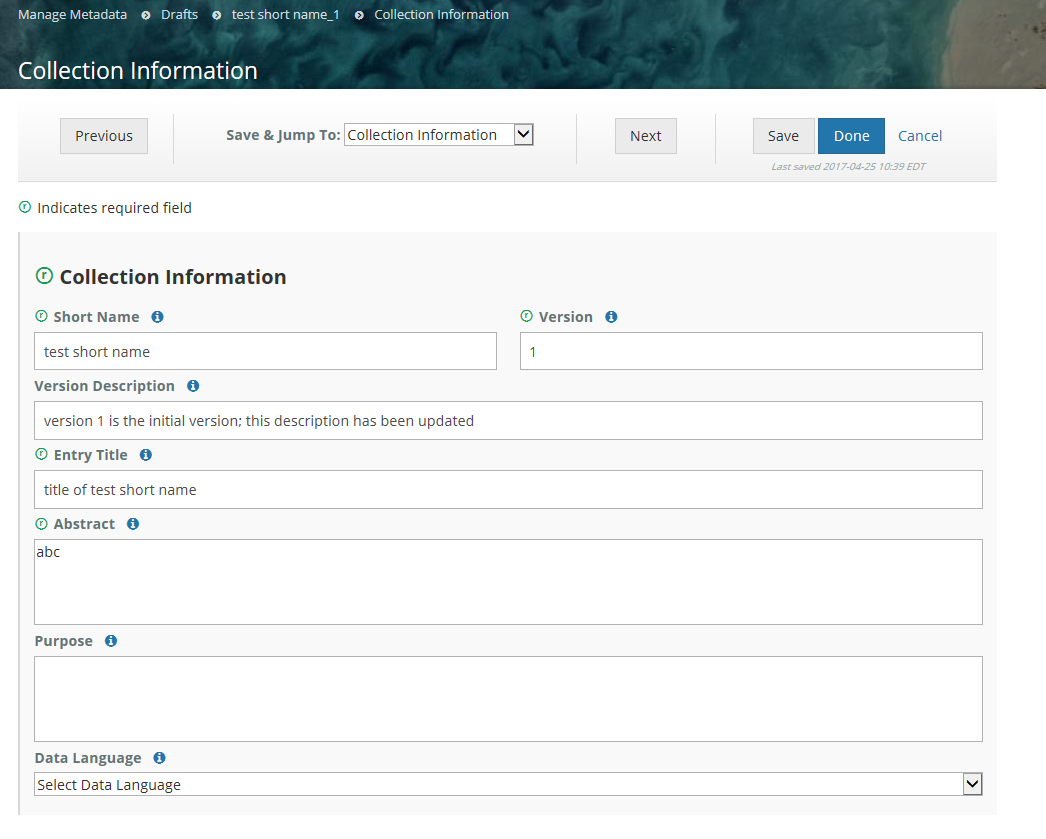
Navigate from form to form using the Previous or Next buttons, or by choosing the next form to edit from the pull-down list at 'Save & Jump To:'

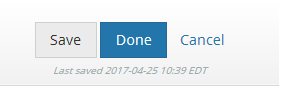
Save form input (within a session or at the end of a session) with the 'Save' button; Finish editing your draft record using the 'Done' button. NOTE: When you are working with a draft collection record, all 'Save' and 'Done' operations update the draft record in the MMT database, not in the CMR, i.e., DRAFT records are not stored in the CMR. Your draft collection record will not be ingested into the CMR until you click on the 'Publish Draft' button below.
Follow progress of your draft record on the progress panel:
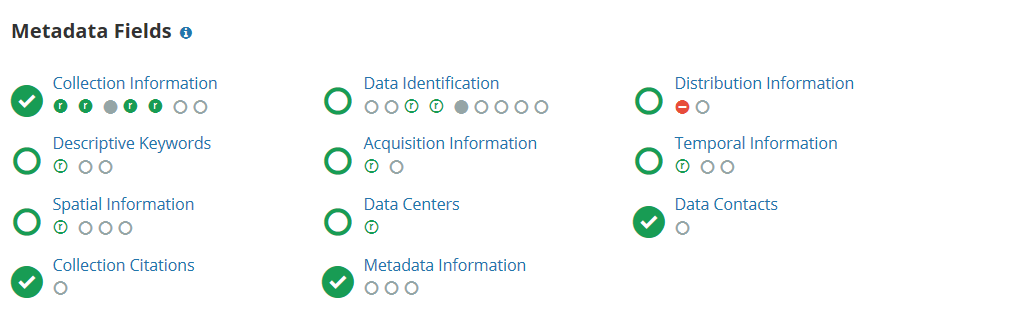
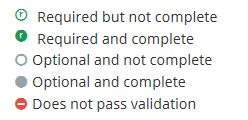
The icons on the progress panel have the following meanings:
When all Required fields are complete with no validation errors (red icon) showing, you are ready to Publish your record to the CMR.
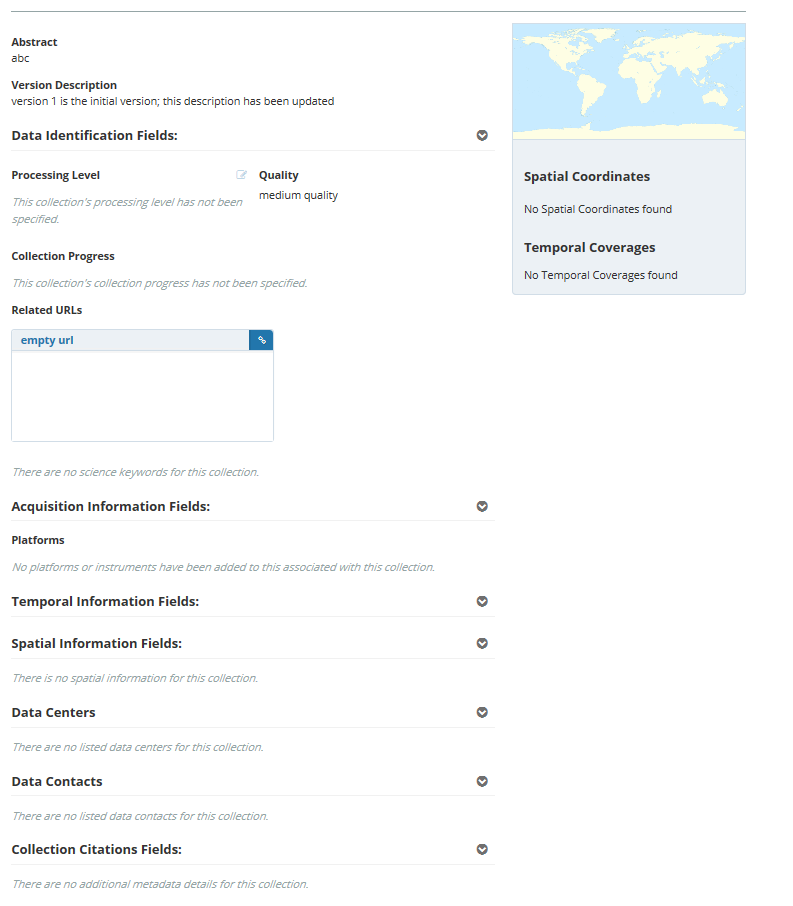
View a HTML rendering of your collection record on the 'preview panel':
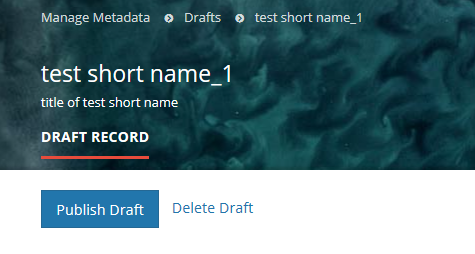
Click on the 'Publish Draft' button above the Progress Panel on the draft record page:
- Find a collection record in the CMR
- Update a collection record in the CMR for my provider
- Delete a collection record in the CMR for my provider
Clone and edit a collection record in the CMR for my provider
B. Produce a Holdings Report for my provider
C. Manage Collection and Granule Permissions for my provider
Manage User Groups for my provider
- Create a New User Group
- Update Membership of a User Group
- Delete a User Group
- Manage collection and granule permissions for my provider
- Define user permissions for a set of collections for my provider
- Update user permissions for a set of collections for my provider
- Manage 'Provider Object Permissions' for a user group
- Manage 'System Object Permissions' for a user group
D. Manage Ordering for my provider
Define Order Policies for my provider
- Track Orders for my provider
- Manage Order Options for my provider
- Create an Order Option
- Find an Order Option
- Update an Order Option
- Delete an Order Option
- Assign an Order Option to Collections
- View existing Order Option to Collection assignments
- Manage Service Options for my provider
- Create a Service Implementation
- Create a Service Option
- Find a Service Option
- Update a Service Option
- Delete a Service Option
- Assign a Service Option to Collections
- View existing Service Option to Collection assignments
E. Manage Data Quality Summaries for my provider
Create a Data Quality Summary
Update a Data Quality Summary
Delete a Data Quality Summary
- Assign a Data Quality Summary to Collections
- View existing Data Quality Summary to Collection assignments
Related articles
Overview
Content Tools